It’s been a while since we talked DIYs & even weddings for that matter! Today, I want to talk about a preservation option for your wedding bouquet that is growing in popularity. A Wedding Bouquet Preservation Block. This is a great way to keep your bouquet looking timeless and grime-free for years to come! Sure, you can always hang your bouquet upside down and dry it out, but there’s always a chance that it may collect dust and debris or get crushed or destroyed at some point.
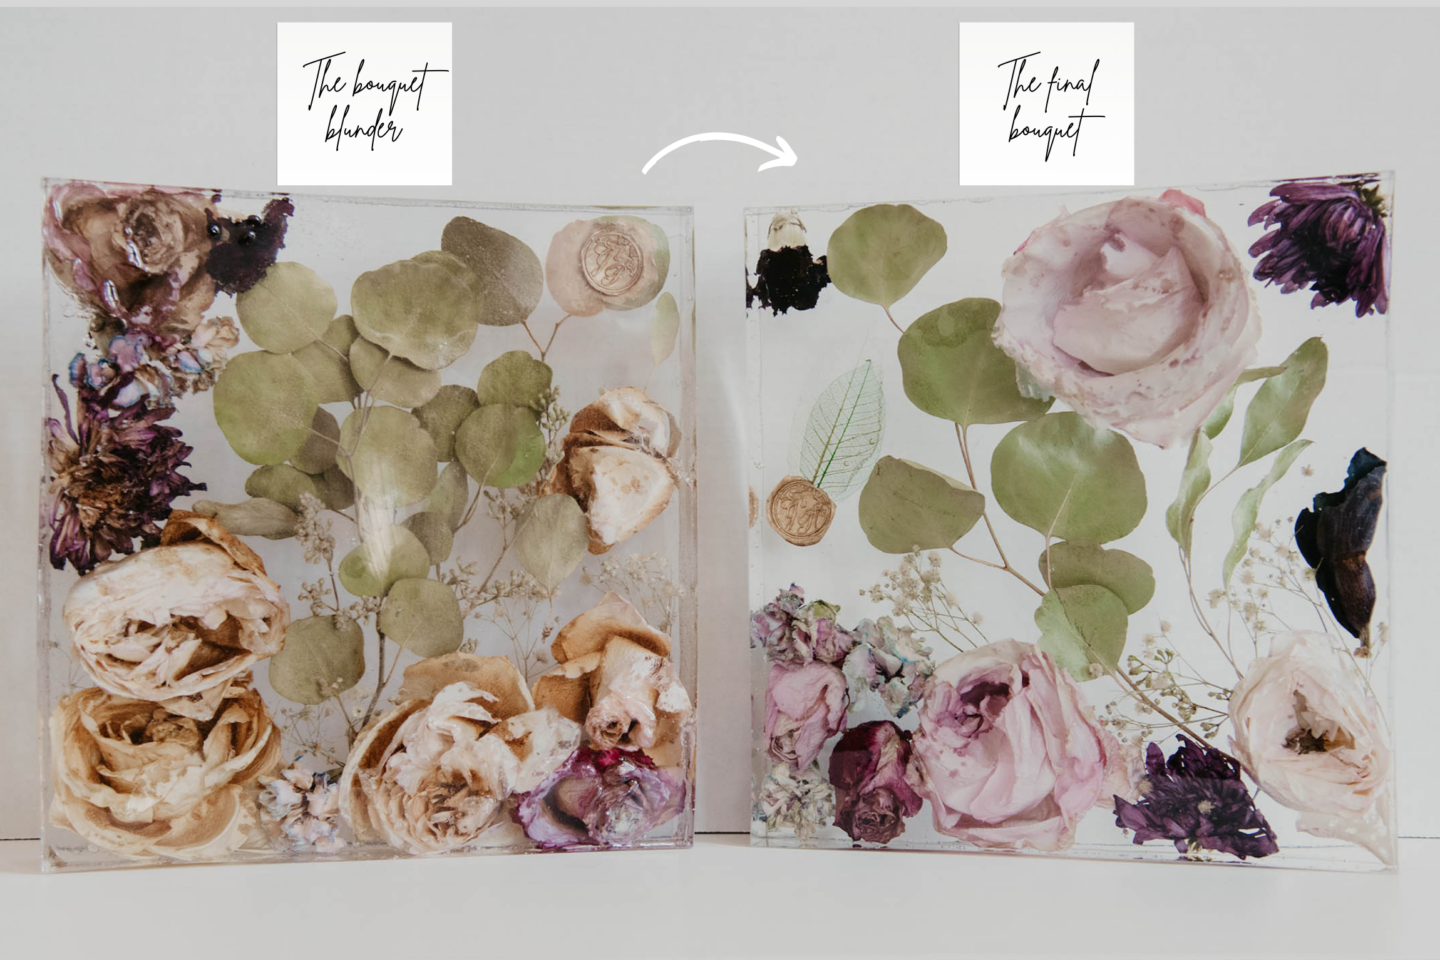
These blocks come in all shapes and sizes and if you are willing to DIY this yourself, you can look for molds on Amazon to find the right style for you. I chose to work with a 10-inch square mold, which is perfect for me. But this project isn’t for the faint of heart – it requires time and patience. And honestly, there is a bit of a learning curve. I blew it on my first block attempt and it looks horrible. But I learned, started over and my second block turned out beautiful!
Preserving my Wedding Bouquet in Resin
Things You’ll Need:
Drying Your Wedding Bouquet
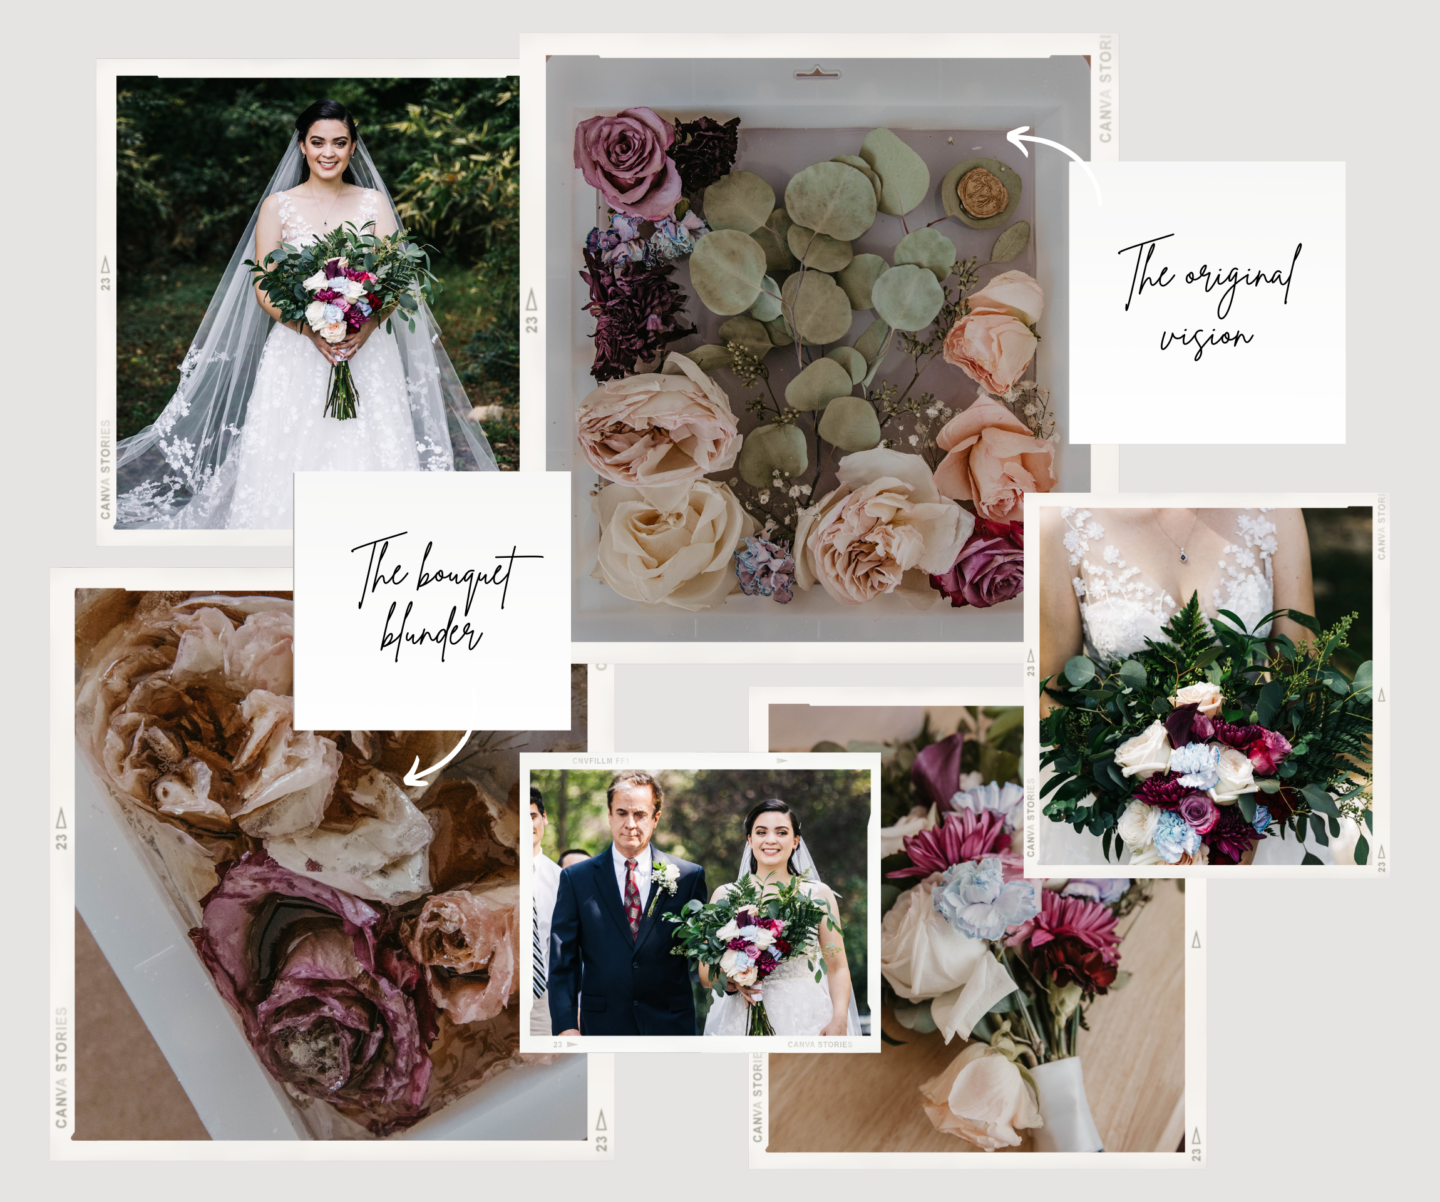
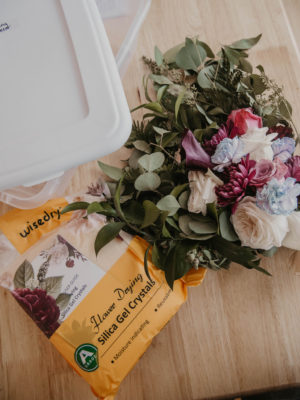
I started drying my bouquet by cutting off all my florals at the base of the petals, where they meet the stem. I also pulled out some greenery that I though had interesting shapes and set those aside. Next, I added a layer of silica gel to the bottom of my storage bin, then place the larger greenery items on top. Once I had covered enough of the first layer, I added a new layer of silica gel and repeated the process with the florals.
Tip: When you start pouring silica gel over florals, you want the gels to go inside the flower itself, so they completely dry out, keeping their color. Carefully, and gently, pour silica gel over the top of the flower. Note: White florals tend to turn brown or yellow overtime, so keep that in mind.
Now you have to wait. The process can take anywhere from 14 days to 30 days depending on how many florals you have and how long they take to dry out. The drier, the better! You don’t want there to be any moisture in your florals when you start casting – Your preservation block may not turn out right, or brown over time.
Designing Your Mold
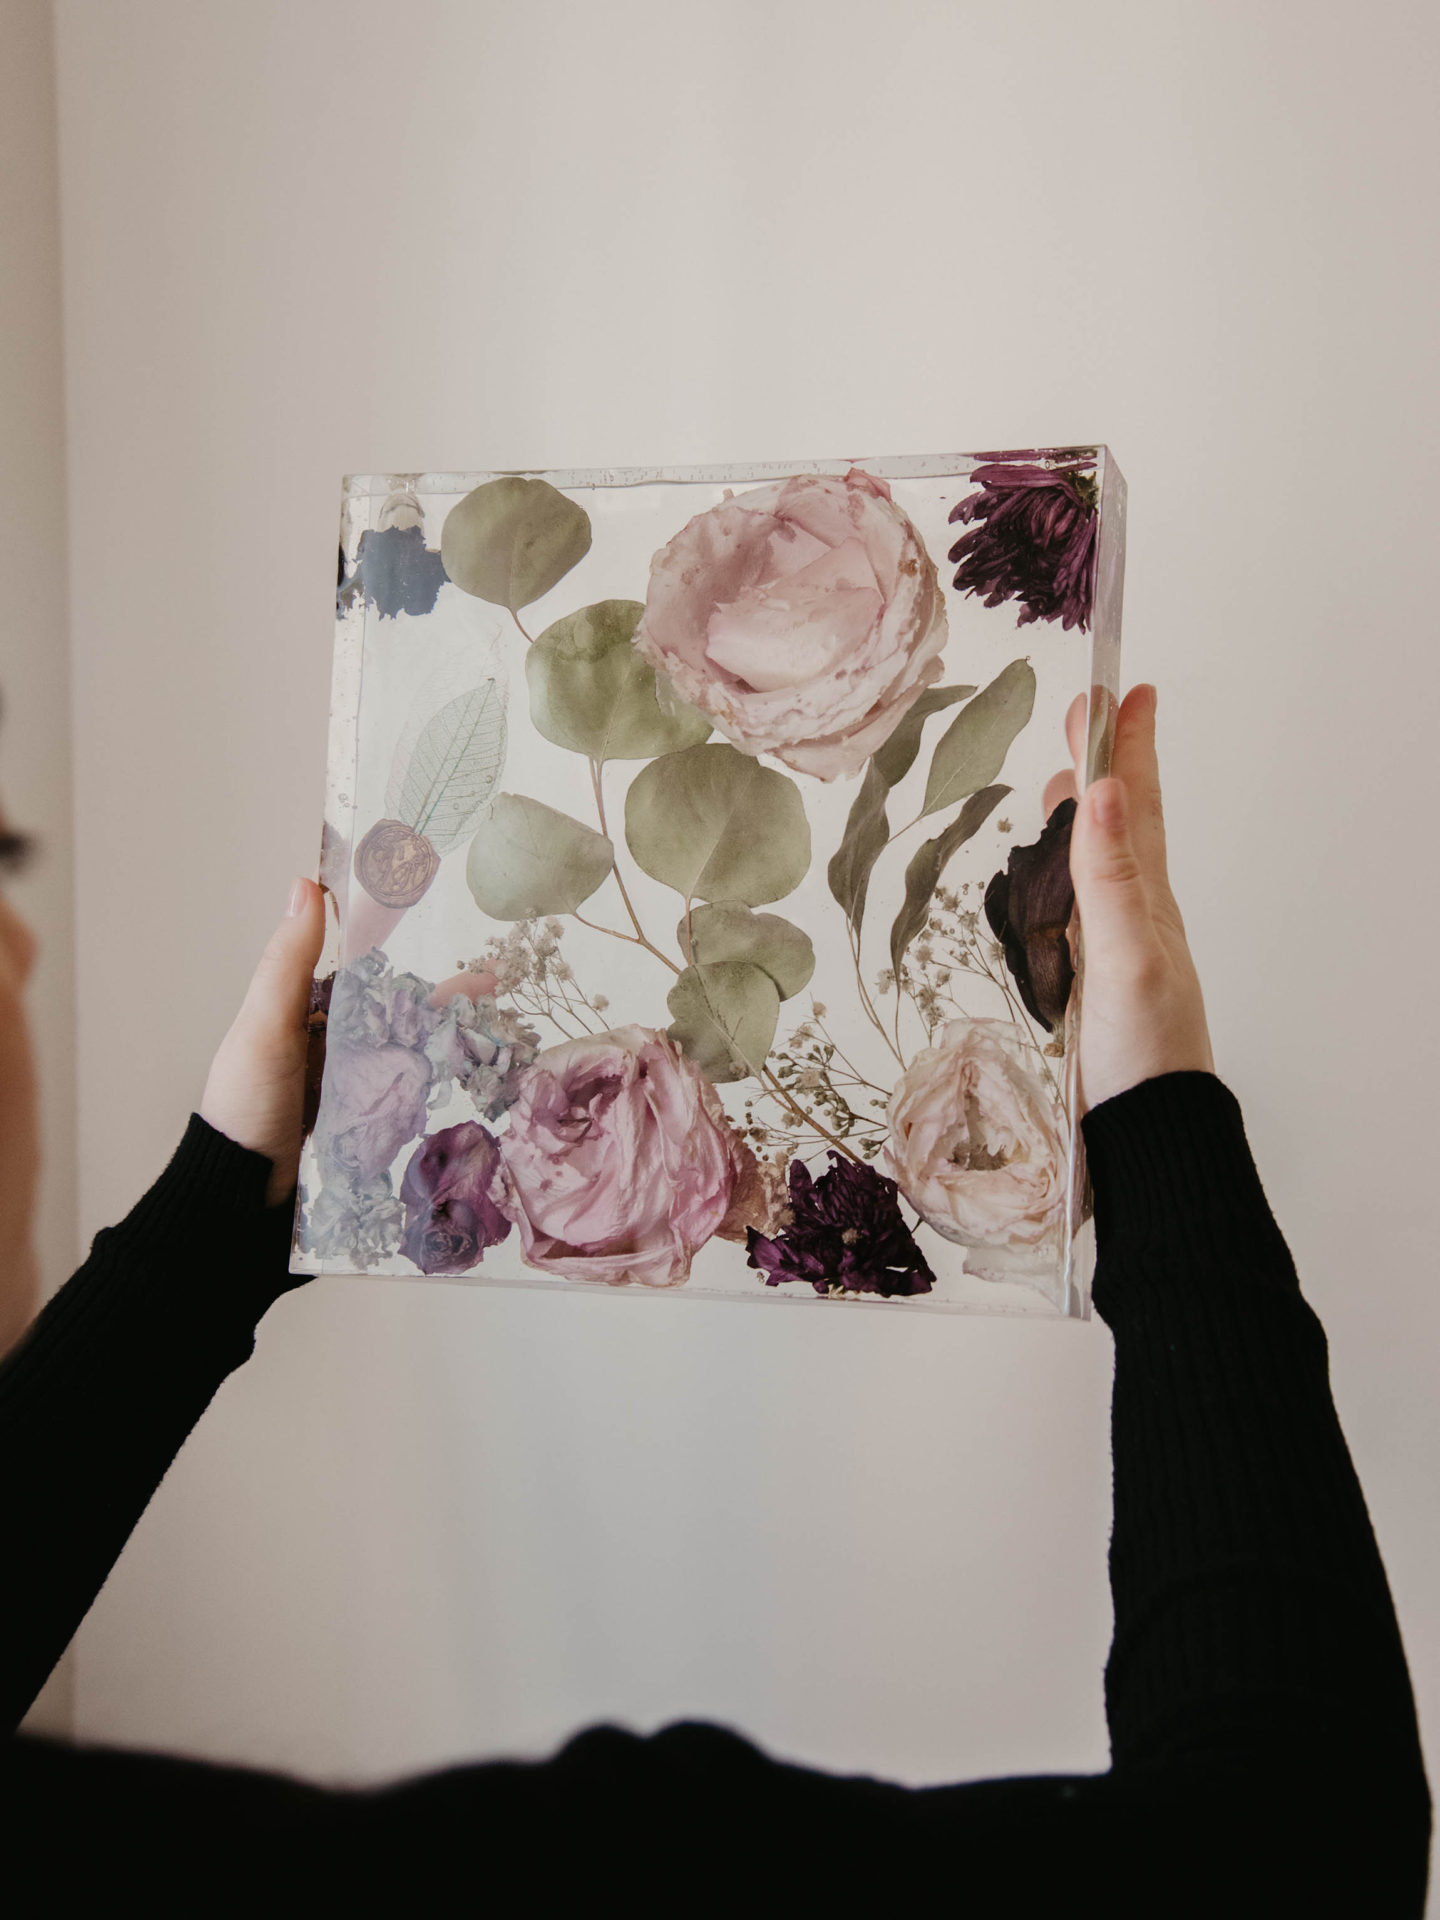
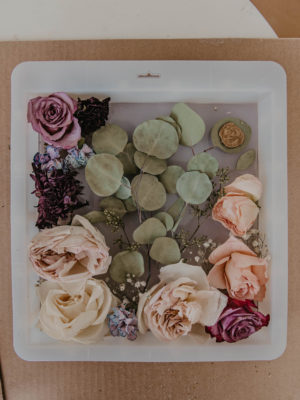
Once your greenery and florals are ready, you can start planning out your wedding bouquet preservation block. Get creative here! You can design your block at an angle, you can make it minimal, or completely fill the block with florals.
Tip: Before you begin designing, pour a thin layer of resin (mixed according to instructions) and let that dry over 24 hours. This prevents any bubbles or holes from occuring at the back of the block.
After my first layer of resin was cured, I started placing eucalyptus in the ‘background’ closest to the bottom of the mold. From there, I filled in with all different flowers and even added a custom wax seal from our wedding programs. Once you are happy with your design, it’s ready to start mixing resin.
Casting Your Wedding Bouquet Preservation Block
Time for that respirator! Mix your resin according to instructions. Always err on the side of caution when it comes to how much resin to pour – if it gets too thick, the resin’s internal heat will rise and your florals will burn. Yes – burn! I had this happen to me on my first attempt at making a preservation block. Using a heat gun, lighter, or torch, will only add to the resin’s internal heat as well, but you need to be able to use those tools to pop any bubbles that form. (Keep in mind, a lighter, or torch, will absolutely set your flowers and greenery on fire – stick with a heat gun).
Tip: This project will NOT be done in a day. It took me a little over a week, doing daily pours, until it was finished. Depending on which resin you buy, the casting thickness instructions will vary. If you get the same resin + mixing cups I did (linked above), I mixed about 2 cups during each daily casting session. That’s 2 cups per day.
Cup 1
Mix the resin my stirring slowly, and within the same direction to minimize bubbles. Once all the streaks are gone and the resin is totally clear, it’s ready to pour. This typically takes about 5 minutes of straight mixing. Once you mix one cup, slowly pour resin into the mold. Focus on pouring directly over the first layer, and not inside the flowers. You want to work layer by layer, so resin will eventually flood the flowers anyway. As that layer settles, start mixing your last cup of the day.
Cup 2
Once the second cup is ready, quickly use your heat gun to pop any surface bubbles that have appeared within the mold. Now that those bubbles are gone, pour the next cup into the mold. During this time, you can make adjustments if your greenery or flowers have shifted. You can also remove any random debris that may have entered your resin using a paperclip or tweezers. After about 5-10 minutes, use your heat gun to pop any surface bubbles. You can continue to pop bubbles as they arise for about 20 minutes after the last pour – after that time, the resin begins to get tacky and bubbles are not likely to rise to the surface anymore. Bubbles are inevitable – you will absolutely have bubbles, but if you stir patiently and pour carefully, you can minimize how many appear. Remember to let resin sit for a few minutes before using the heat gun so you can pop as many surface bubbles as possible.
Tip: If you have pets, consider covering the mold with tin foil or a piece cardboard to prevent pet hairs from landing in the resin as it cures.
Demoulding & Sanding
After your wedding bouquet preservation block is full encased in fully cured resin, it’s time to demold. You need to be very careful at this step. Resin can be very sharp and I actually cut my finger open demolding my first block. Start by pulling the edges away from the block. Then turn it upside down and try to lift the mold off the block. This is going to be difficult and take some time.
Once the wedding bouquet preservation block is free, start sanding the sharp edges. Don’t forget to wear your respirator or sanding mask for this step! I sanded all my edges down to round them out a bit. I didn’t want to risk any sharp edges hurting anyone else.
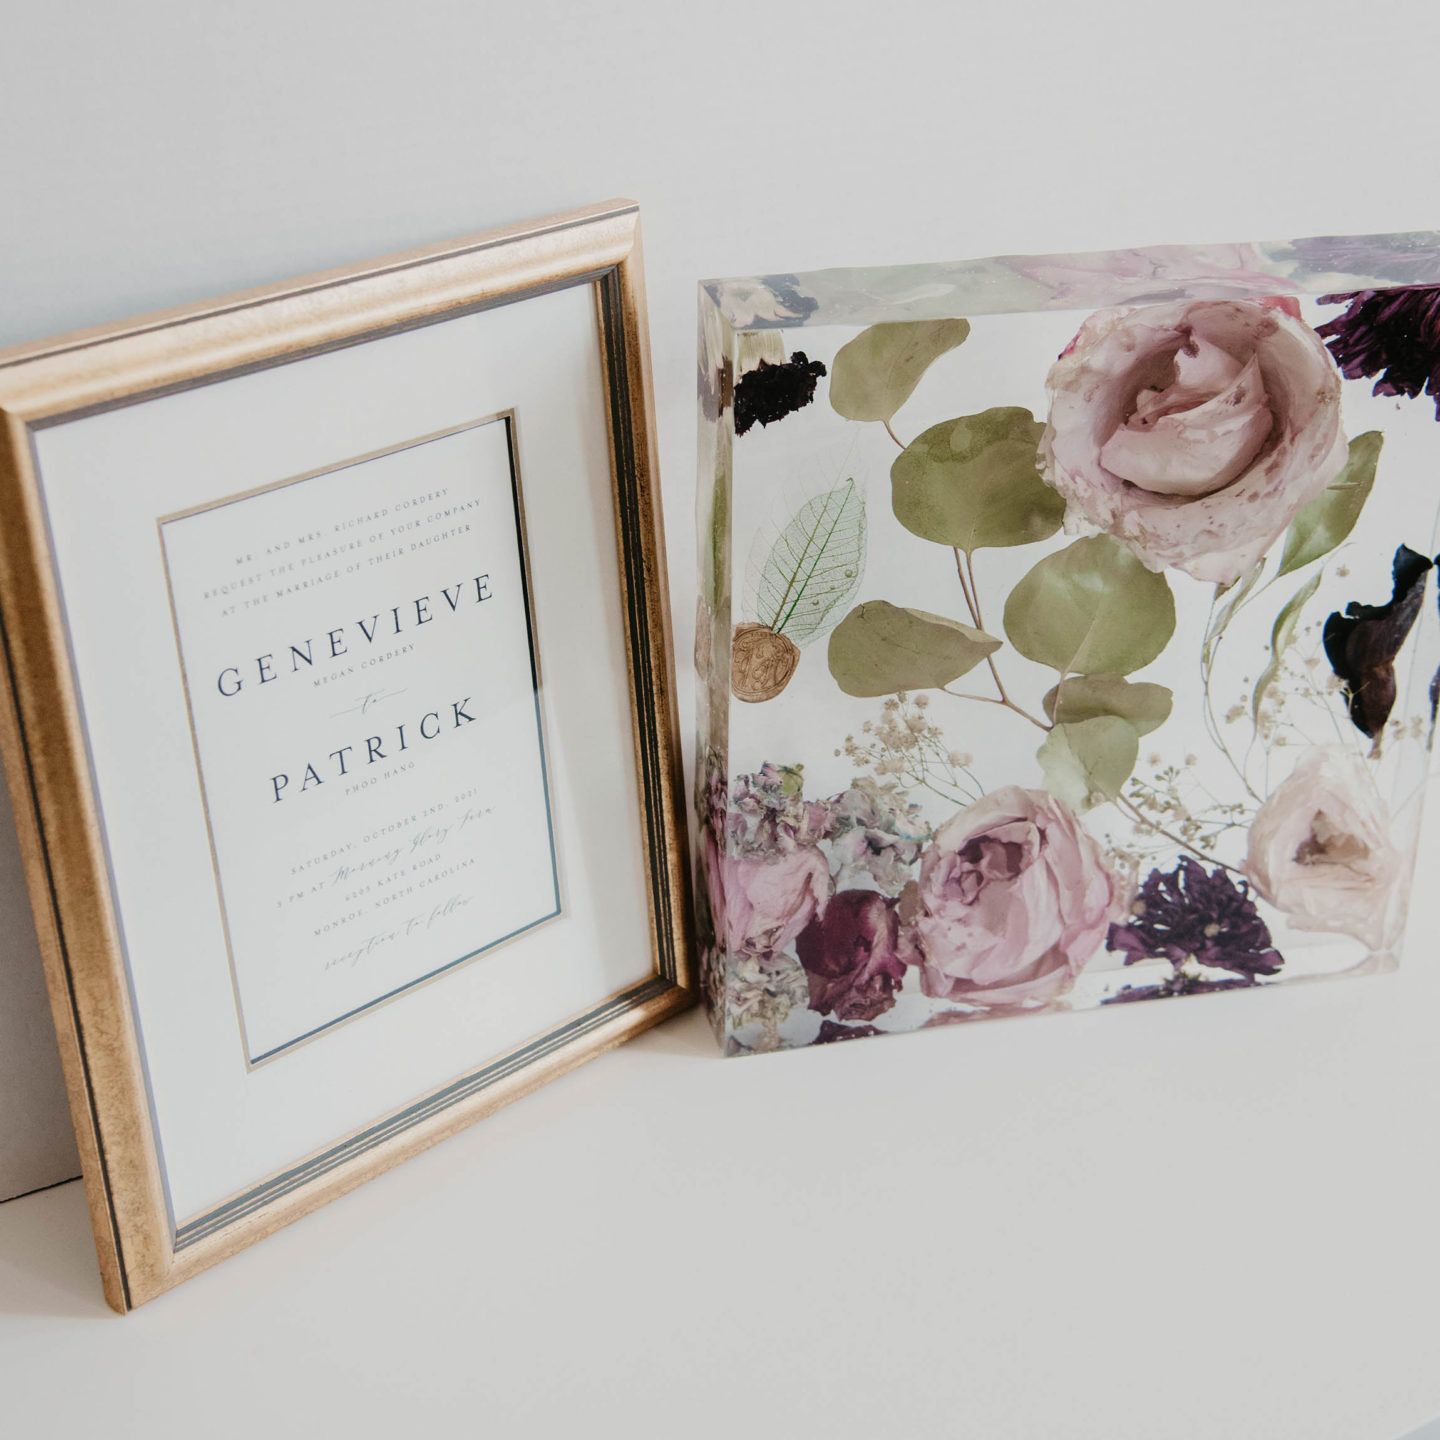
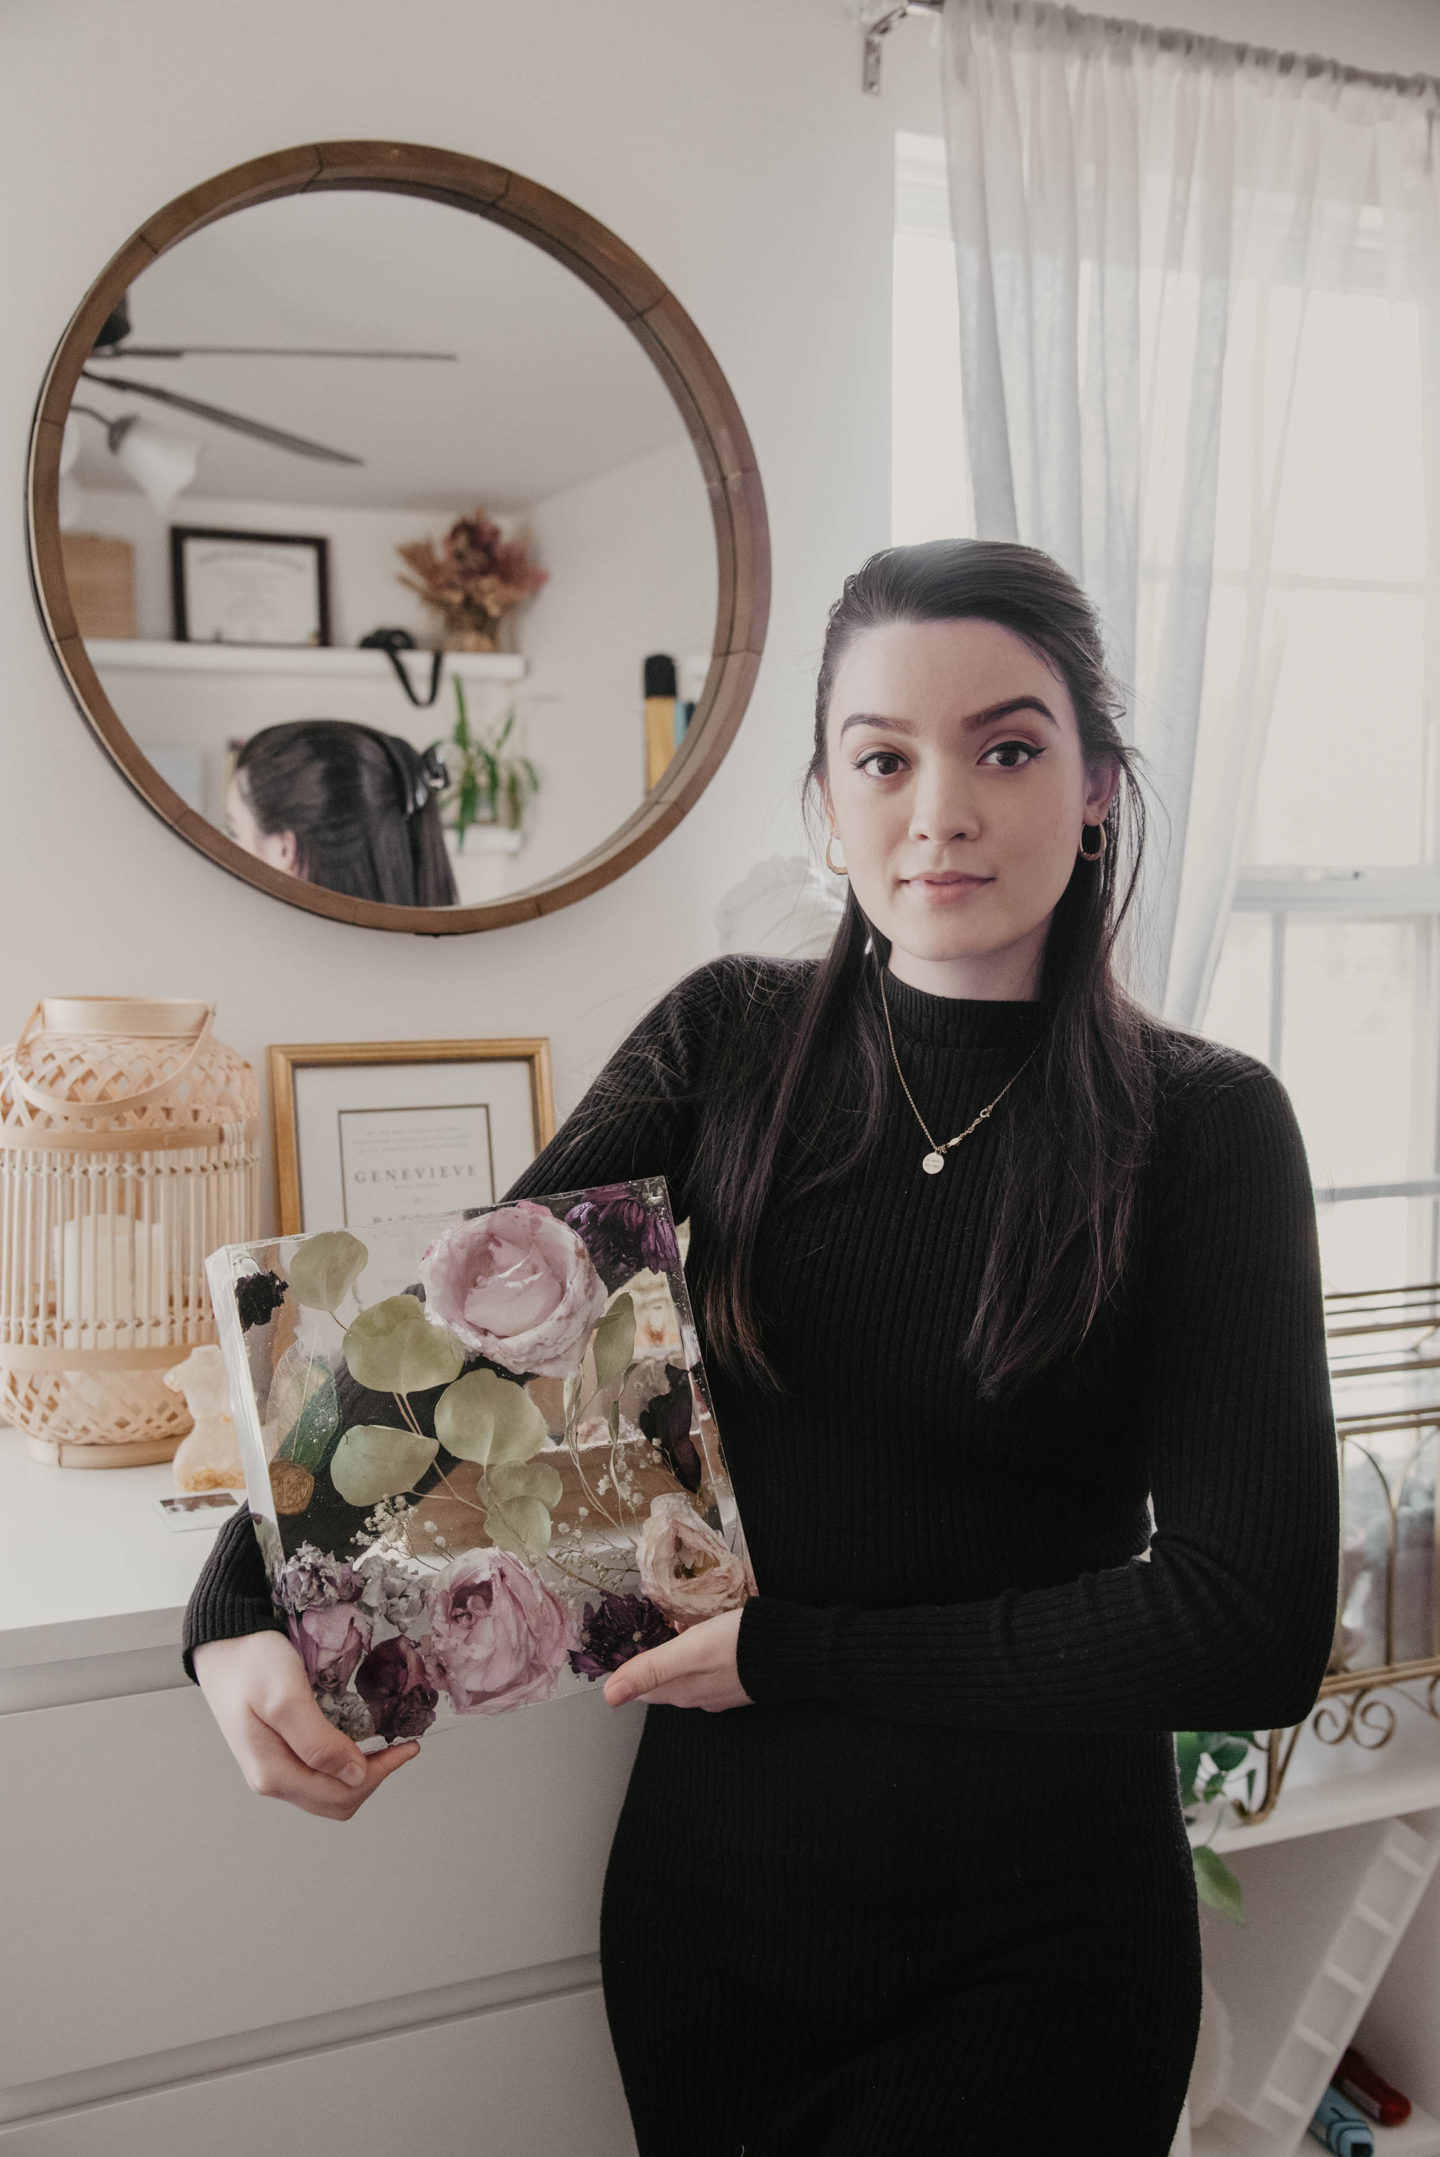
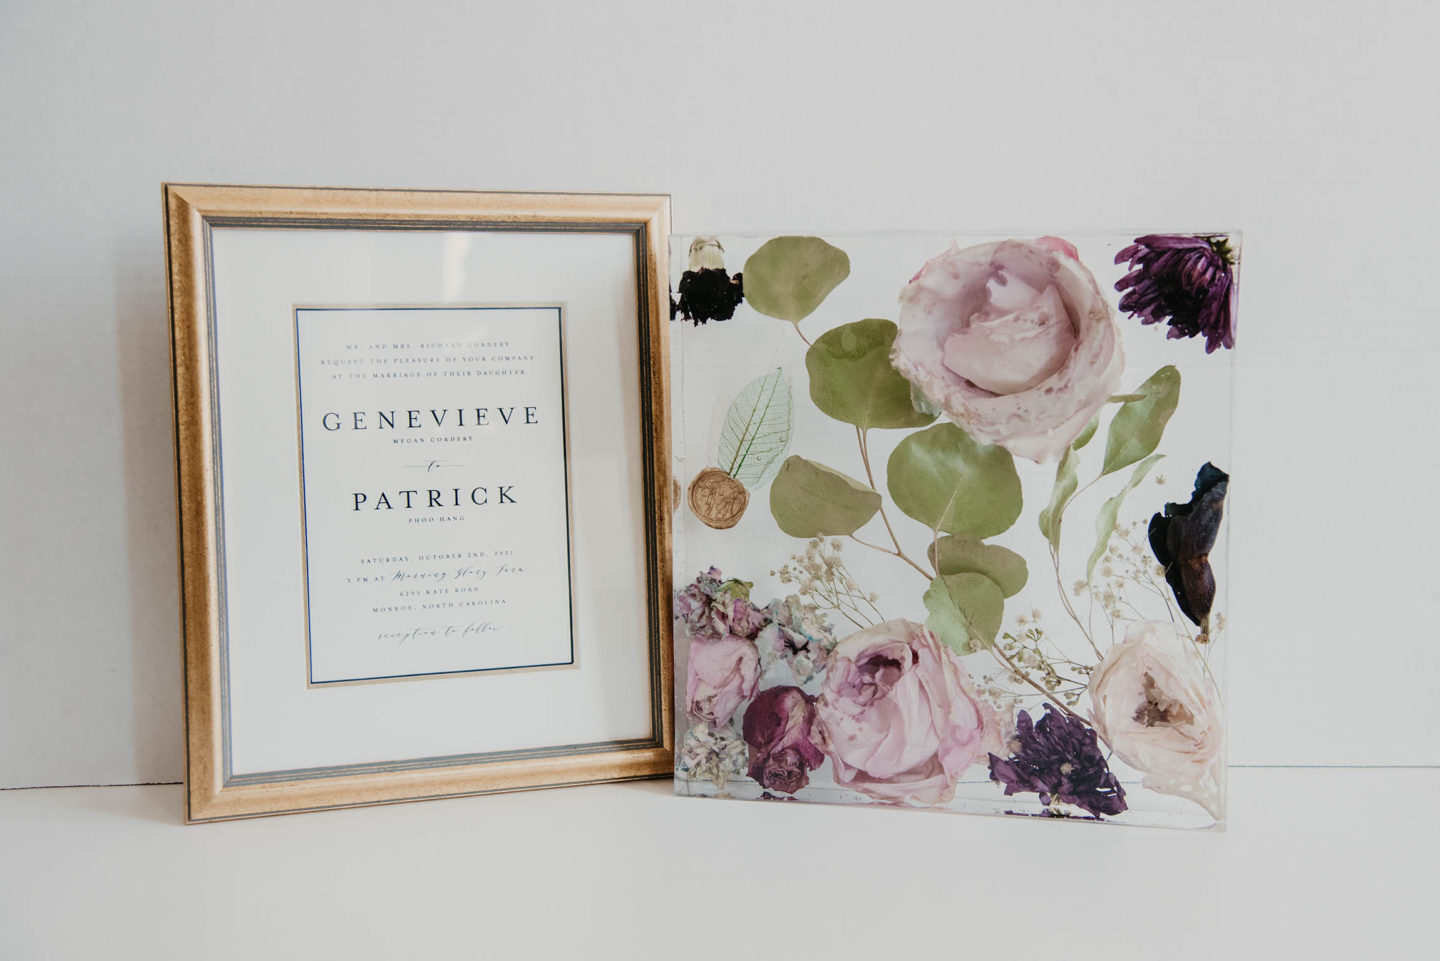
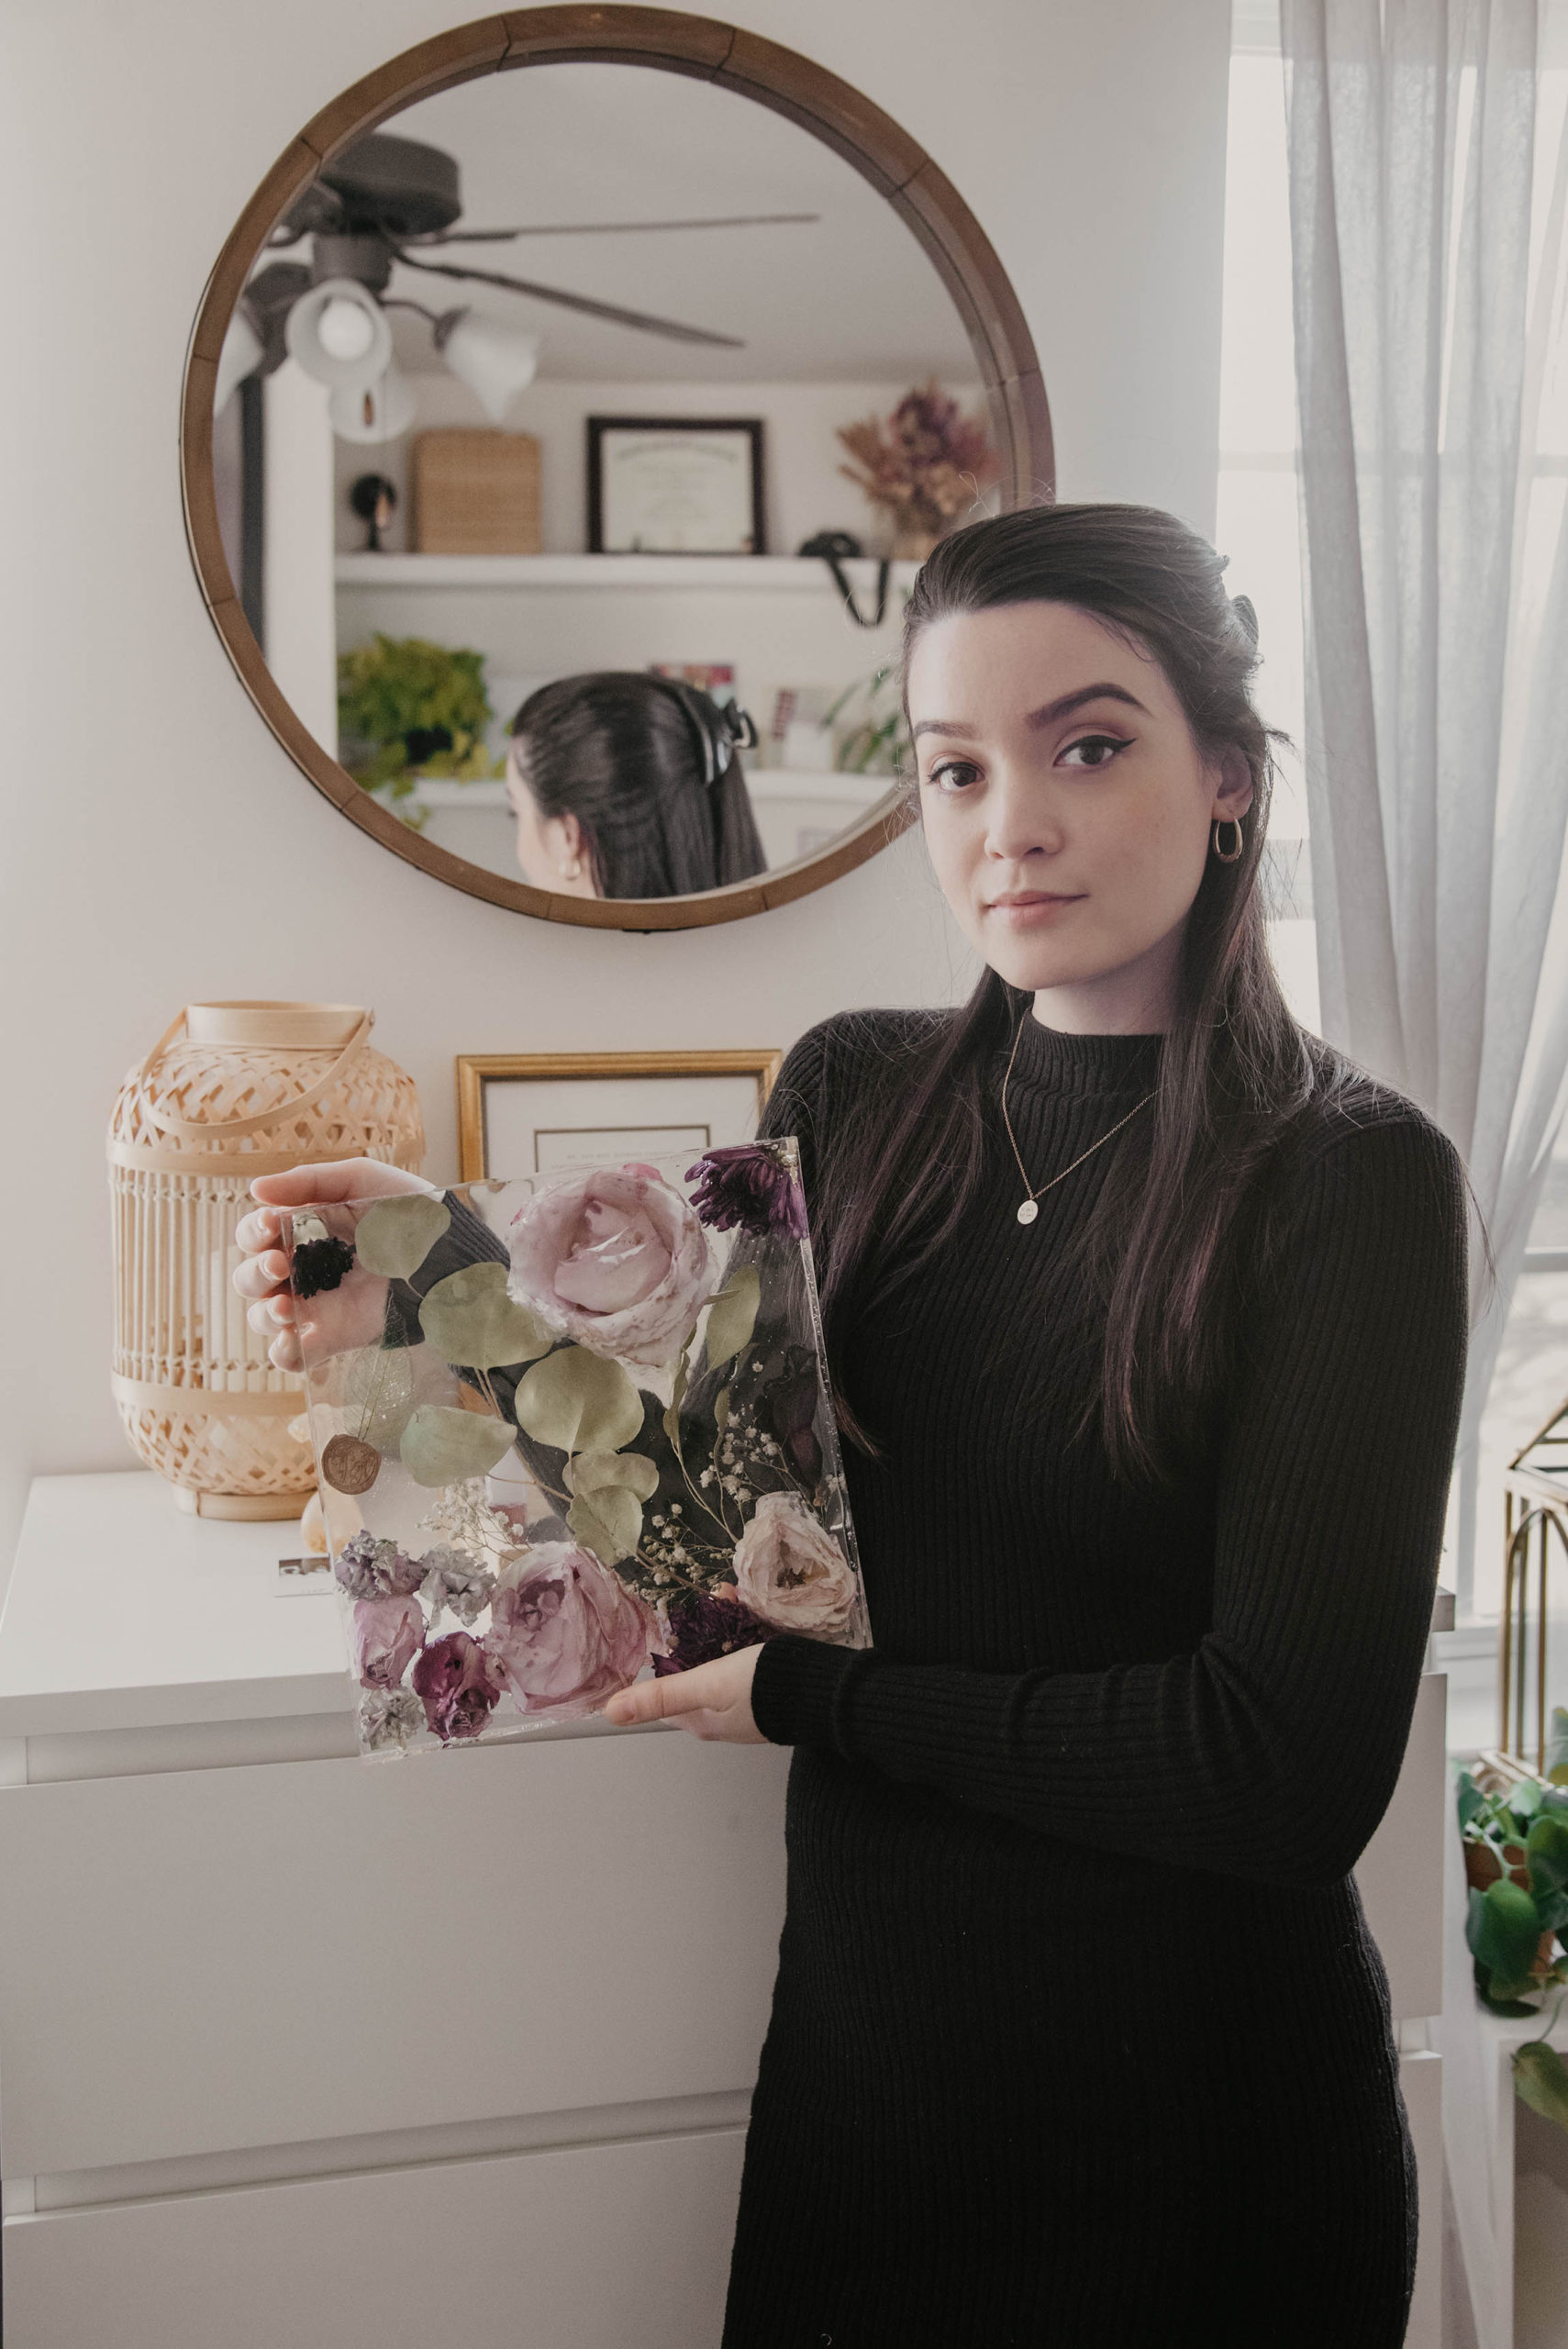
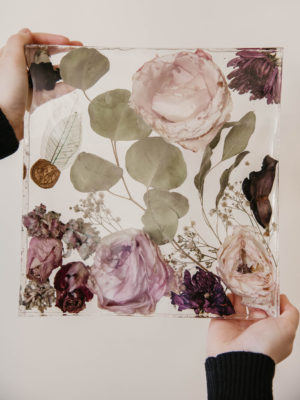
This unique keepsake will be cherished for years to come. I am really happy with how my final block turned out. I learned a lot by making the first one, and although I think my design was better with that one, it really doesn’t look great. The final one has minimal bubbles and no burned flowers! It’s something I proudly display in my home and I plan to have our wedding invitation framed to display next to it soon.
Would you try making your own wedding bouquet preservation block?
![]()