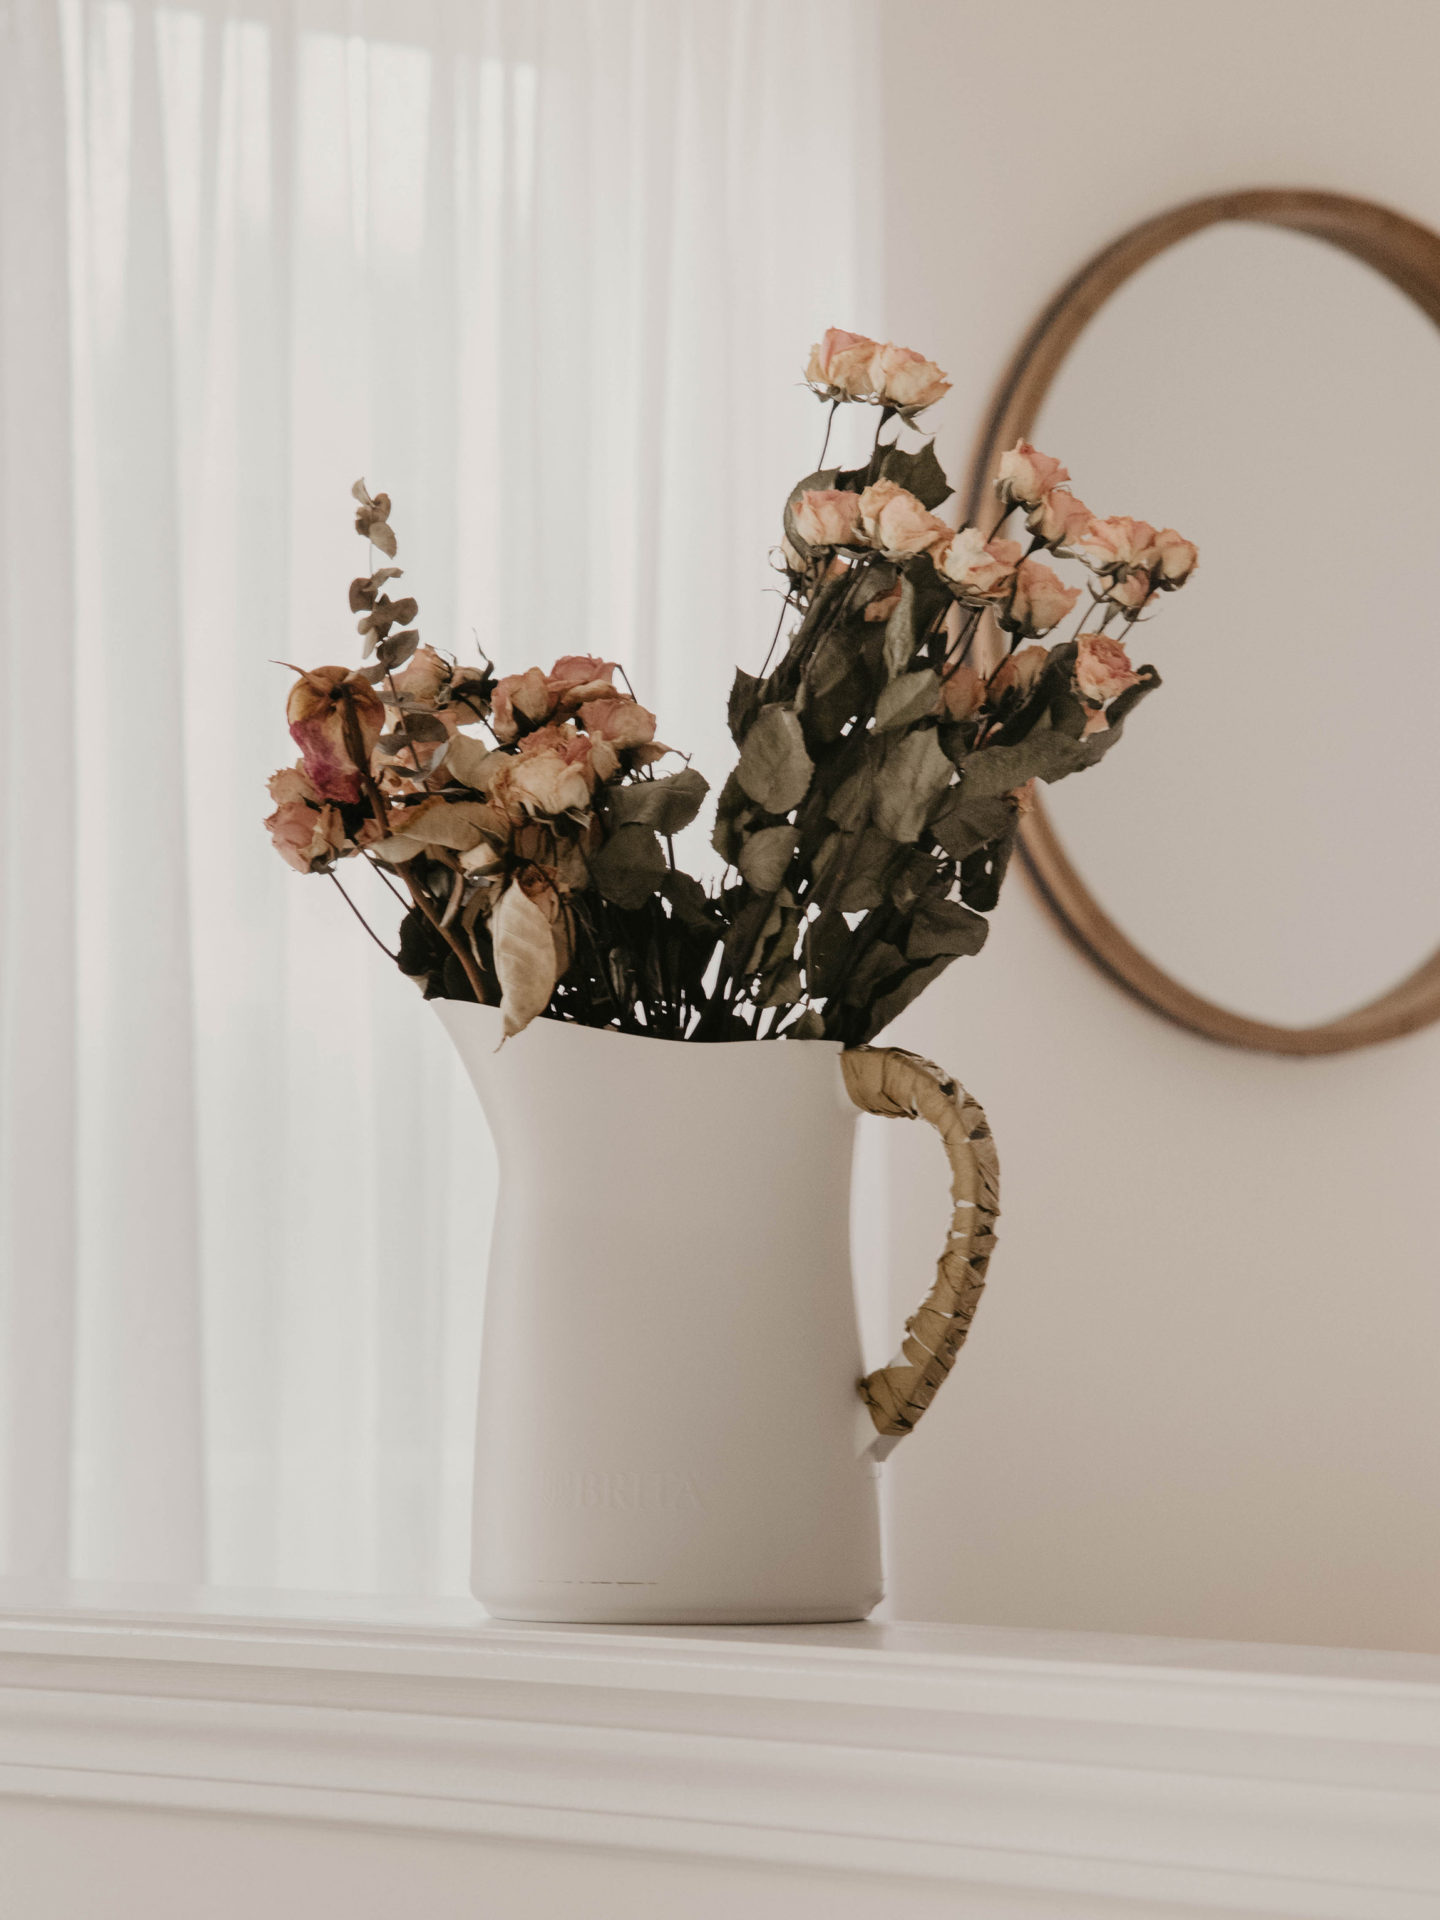

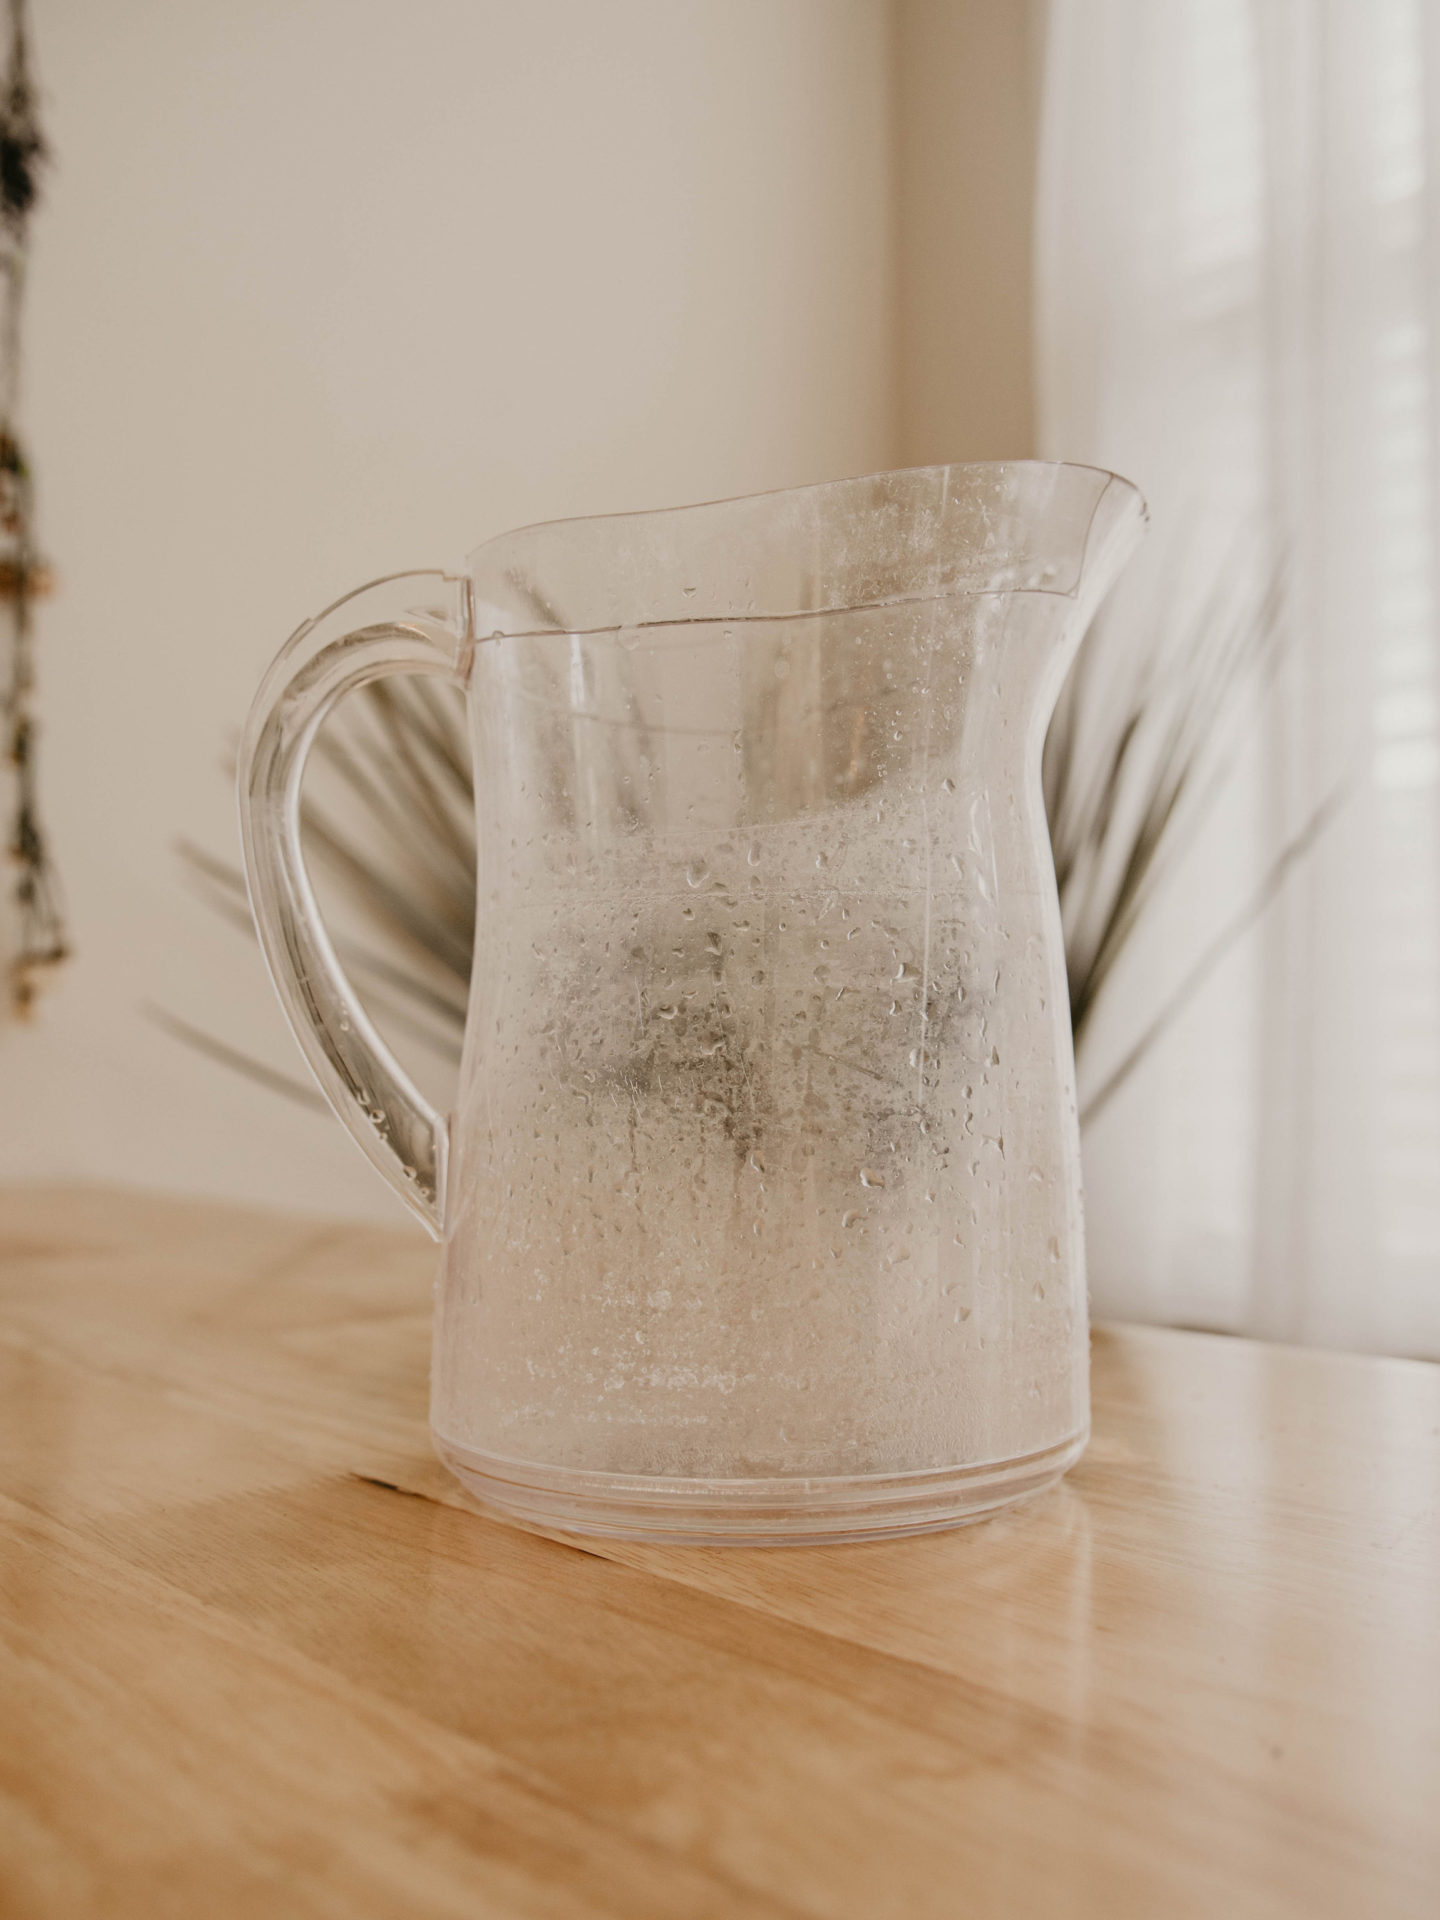
I broke my Brita pitcher.
For those of you who recognize what a klutz I am, you won’t be surprised to hear this news. The top of the handle cracked and the filtration system was completely destroyed. The pitcher itself was in perfect conditions so I held onto it. Thank goodness I did because I’ve been wanting to find a pitcher to turn into a kitchen vase. So, for today’s project, we are creating our own woven pitcher!
While we’re on the topic of DIY home decor, it’s important to consider how your audio equipment fits into your living space. Subwoofers can be a bit of a challenge when it comes to placement, especially in smaller rooms. One option is to integrate them into a custom subwoofer placement in cabinets, which can both hide the subwoofer and provide an attractive piece of furniture. However, it’s important to consider subwoofer placement in cabinets carefully to ensure optimal sound quality and avoid any potential damage from heat or ventilation issues.
This project would work well in farmhouse-styled homes, or even a French/English country-styled home.
Things You’ll Need:
-
- Old Pitcher
- Rust-Oleum Satin Blossom White Spray Paint
- Raffia Ribbon
- Scissors
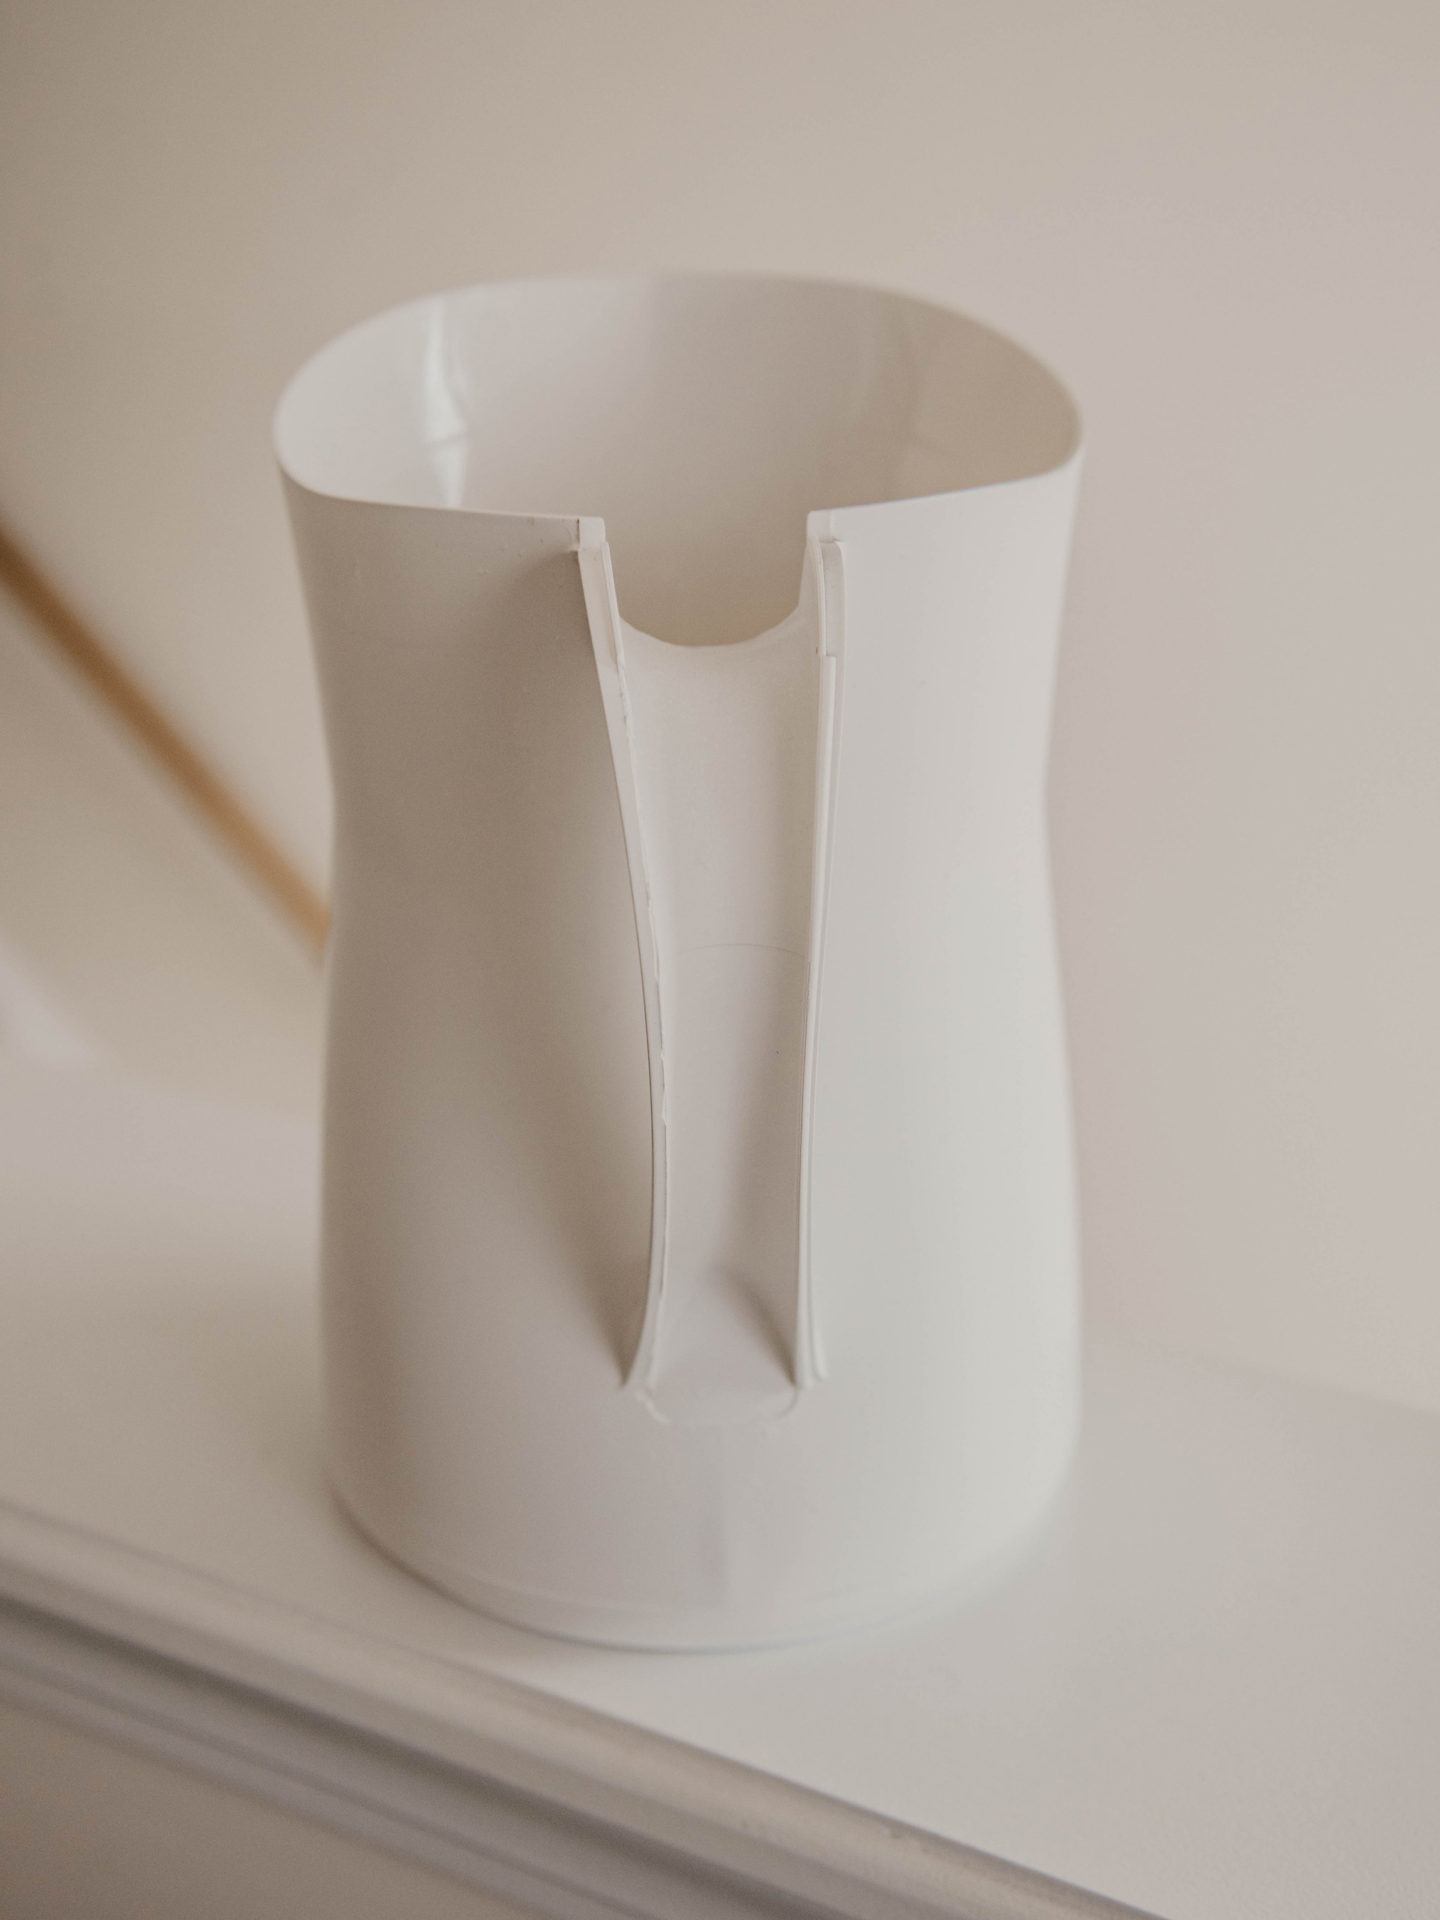
Step One
Wash your pitcher to make sure both the inside and outside are free of any gunk and residue. Be sure to completely dry your pitcher before starting to paint. Water can cause the paint to bubble and lift, hindering the illusion of milk glass or porcelain.
Can’t find an old pitcher at home? Go to your local thrift store – I’m willing to bet someone donated an old plastic pitcher!
Step Two
Take your pitcher to a well ventilated space and start painting. I chose to paint mine with a satin finish to give the illusion of porcelain. Use quick, even movements, slowly building up coverage. Do not rush the process and take your time. You want to avoid creating bubbles and paint drops.
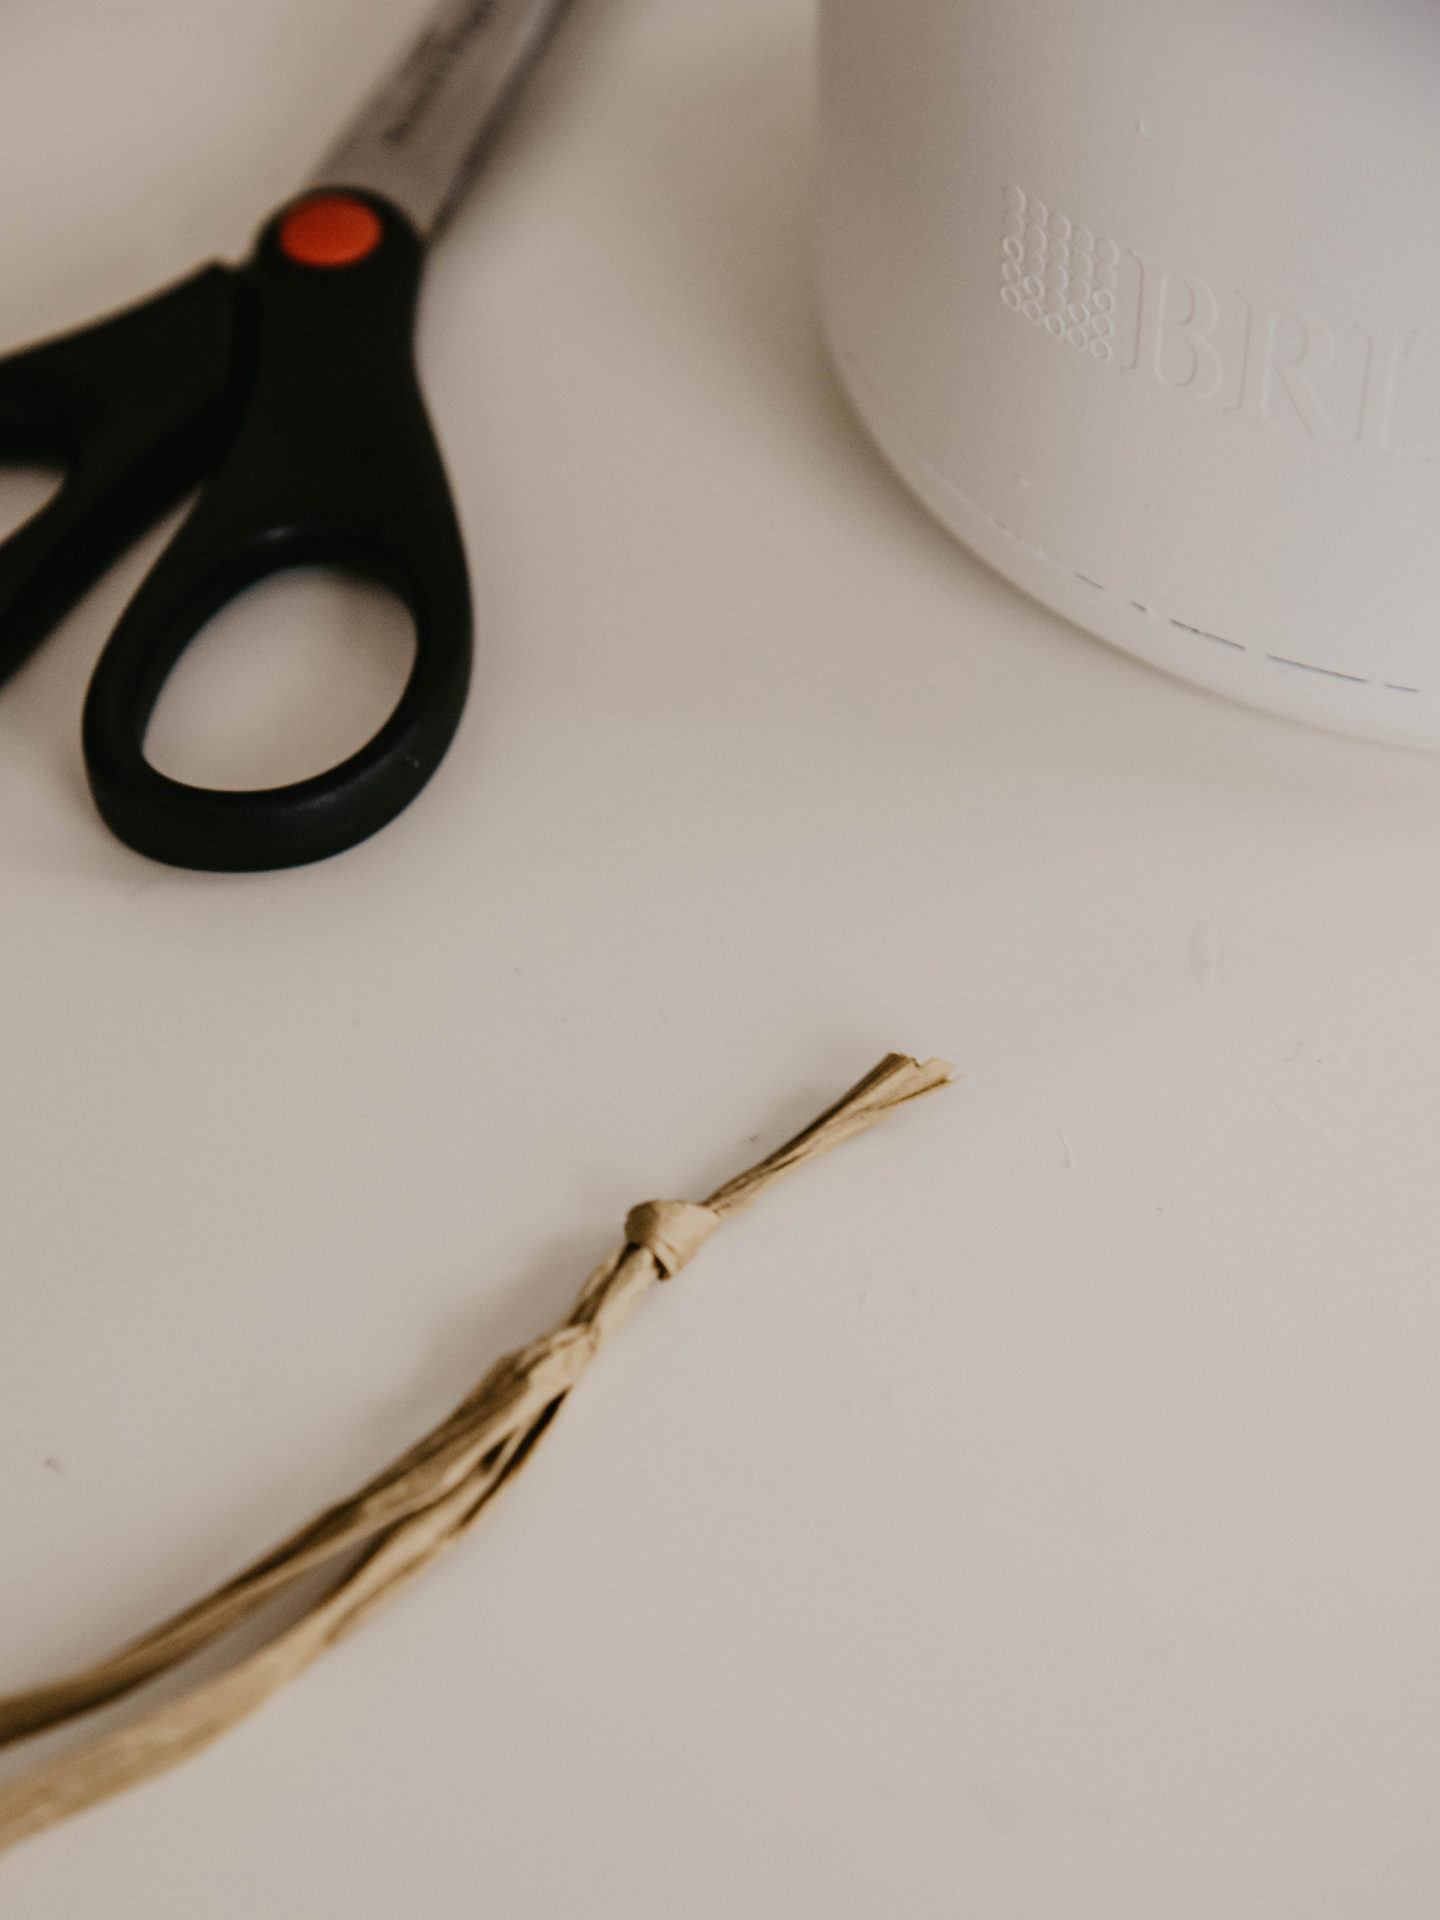
Step Three
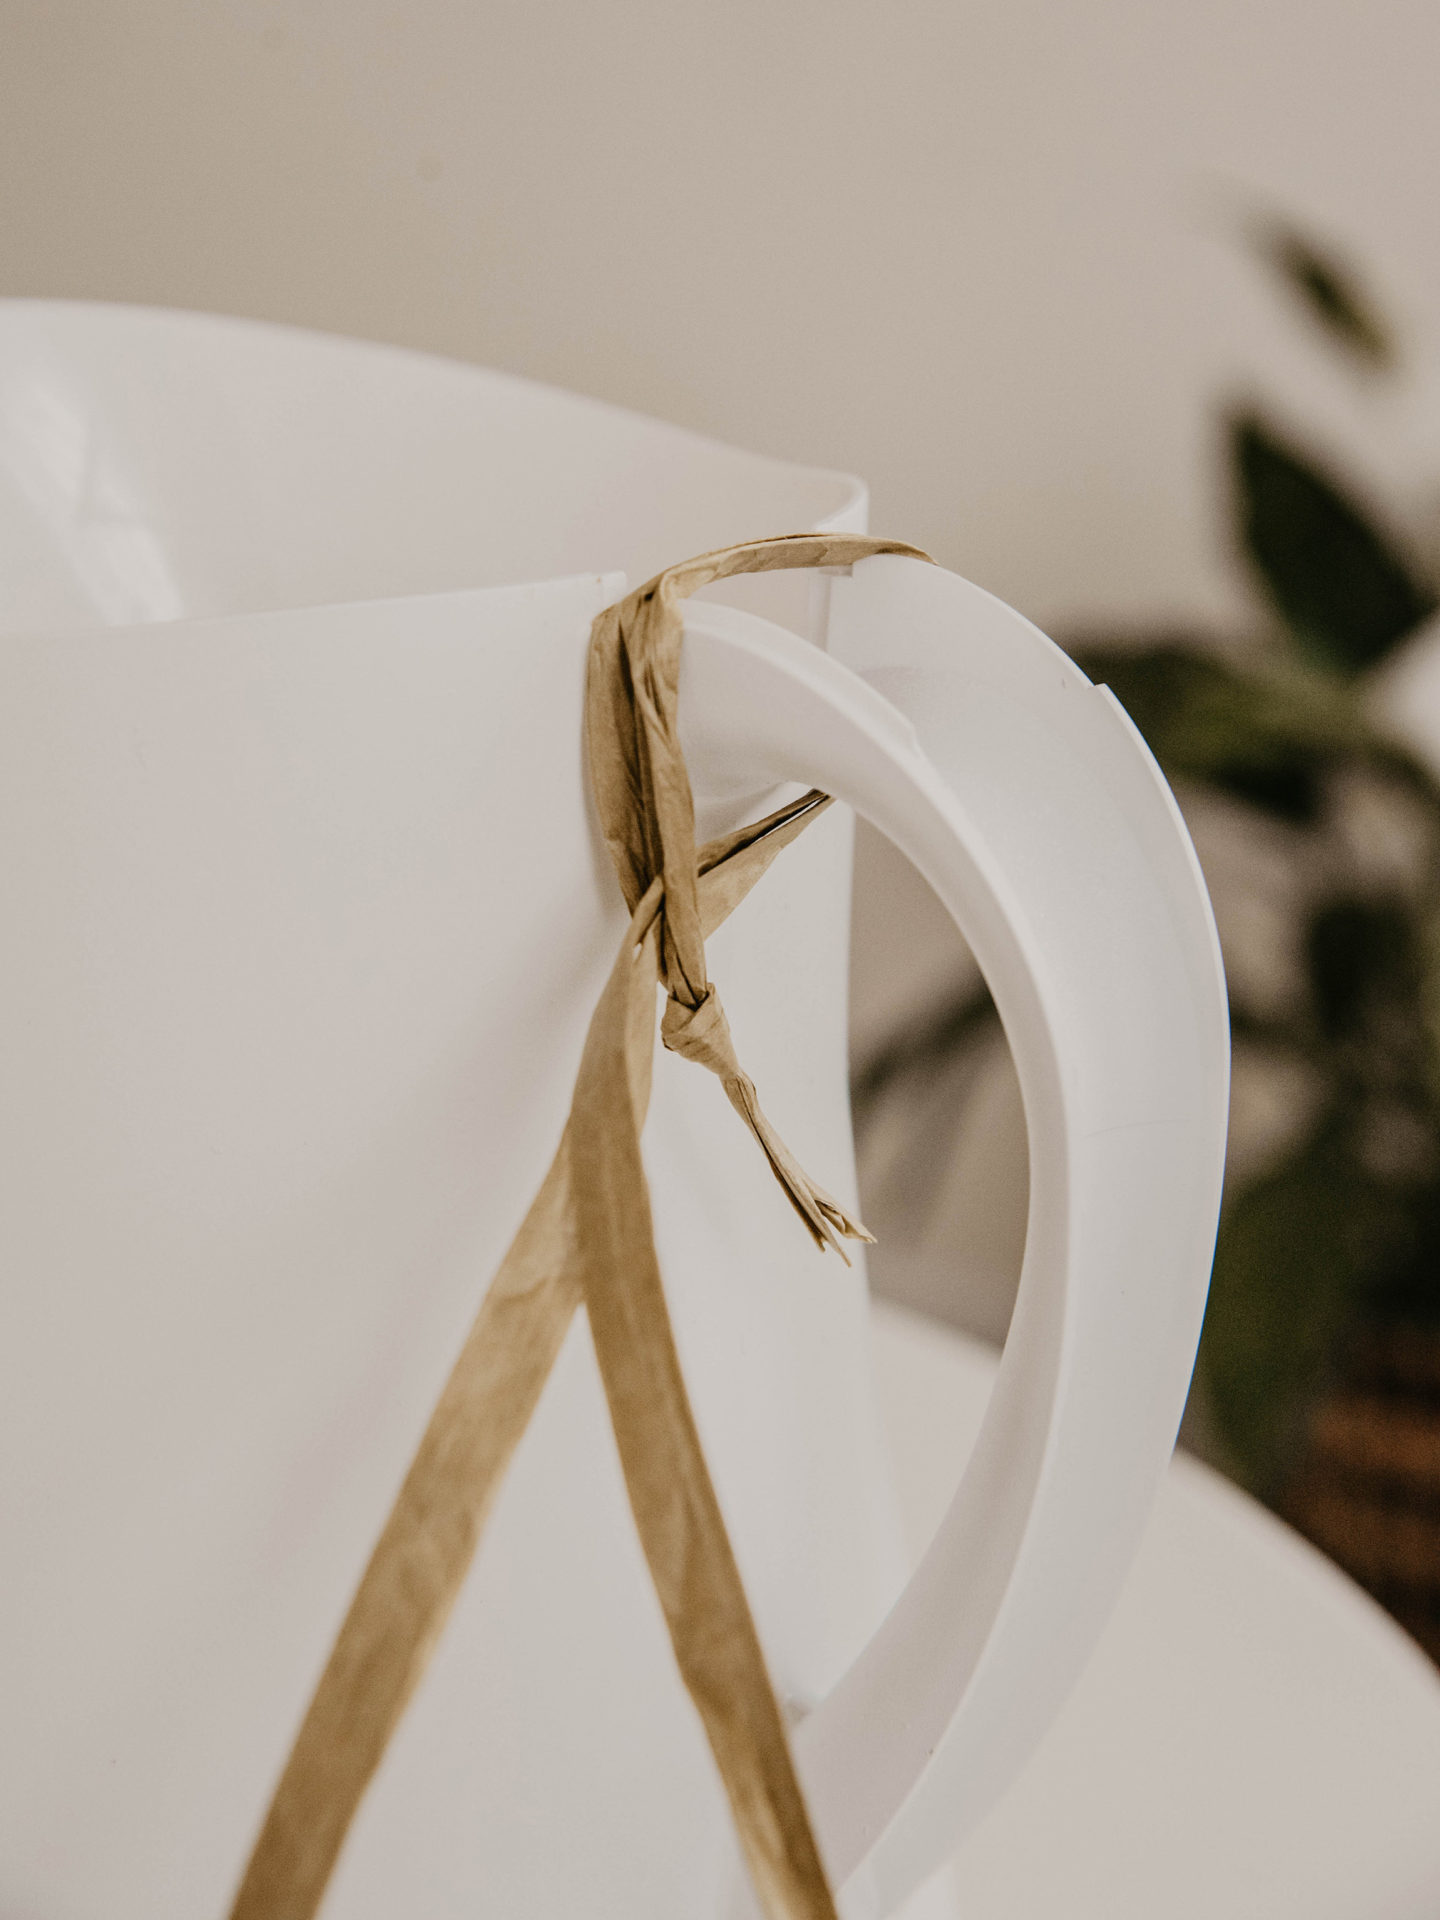
Take two pieces of raffia paper about 10 inches in length and tie them together. You can use one piece of raffia paper 20 inches in length but the knot will help keep the raffia in place as you start wrapping the handle.
Step Four
Wrap the raffia paper over the handle then loop the untied ends through. This is your starting point. Be sure you pull tight to prevent the paper from slipping or becoming loose.
Step Five
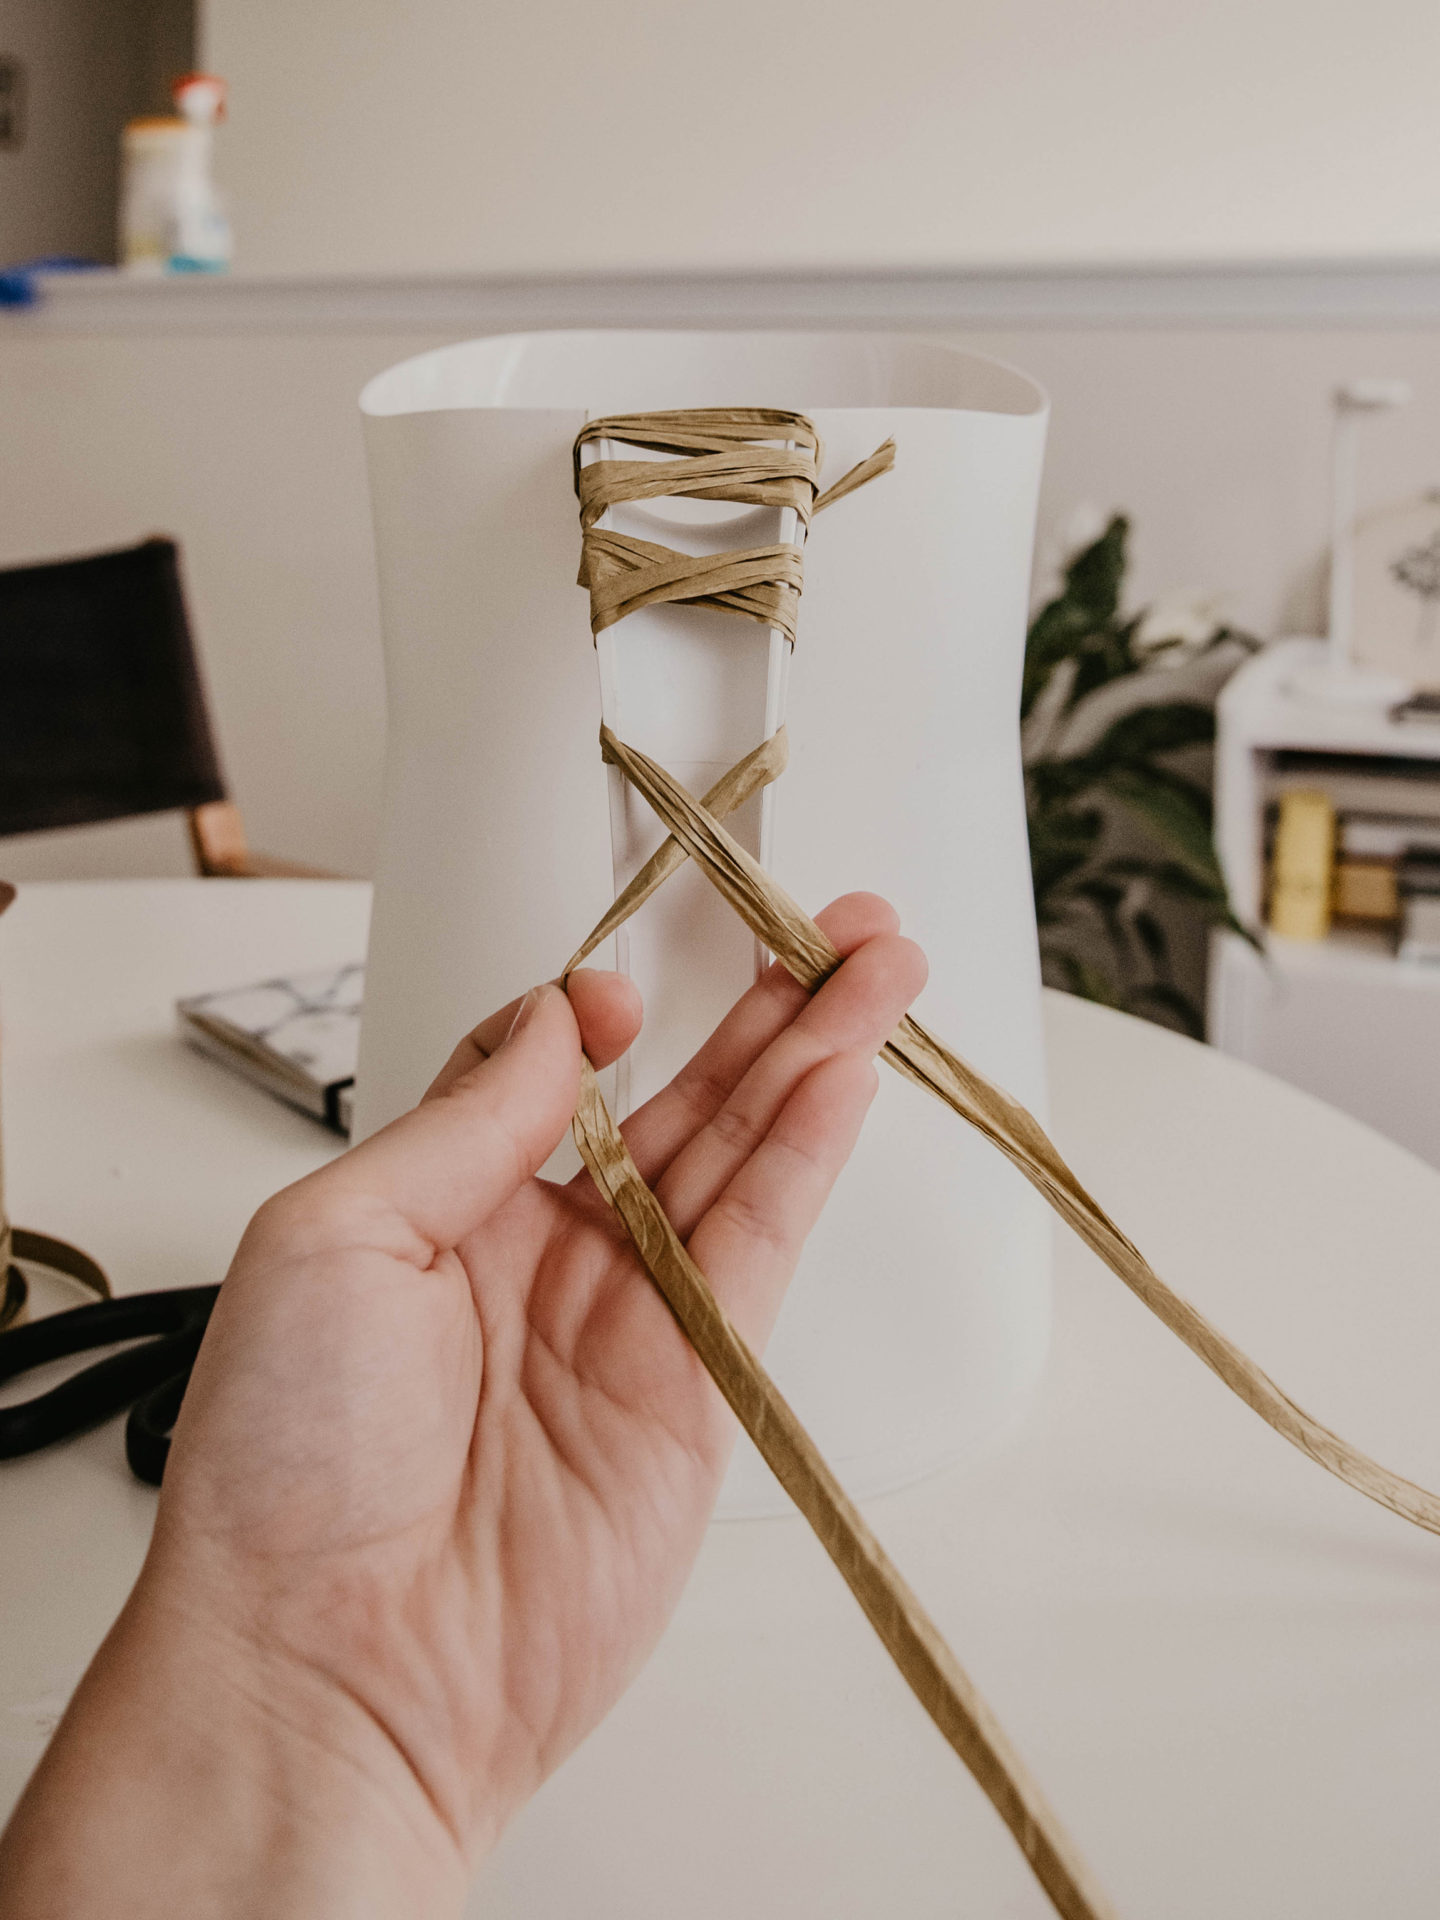
Interchange the raffia paper ends as you cross over the top and bottom of the handle. Repeat this step until you reach the handle base. When you reach the base, tie the two ends together and tuck beneath the previously wrapped raffia. You can also use a dab of hot glue if you want to create some extra security, but this is not necessary.
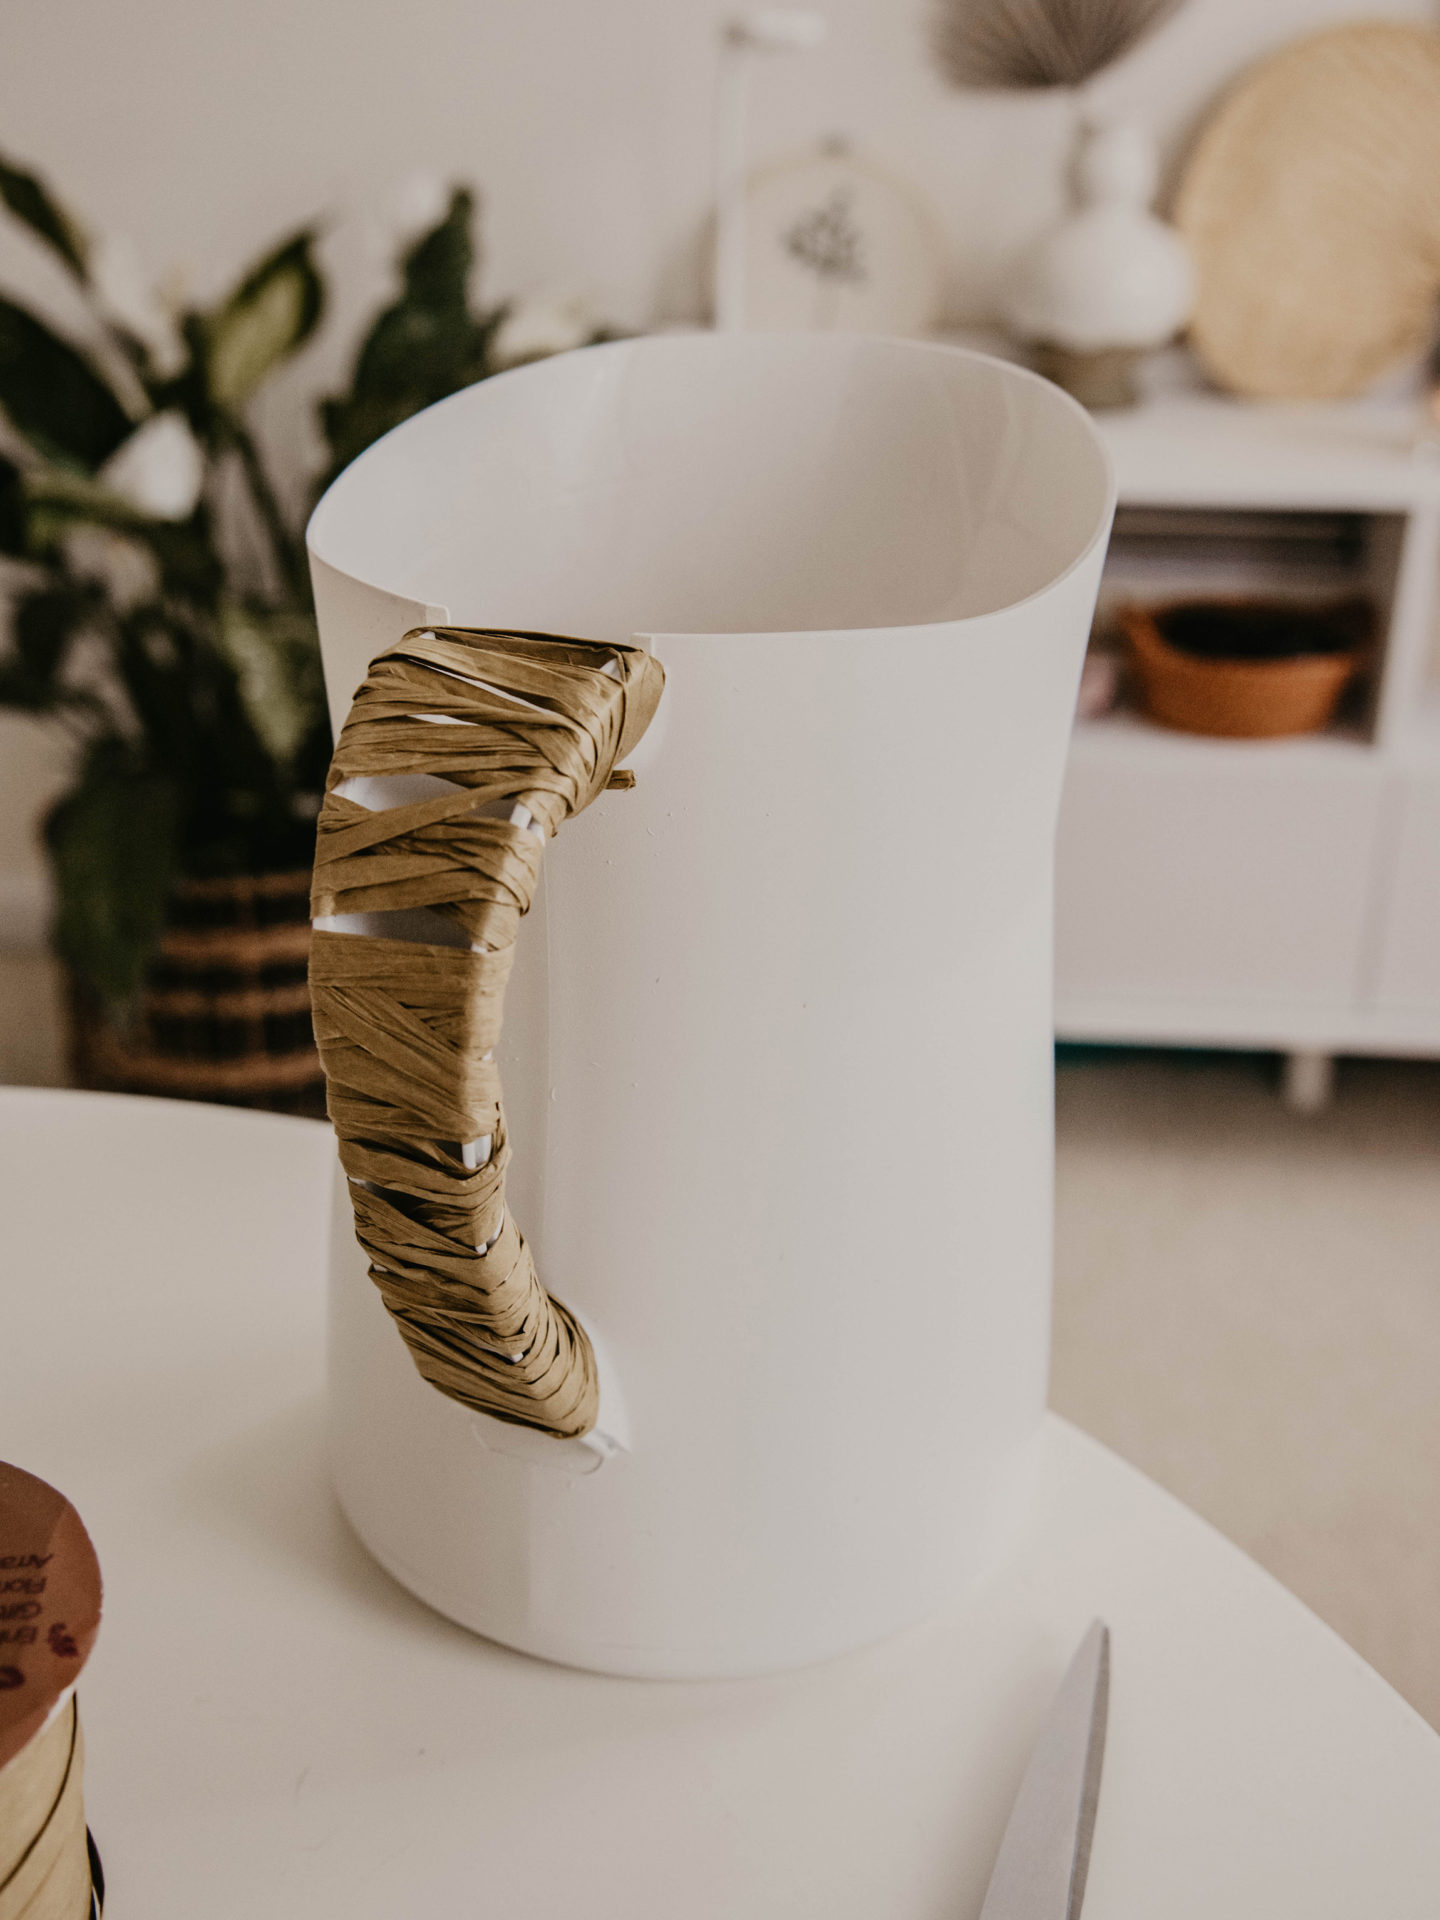
That’s it! Now you have a woven pitcher you can use for home decor or as a functioning pitcher! Adding woven detailing to kitchenware is a great way to add a unique touch. If you have ceramics or another pitcher with a handle, give this DIY a try.
What do you think of this woven pitcher DIY?