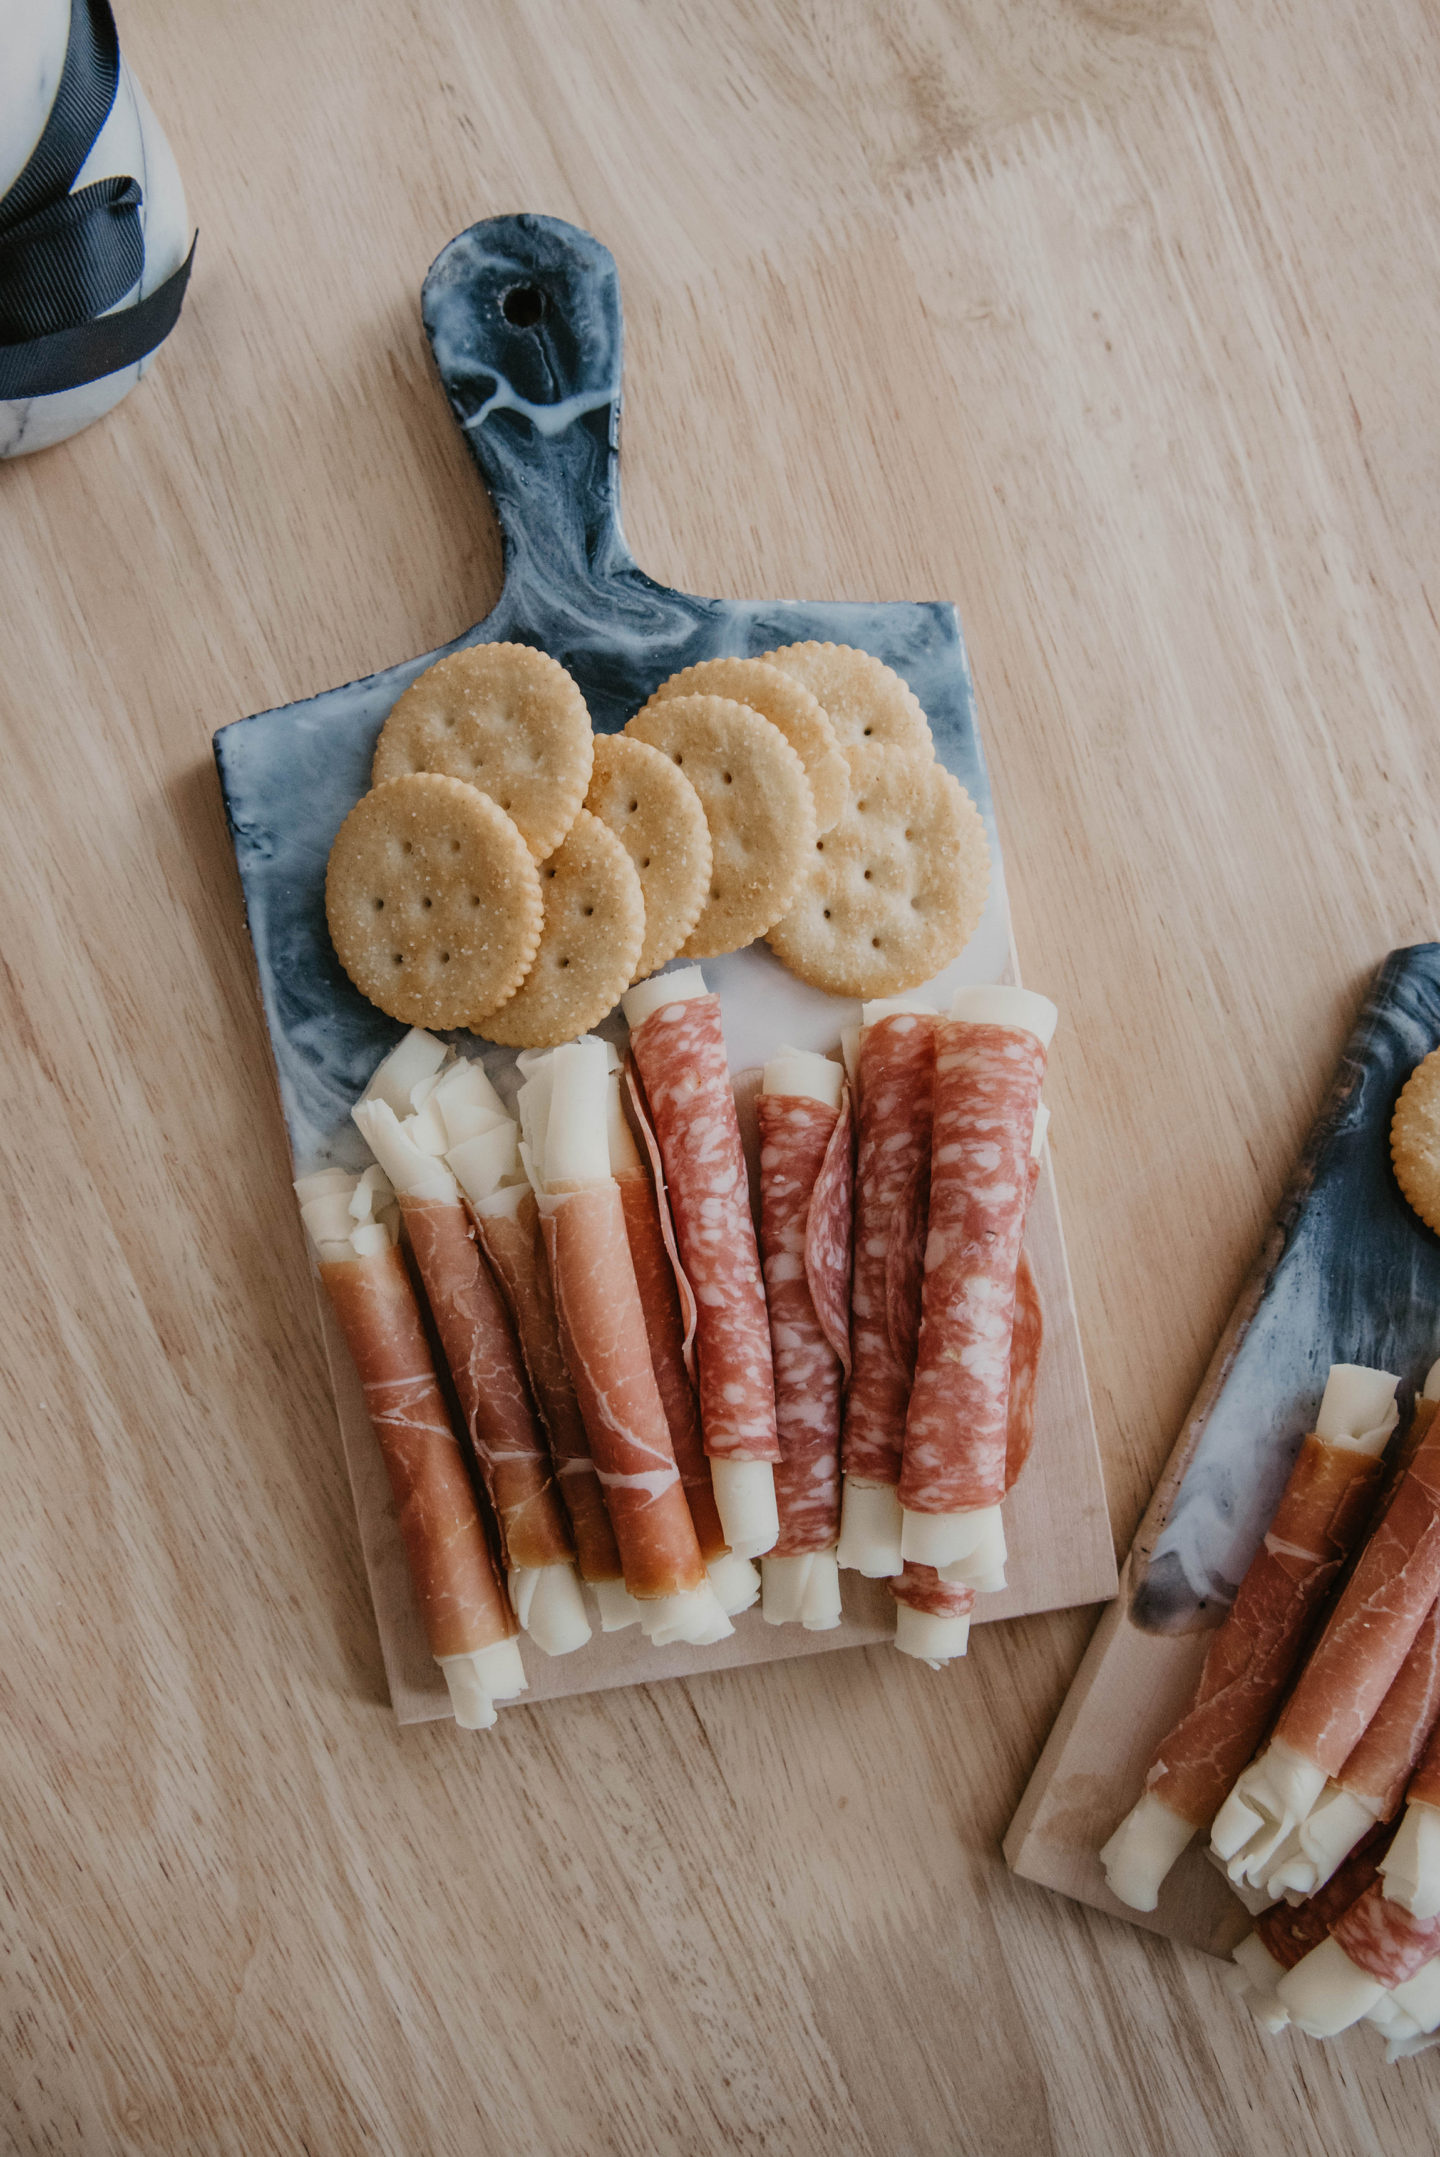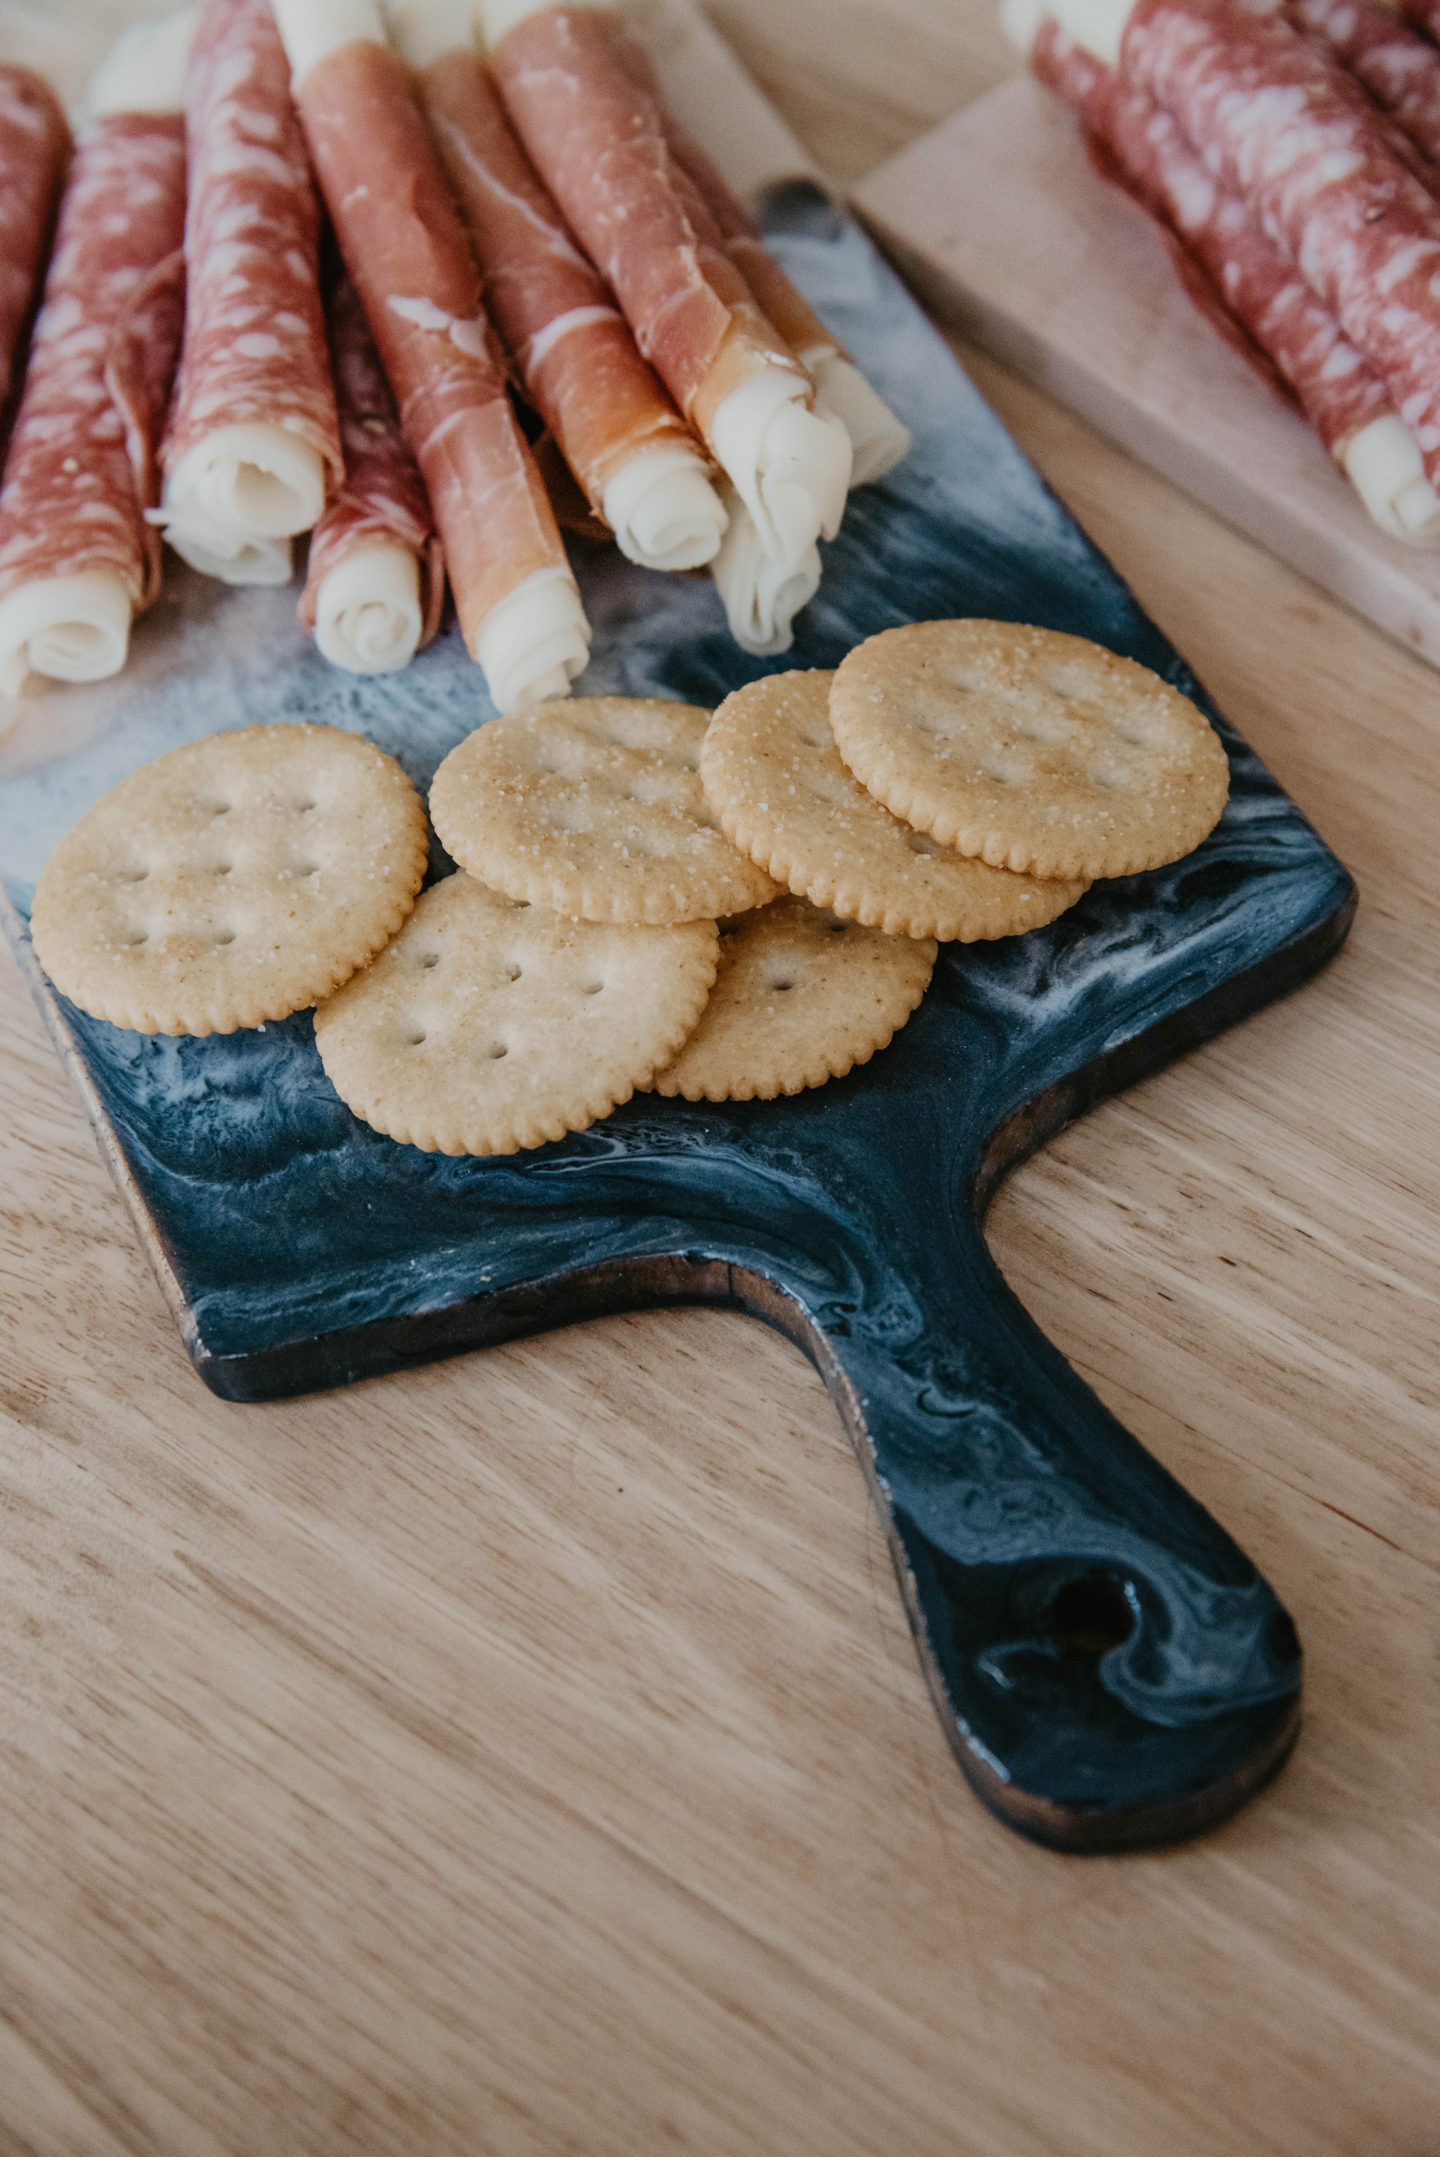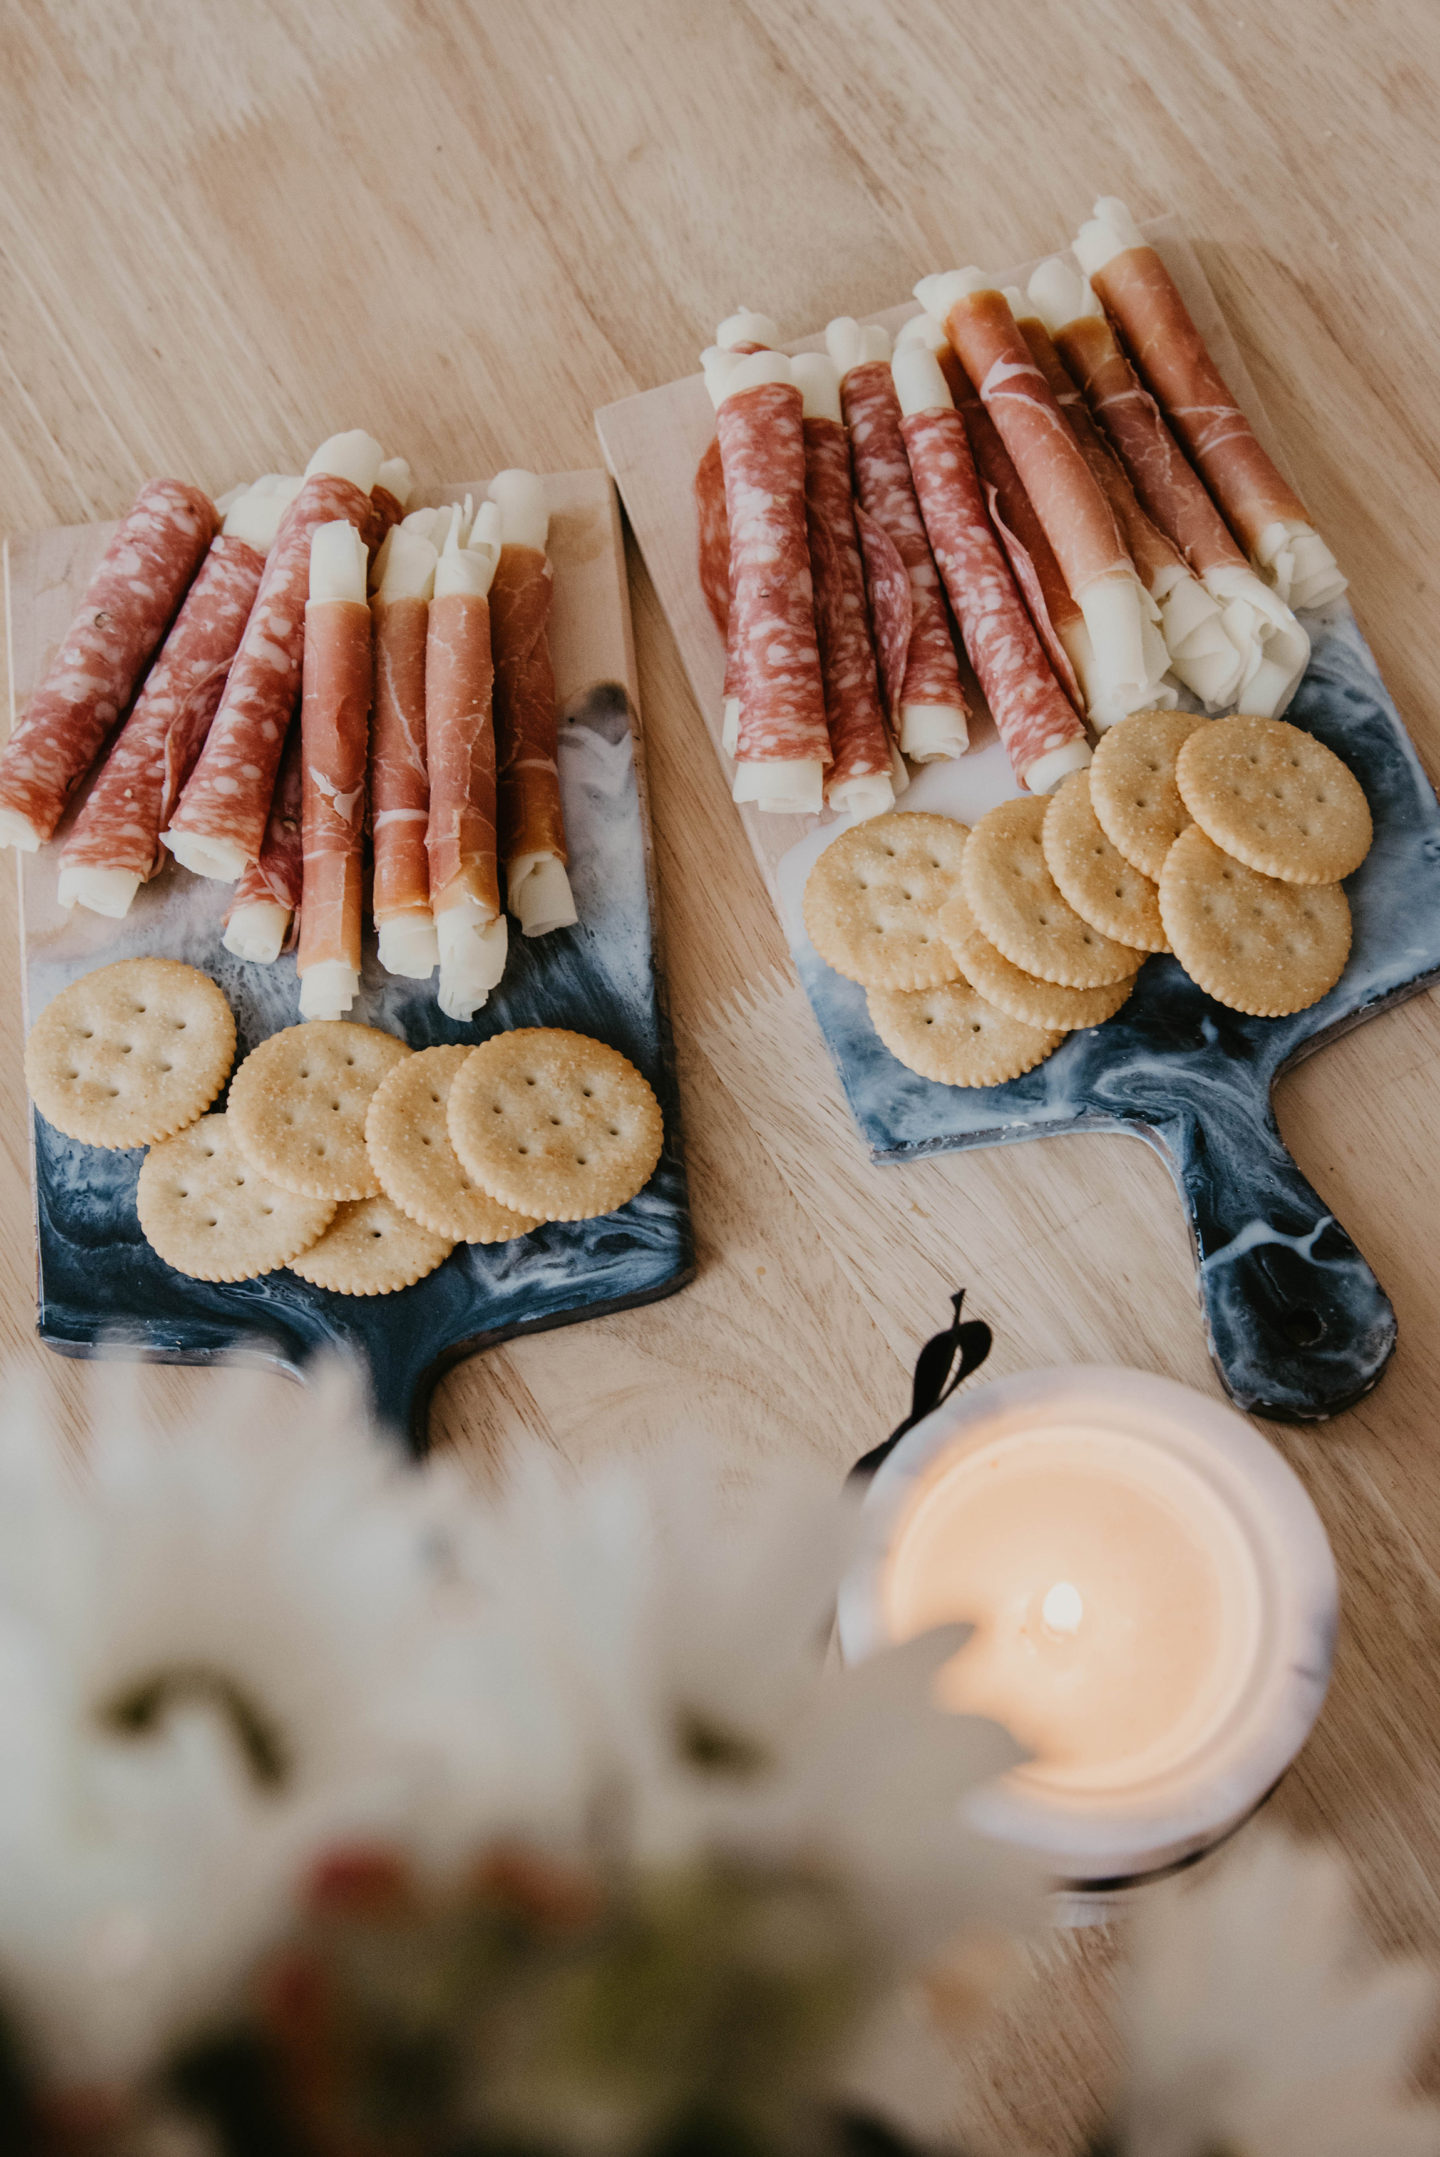
Charcuterie anyone?
Does anyone remember lunchables? That was basically charcuterie for children…so this chic snack platter has been ingrained in us since childhood. We just like serving it on fancy marble or resin cutting boards now. #adulting
Resin projects started to really become popular before the pandemic but throughout quarantine so many people started making and selling their own resin art. I’ve only been making resin art for a couple of months now but I’ve learned so much during that time. It’s really not hard, but you have to understand mixology, gear, and be flexible.
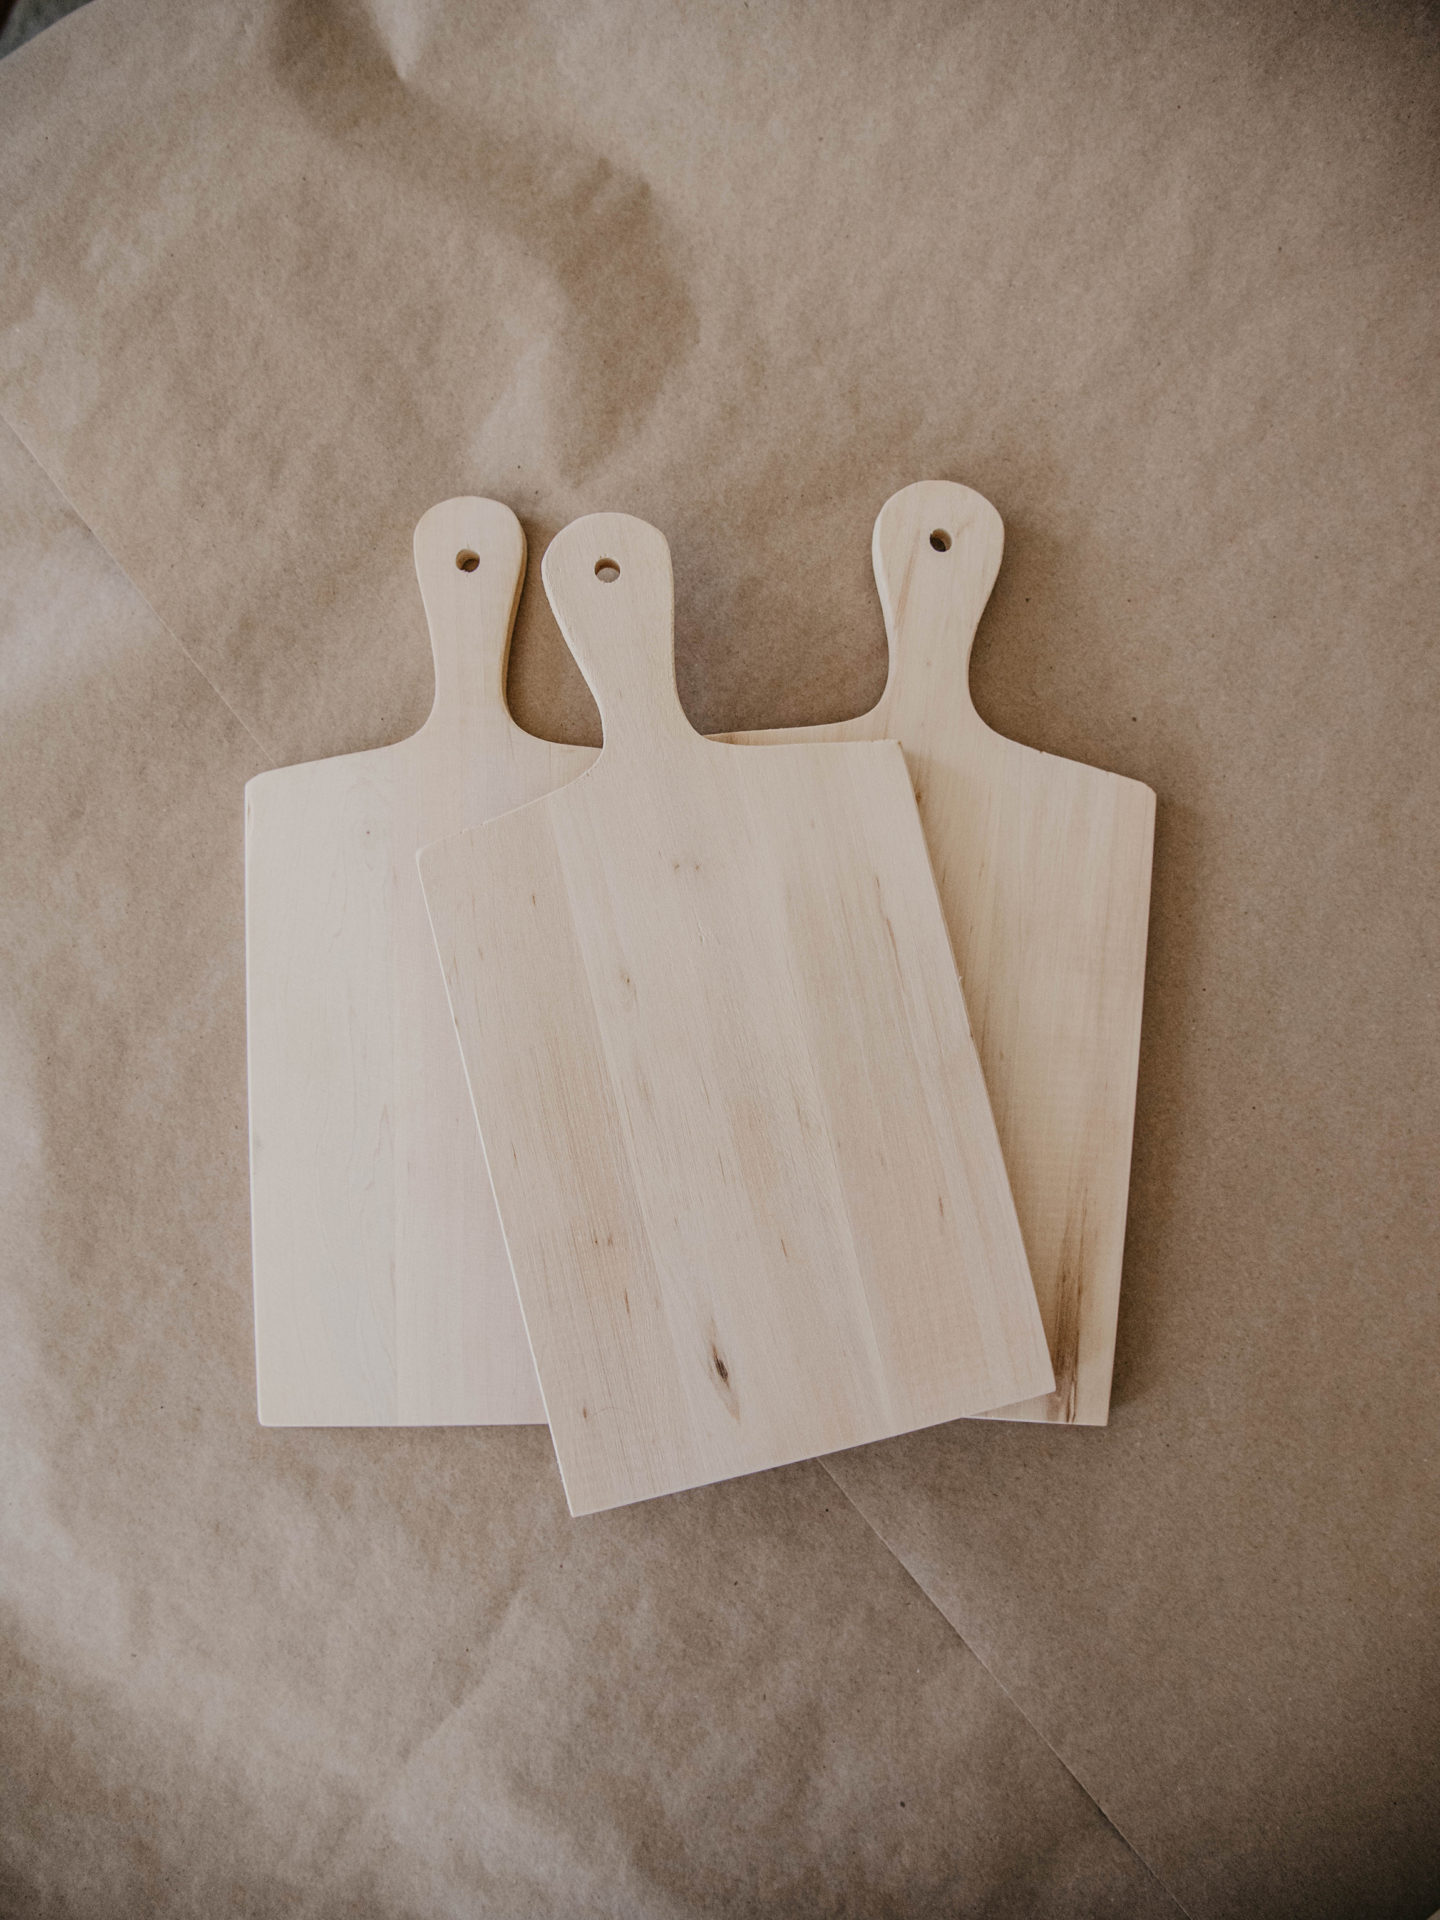
When I went thrift shopping a couple of weeks ago, I found these wood cutting boards and could not pass them up. We had a good friend recently purchase his first home with his girlfriend and I wanted to give them something special as a housewarming gift.
Things You’ll Need:
-
- 16 oz. Resin Kit
- Silicone Measuring Cups + Mixing Spoons
- Black and White Acrylic Paint
- Unfinished Wood Cutting Board(s)
- Heat Gun
- Silicone Sheet/Table Cover
- Wet Wipes
- Gloves
- Mask (especially if you are not in a ventilated space)
G E A R U P
Mask: If you plan to work with resin it’s always a great idea to work with a mask. The fumes are not healthy and can cause headaches, which is why I recommend working in a ventilated area.
Gloves: Always wear gloves when you are working with resin. You do not want it to get on your skin. It can cause irritation plus it’s a major pain in the butt to get off.
Wet Wipes: I always keep wet wipes or baby wipes at the ready when I work with resin. It’s great for wiping off mixing spoons, spills, or for clean up.
P R E P + M I X
DIY resin kits typically come with mixing instructions. Mine called for an even ratio of part A and part B, but be sure you follow your instructions when pouring both parts into a silicone cup.
Slowly mix the resin in the same circular direction; this helps limit bubbles. Once the resin was thoroughly mixed, I divided them into additional silicone cups for color mixing. I chose three for the black, clear, and white mixes.
Next, I added a small part of acrylic paint to the silicone cups. I used this YouTube video to help me with mixing ratios with resin and acrylic paint. Remember to keep one as is – the clear resin allows for the resin to take shape with the heat gun later.
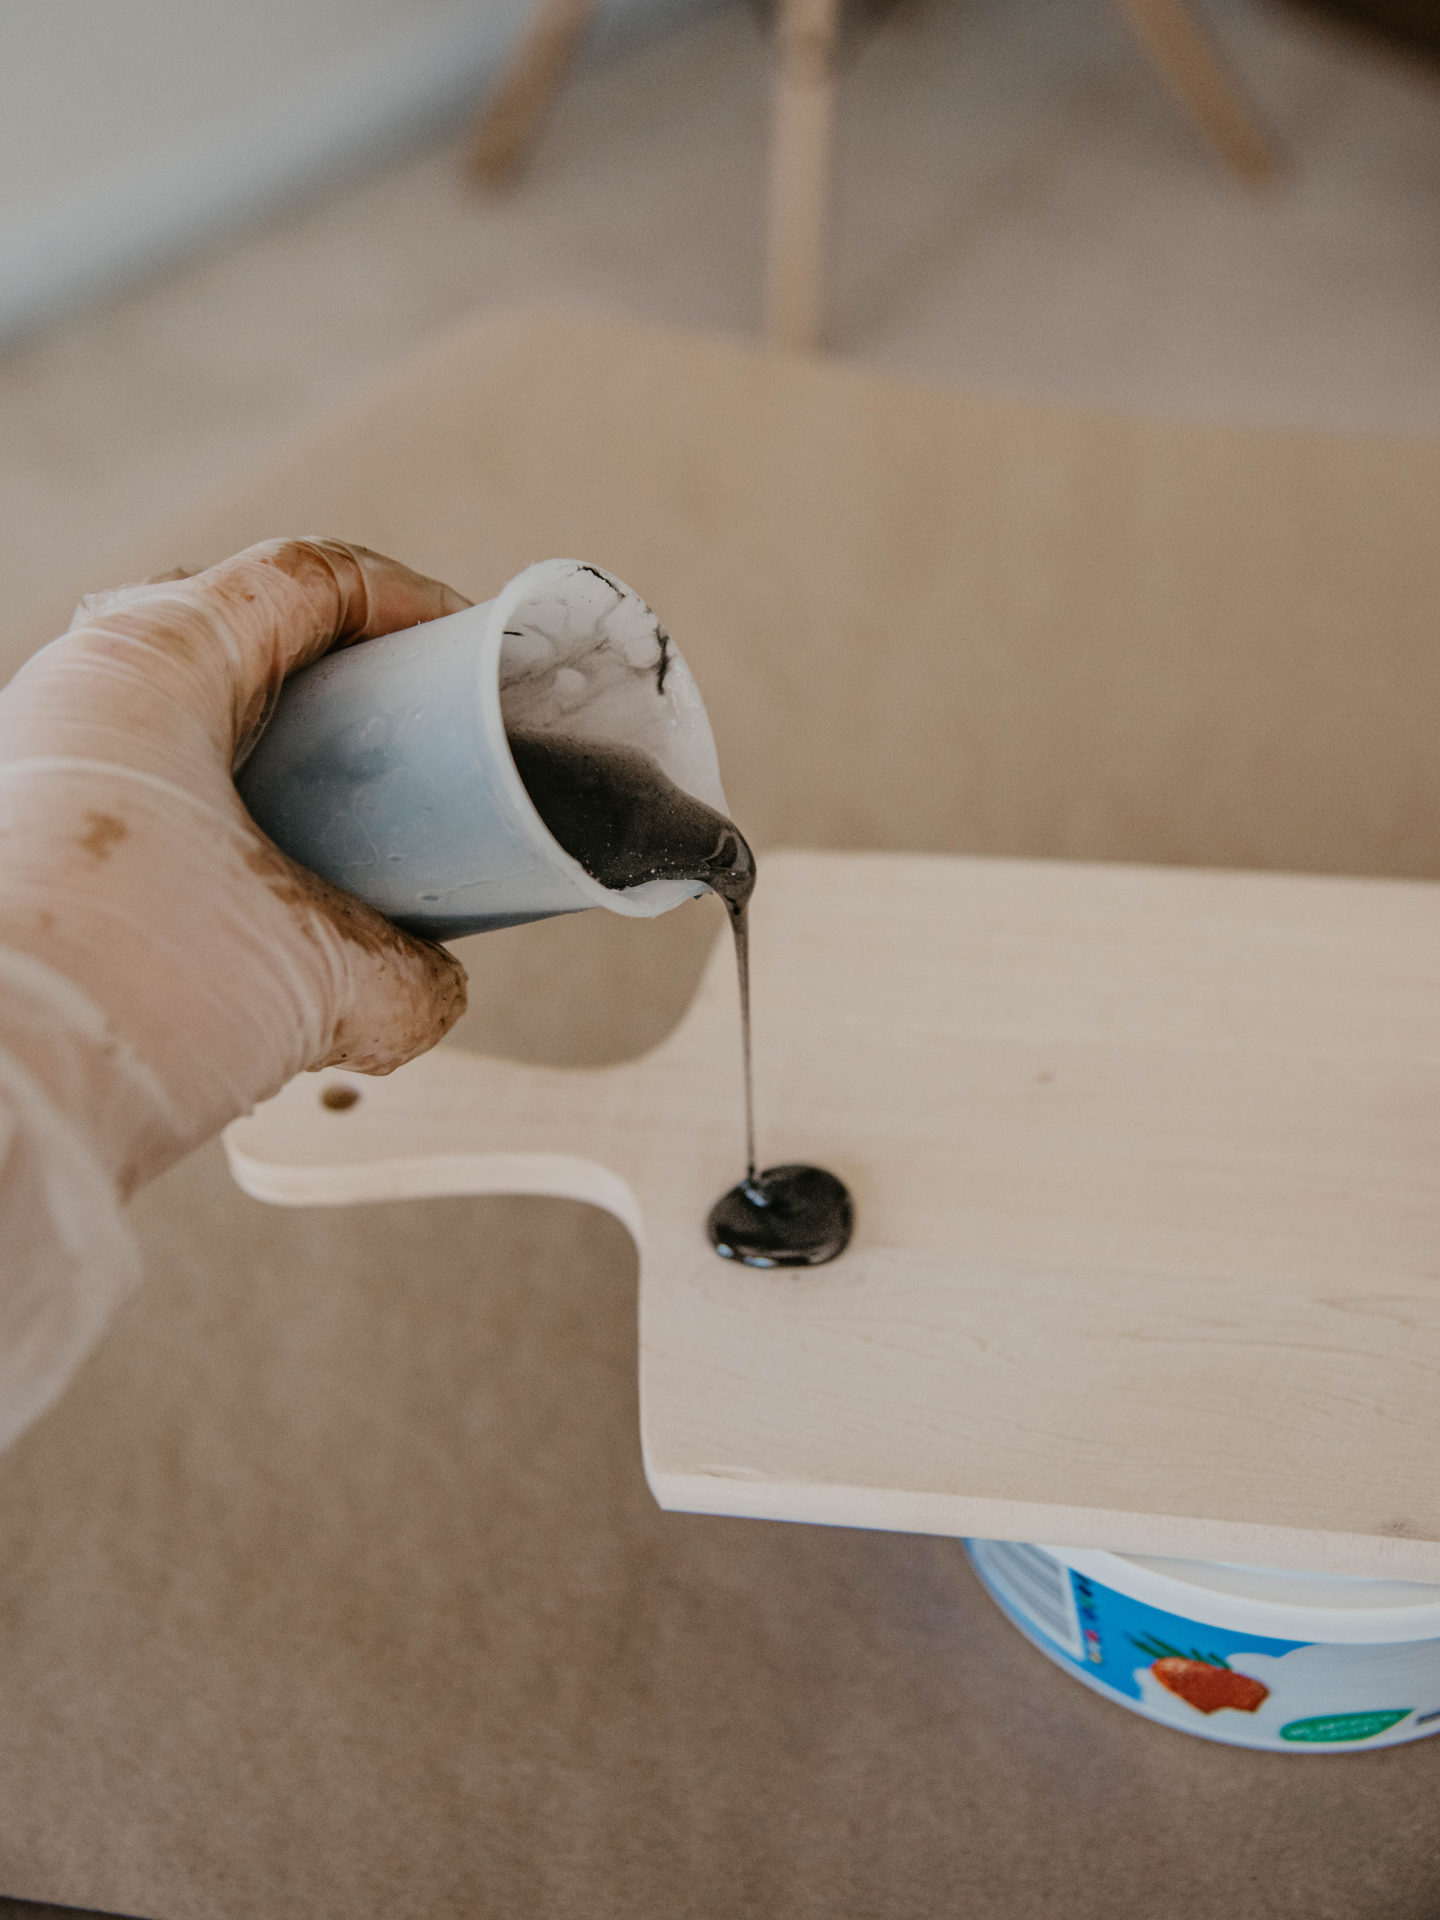
Place the cutting board on top of a flat object that lifts it off the silicone mat. This will allow for the resin to drip and not pool around the board. I used an empty cool whip container and a soda can.
Something I Learned: I should have taped of the back side to prevent any drips from accumulating during the drying time. The backs of my boards are not very pretty and there’s not a lot I can do about it now, but if I had taped it off then I could have had a cleaner-looking reverse side.
P O U R
This is where things get messy and fun! Slowly pour the resin over the cutting board. Don’t hesitate to lift the cutting board to move the resin around, too. Resin will drip onto the silicone mat, but that’s easy to clean once it’s dry. It will literally break away from the silicone mat after 24 hours. If you opt for an old box rather than the mat, you can dispose of it once it’s dry.
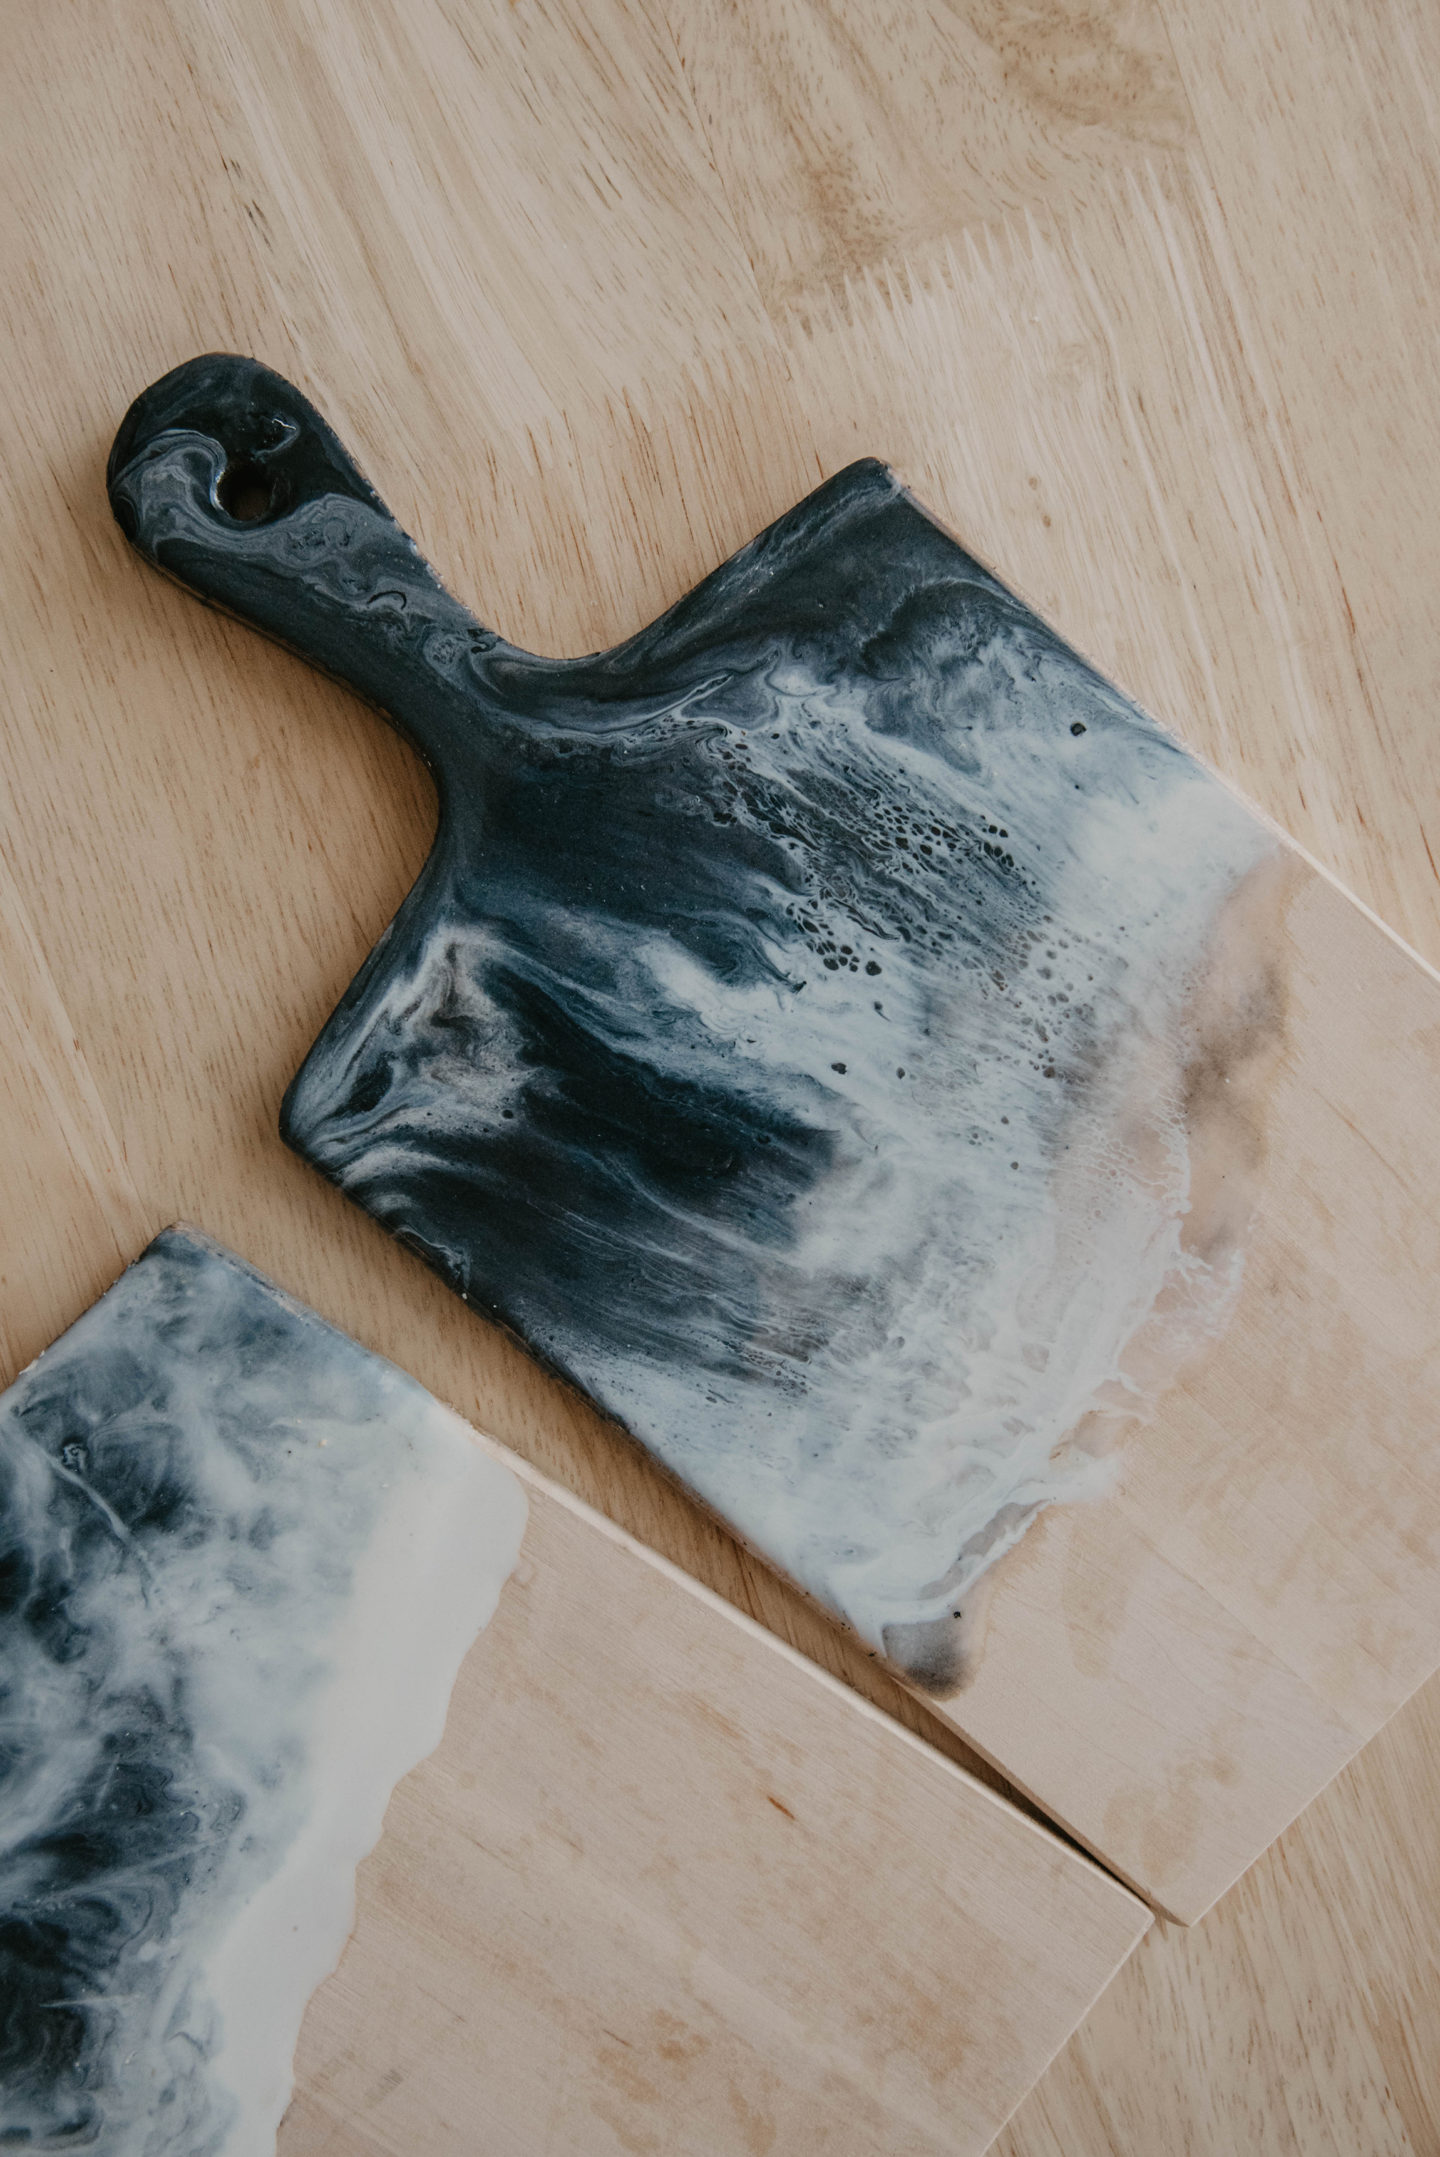
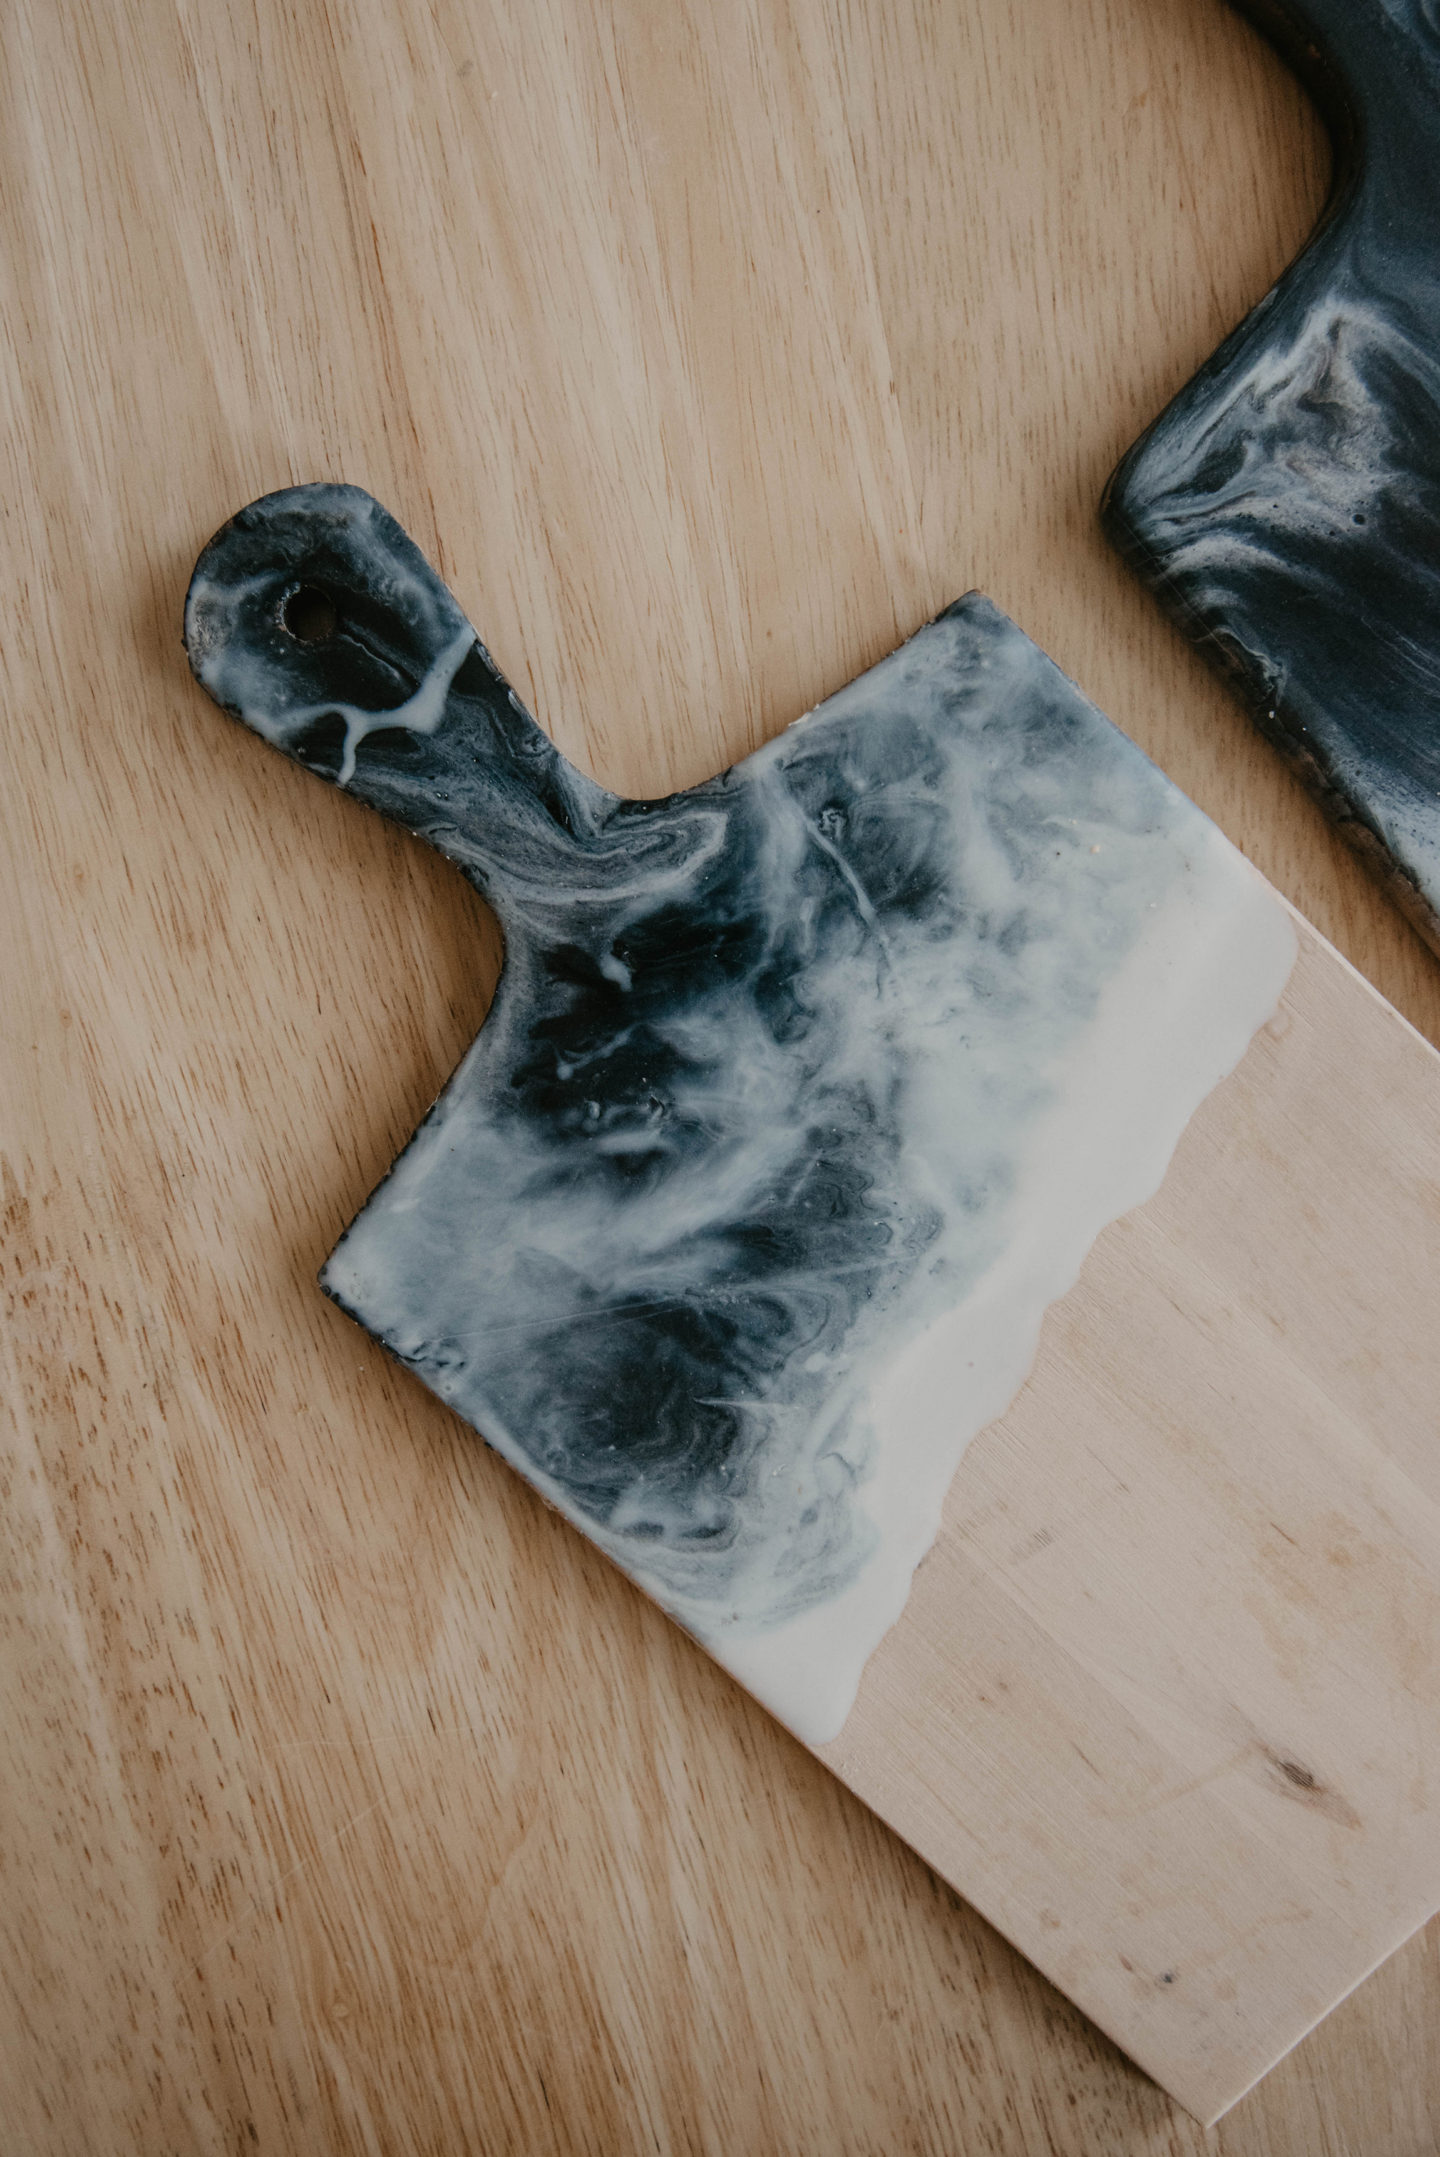
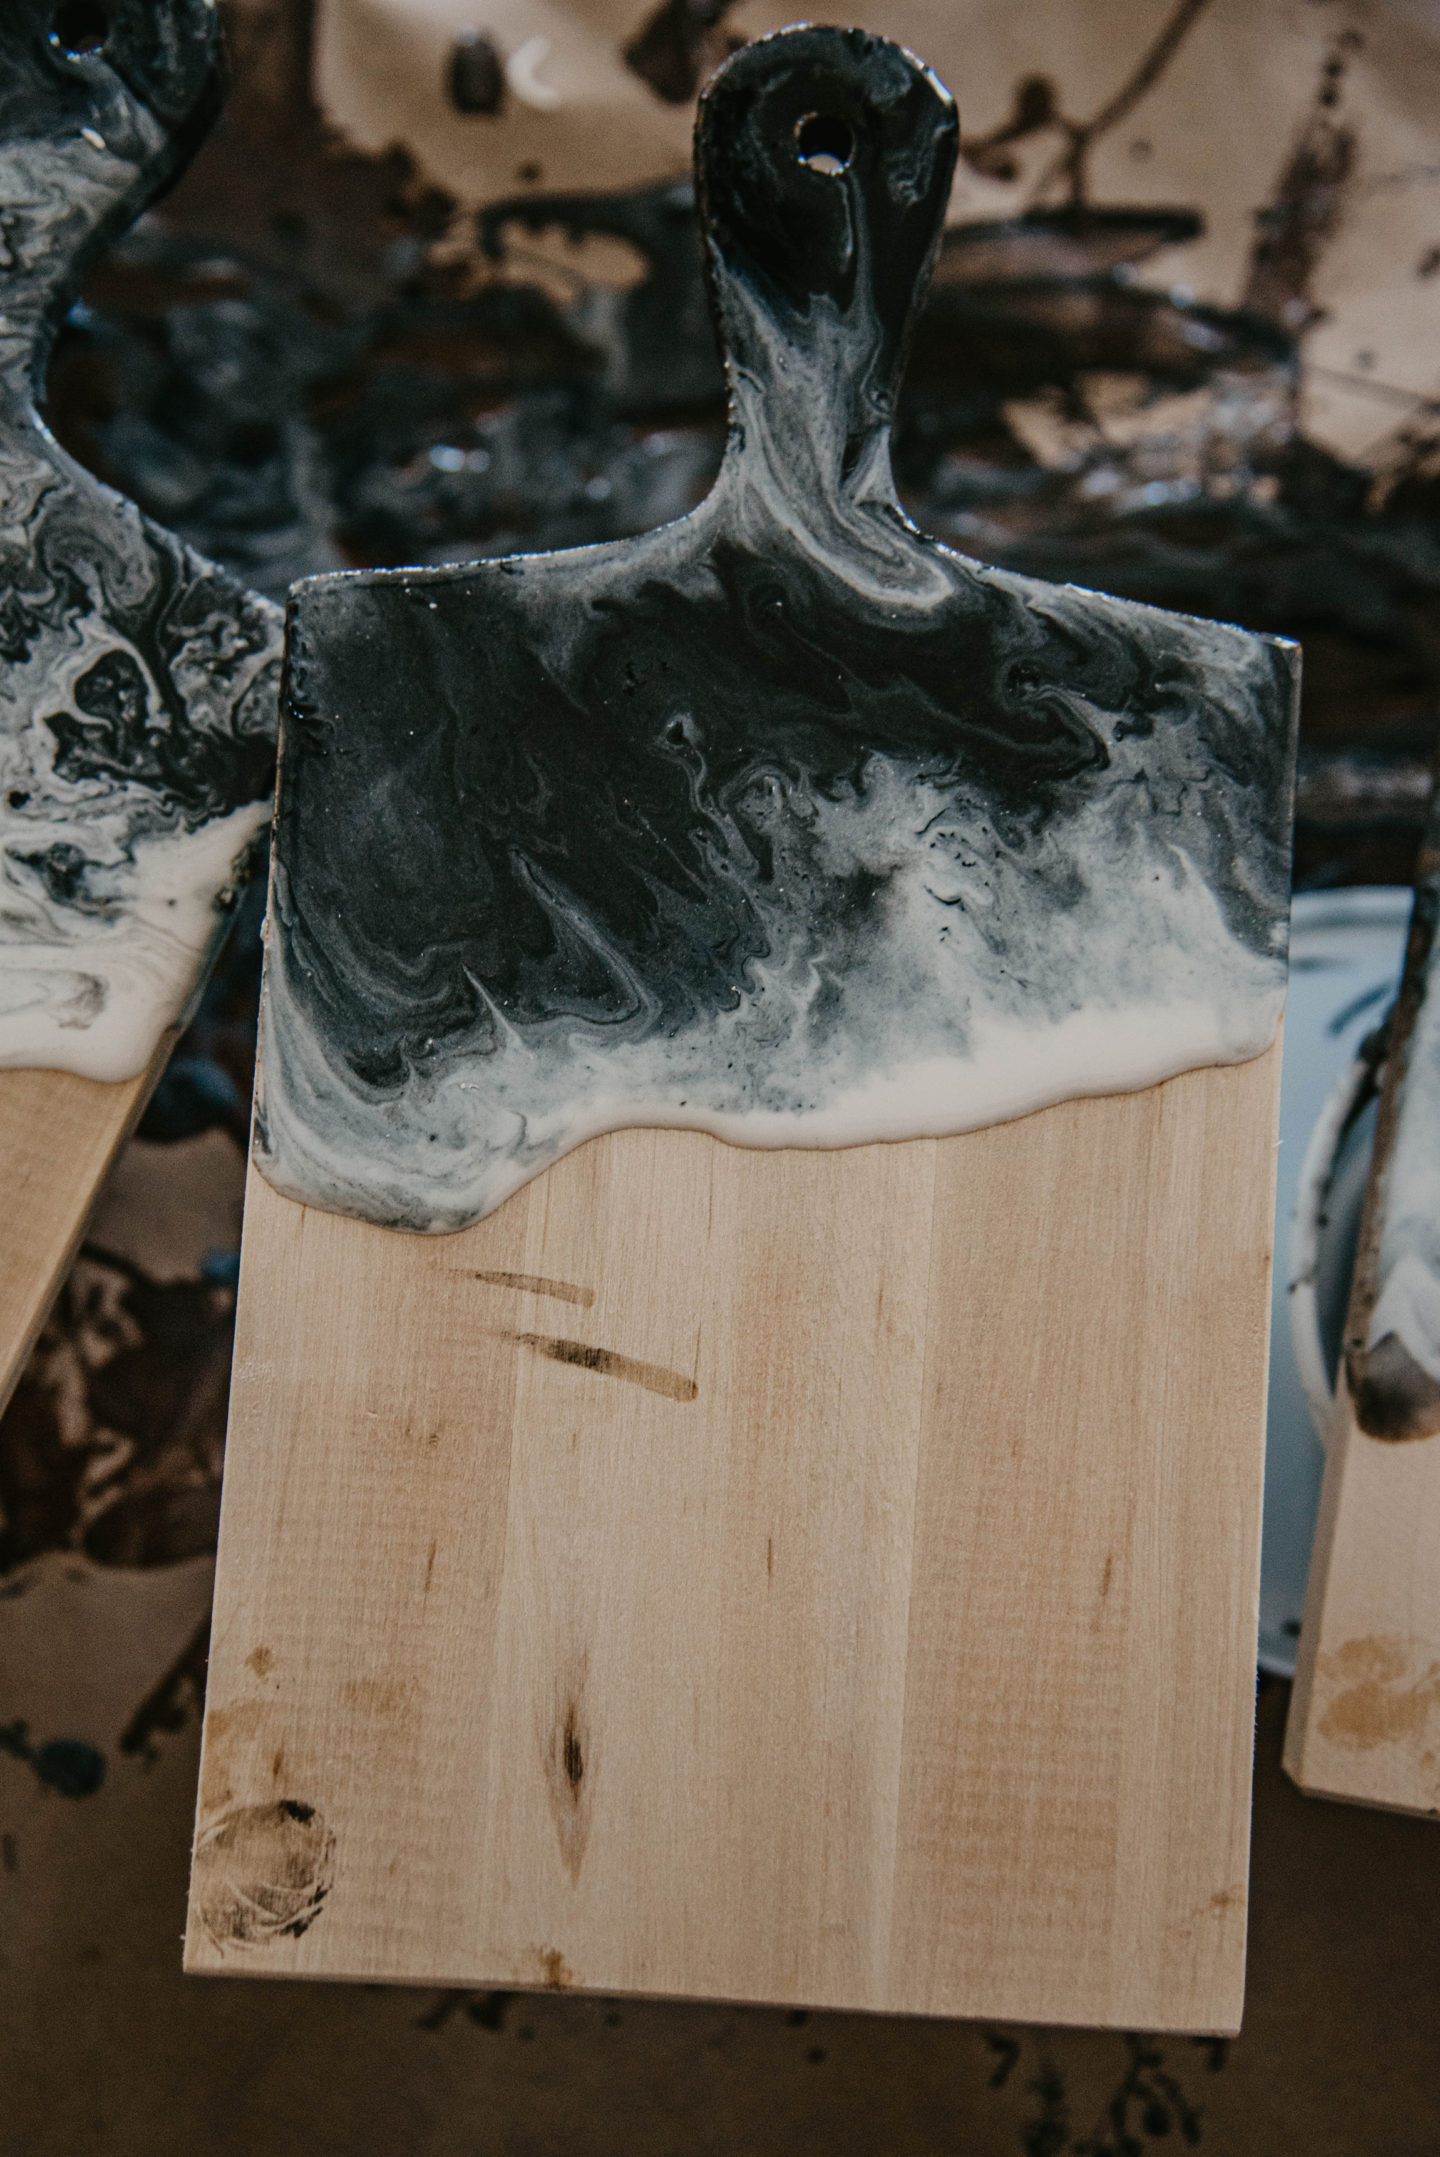
I started with black resin first, then poured thin lines of white and clear towards the bottom of the black (see image).
S H A P E
Using my heat gun, I pushed the white and clear resin towards the handle. This pops any bubbles that rise to the surface and creates the movement within the resin art. Get creative here – and don’t be afraid to add some more resin if needed.
The more heat resin is exposed to, the quicker it begins to set/harden, so be wary of your time and work as quickly has you can.
L E T D R Y + S A N D
If more air bubbles rise to the top, you can use your heat gun to pop them – although this may move the resin around. If you have a long neck lighter, you can use the flame to pop bubbles but work quickly, as resin can be flammable. Bubbles are unavoidable sometimes but it’s okay! After you let it cure for 24 hours, you’ll have a beautiful DIY resin cutting board for your home.
For any areas that got dirty, take sandpaper and gently sand resin residue away. This will only work when the resin is dry so do not attempt to sand wet resin. Keep in mind that palm sanders and other electrical sanders will generate heat that can melt the resin.
Something I Learned: Apply a sealant to the exposed wood to help prevent grease marks from food. After I shot my photos of the rolled charcuterie, I tried to take individual pictures of each board but there were significant grease marks on the cutting board. A sealant would work to keep out water between washes and prevent and stains from food.
–
Don’t worry – if you mess up, let it dry and start over with another coat or add new layers on top. I had to do that to one because it didn’t WOW me. But it’s important to note the curing time on this. One of my cutting boards was completely ruined because I kept trying to fix it while the remaining resin in my silicone cup was starting to set. I featured this resin cutting board on my DIY Fails Instagram story last week.
Consider gifting to friends as housewarming presents, wedding gifts, etc. You should absolutely give this DIY a shot. It’s actually quite relaxing and the results are amazing.
What do you think of these DIY Resin Cutting Boards?
![]()