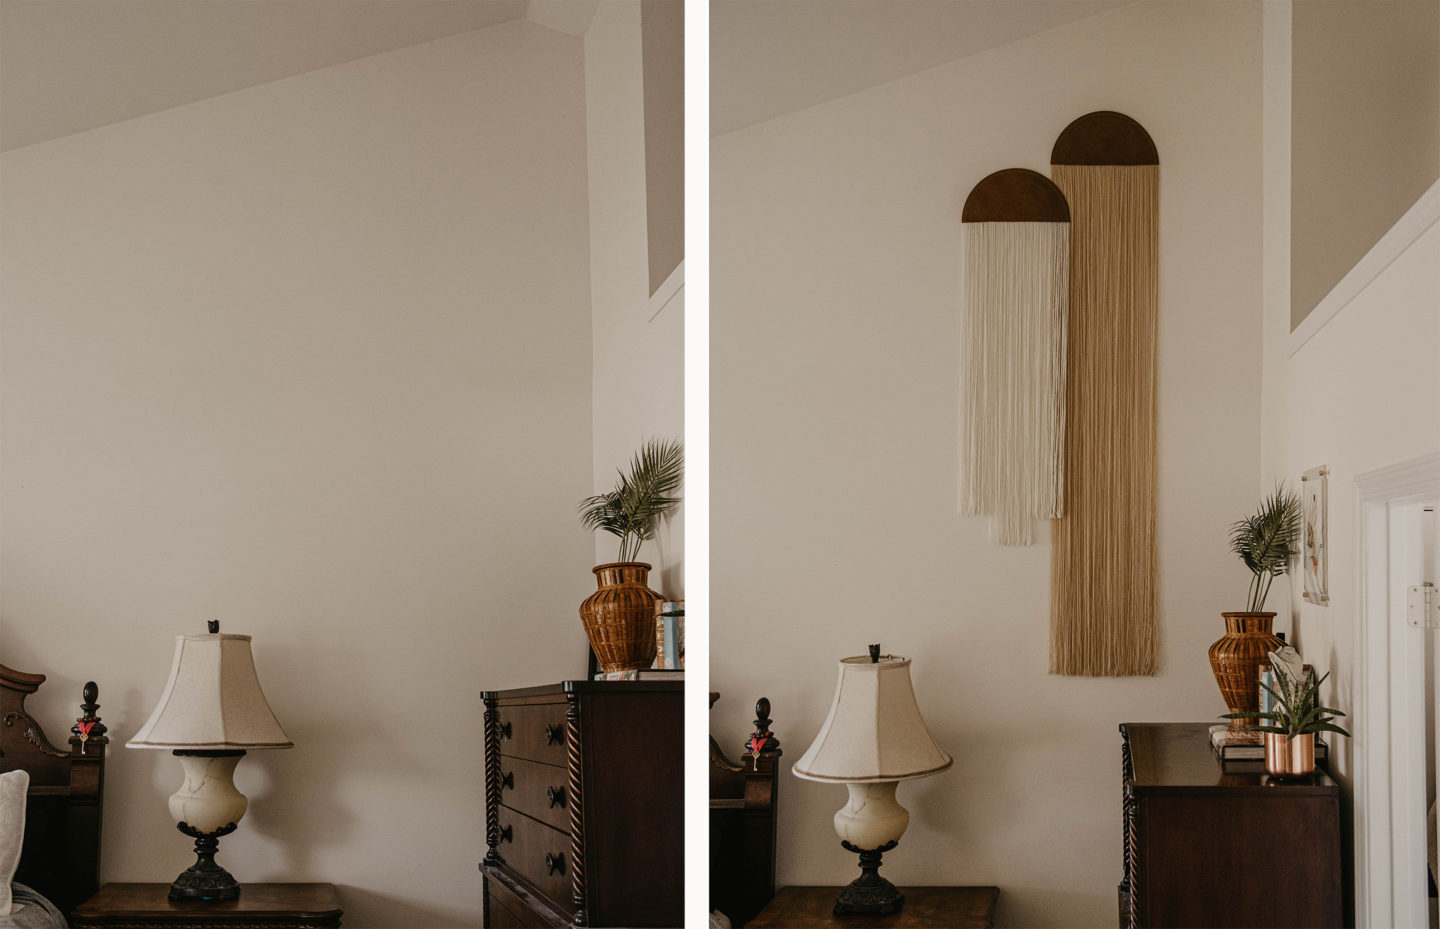
My bedroom was in need of some decor so I decided to make my own fiber wall art.
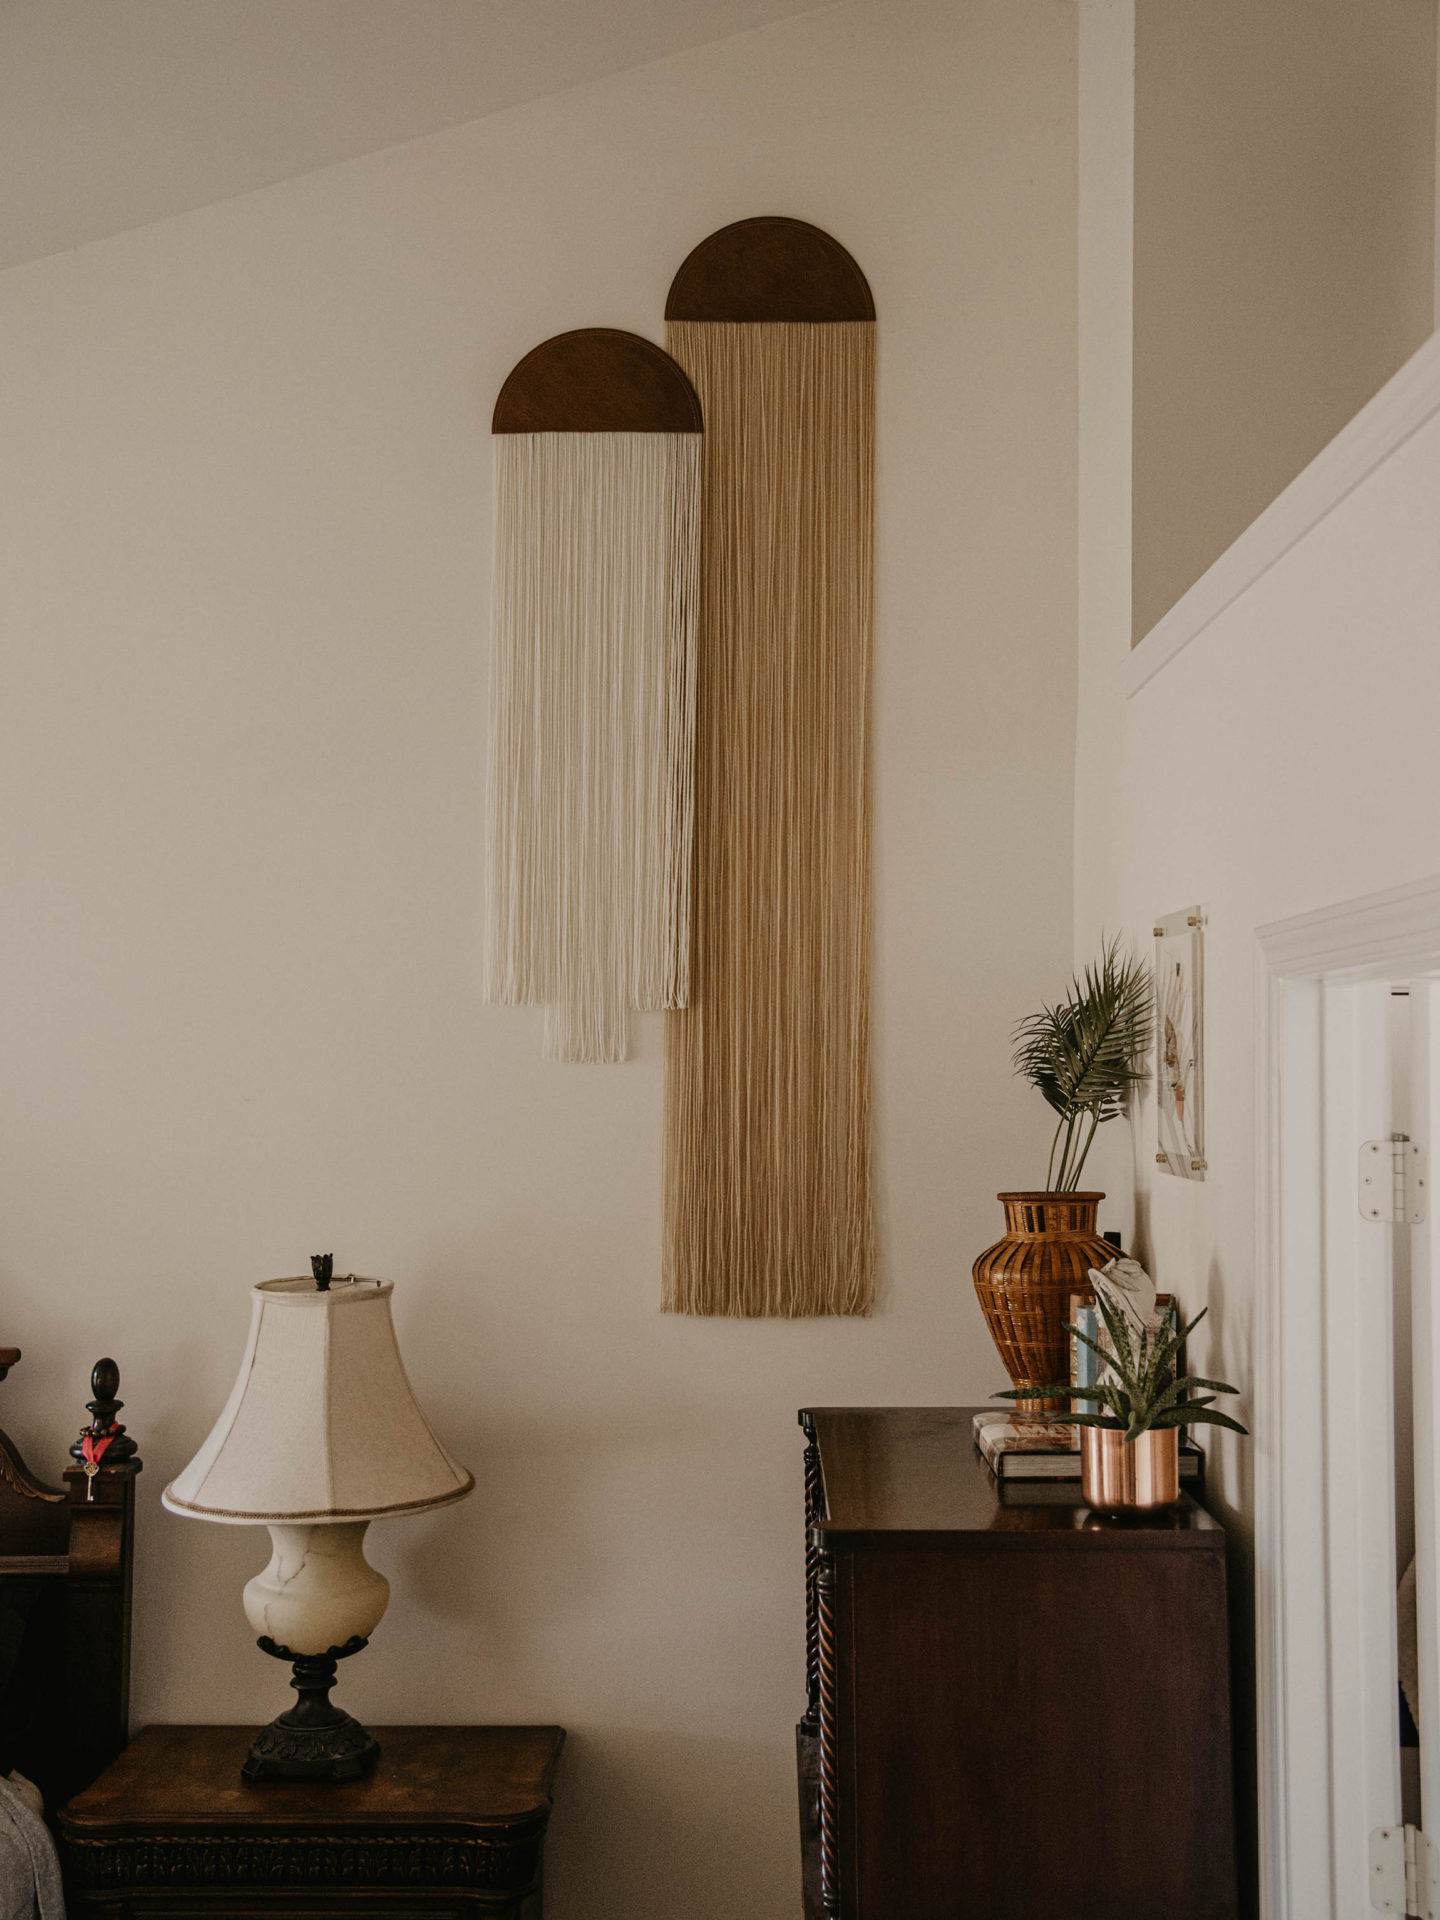
I have cathedral ceilings in my master bedroom and bathroom so it makes it a bit of a challenge to decorate the walls. My bedroom ceiling is basically one giant slant upward. Anything with straight lines becomes an eyesore so I needed to find something non-linear to use as decoration. I’ve been eyeing half-moon shaped fiber wall art for a while now, but no matter where I look, prices are high. So, naturally, I decided to make my own version.
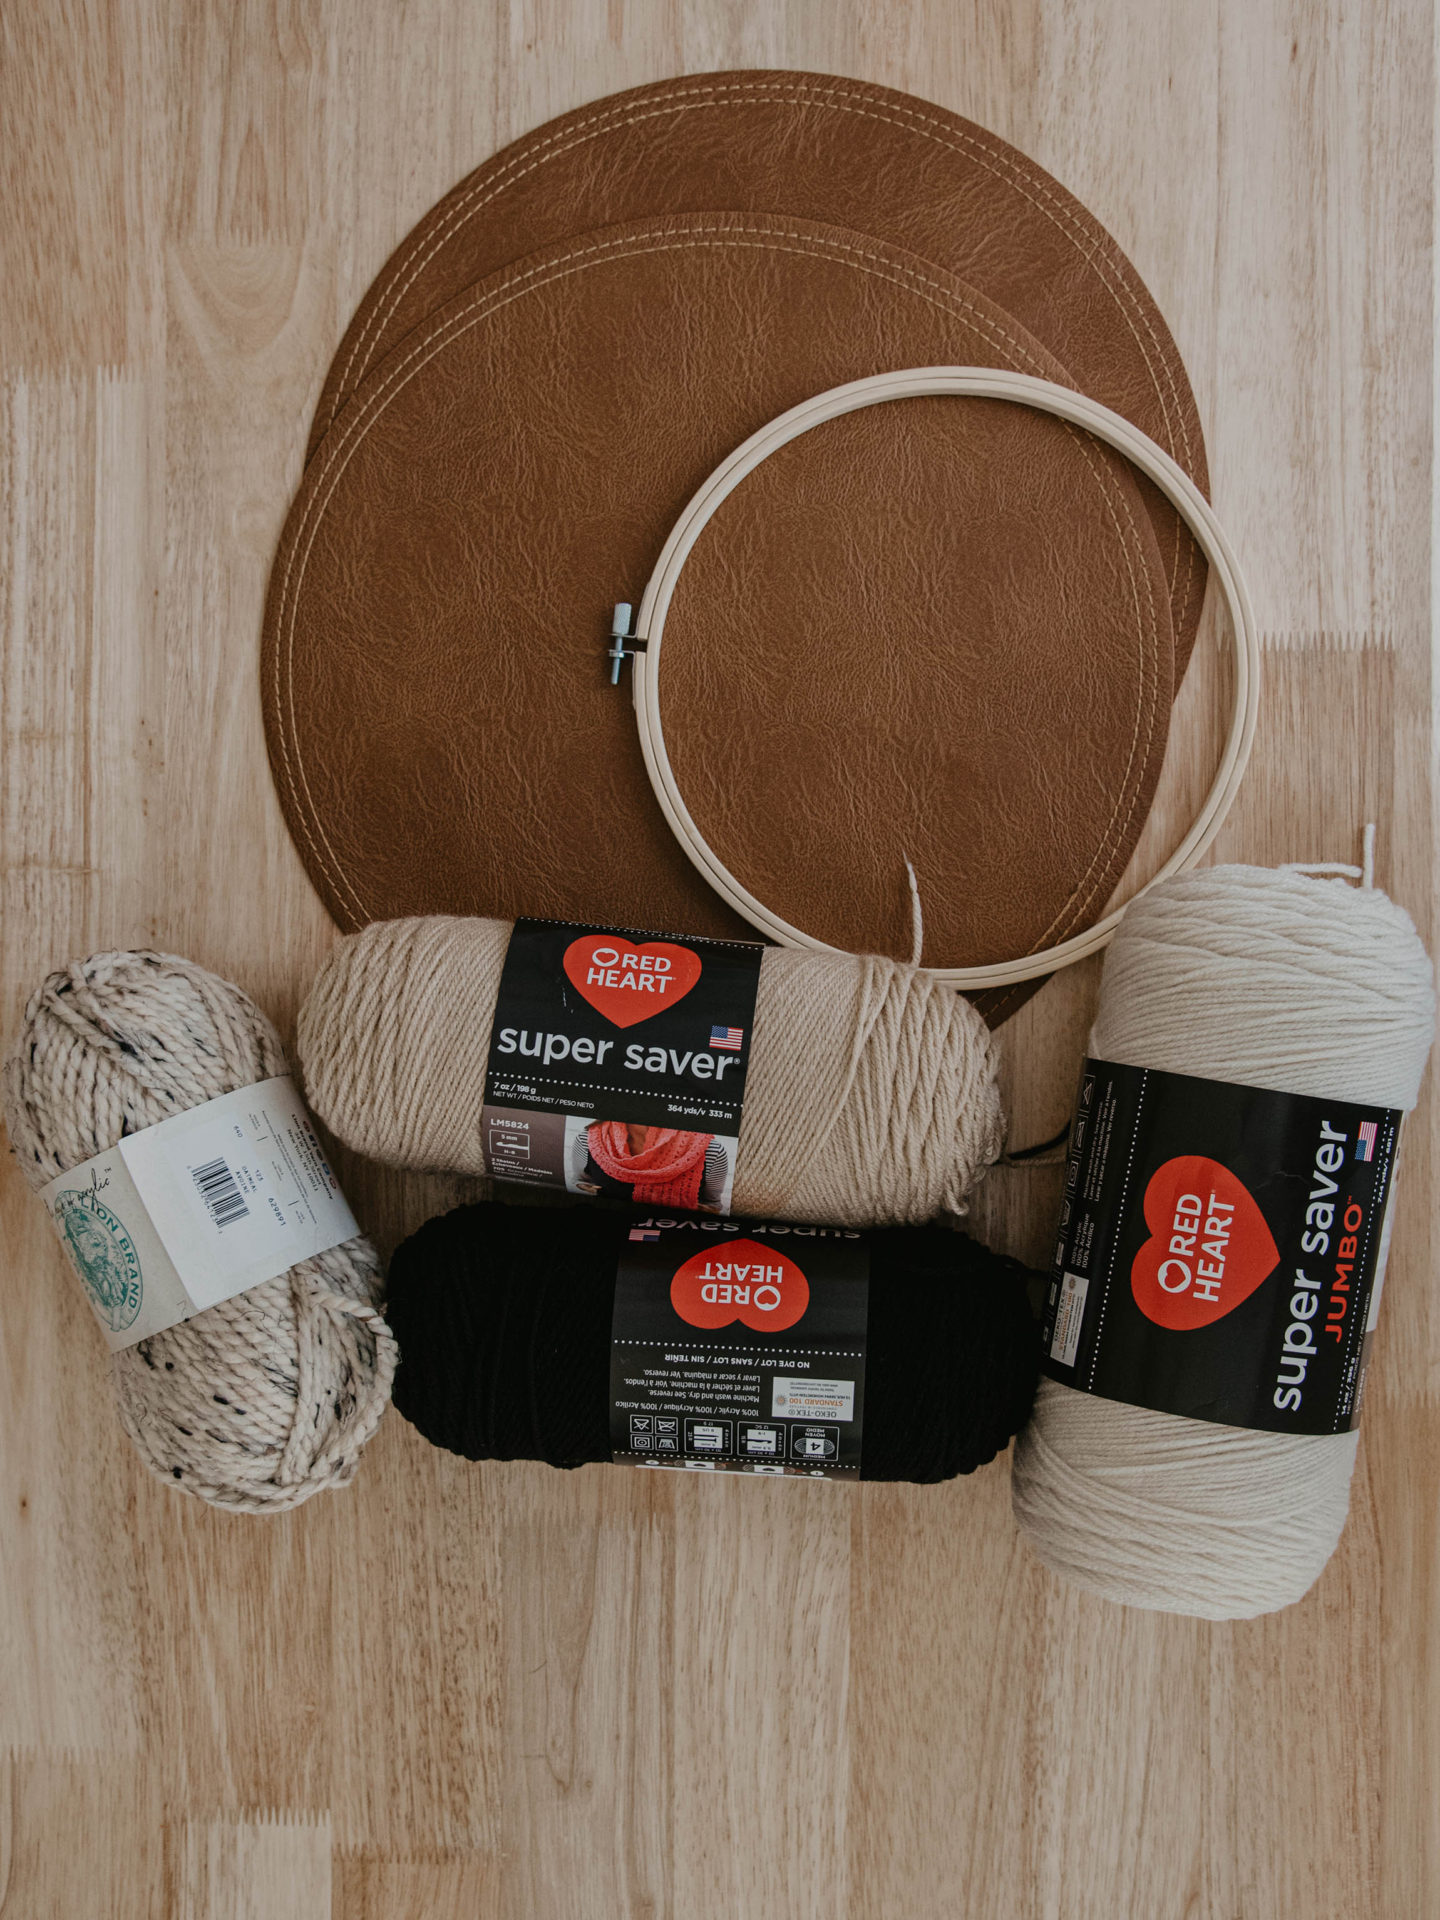
Things You’ll Need:
-
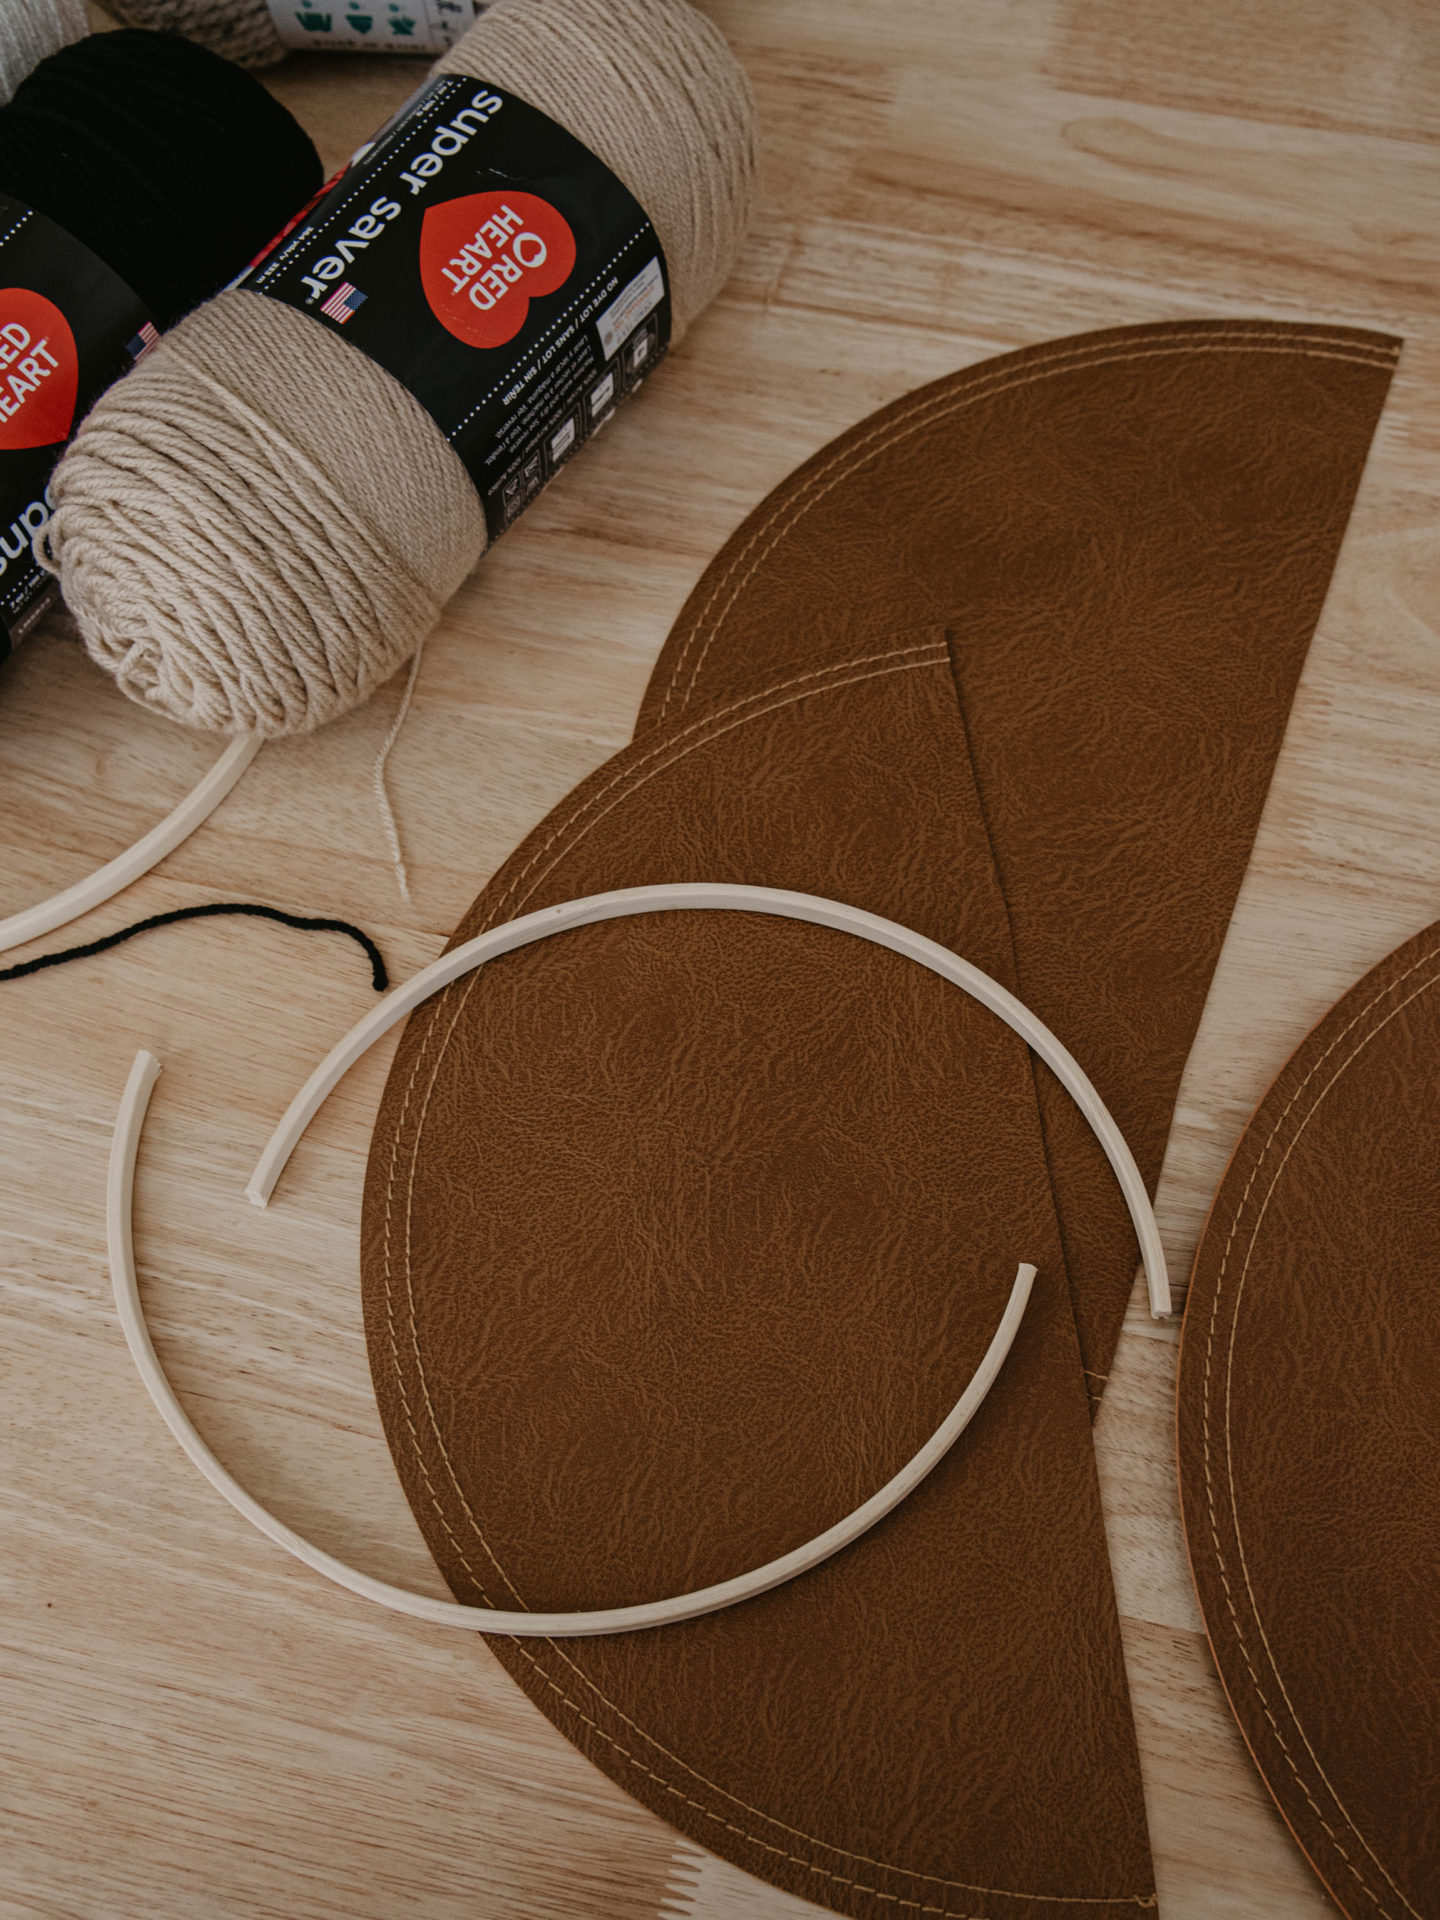
- Faux Leather Placemat
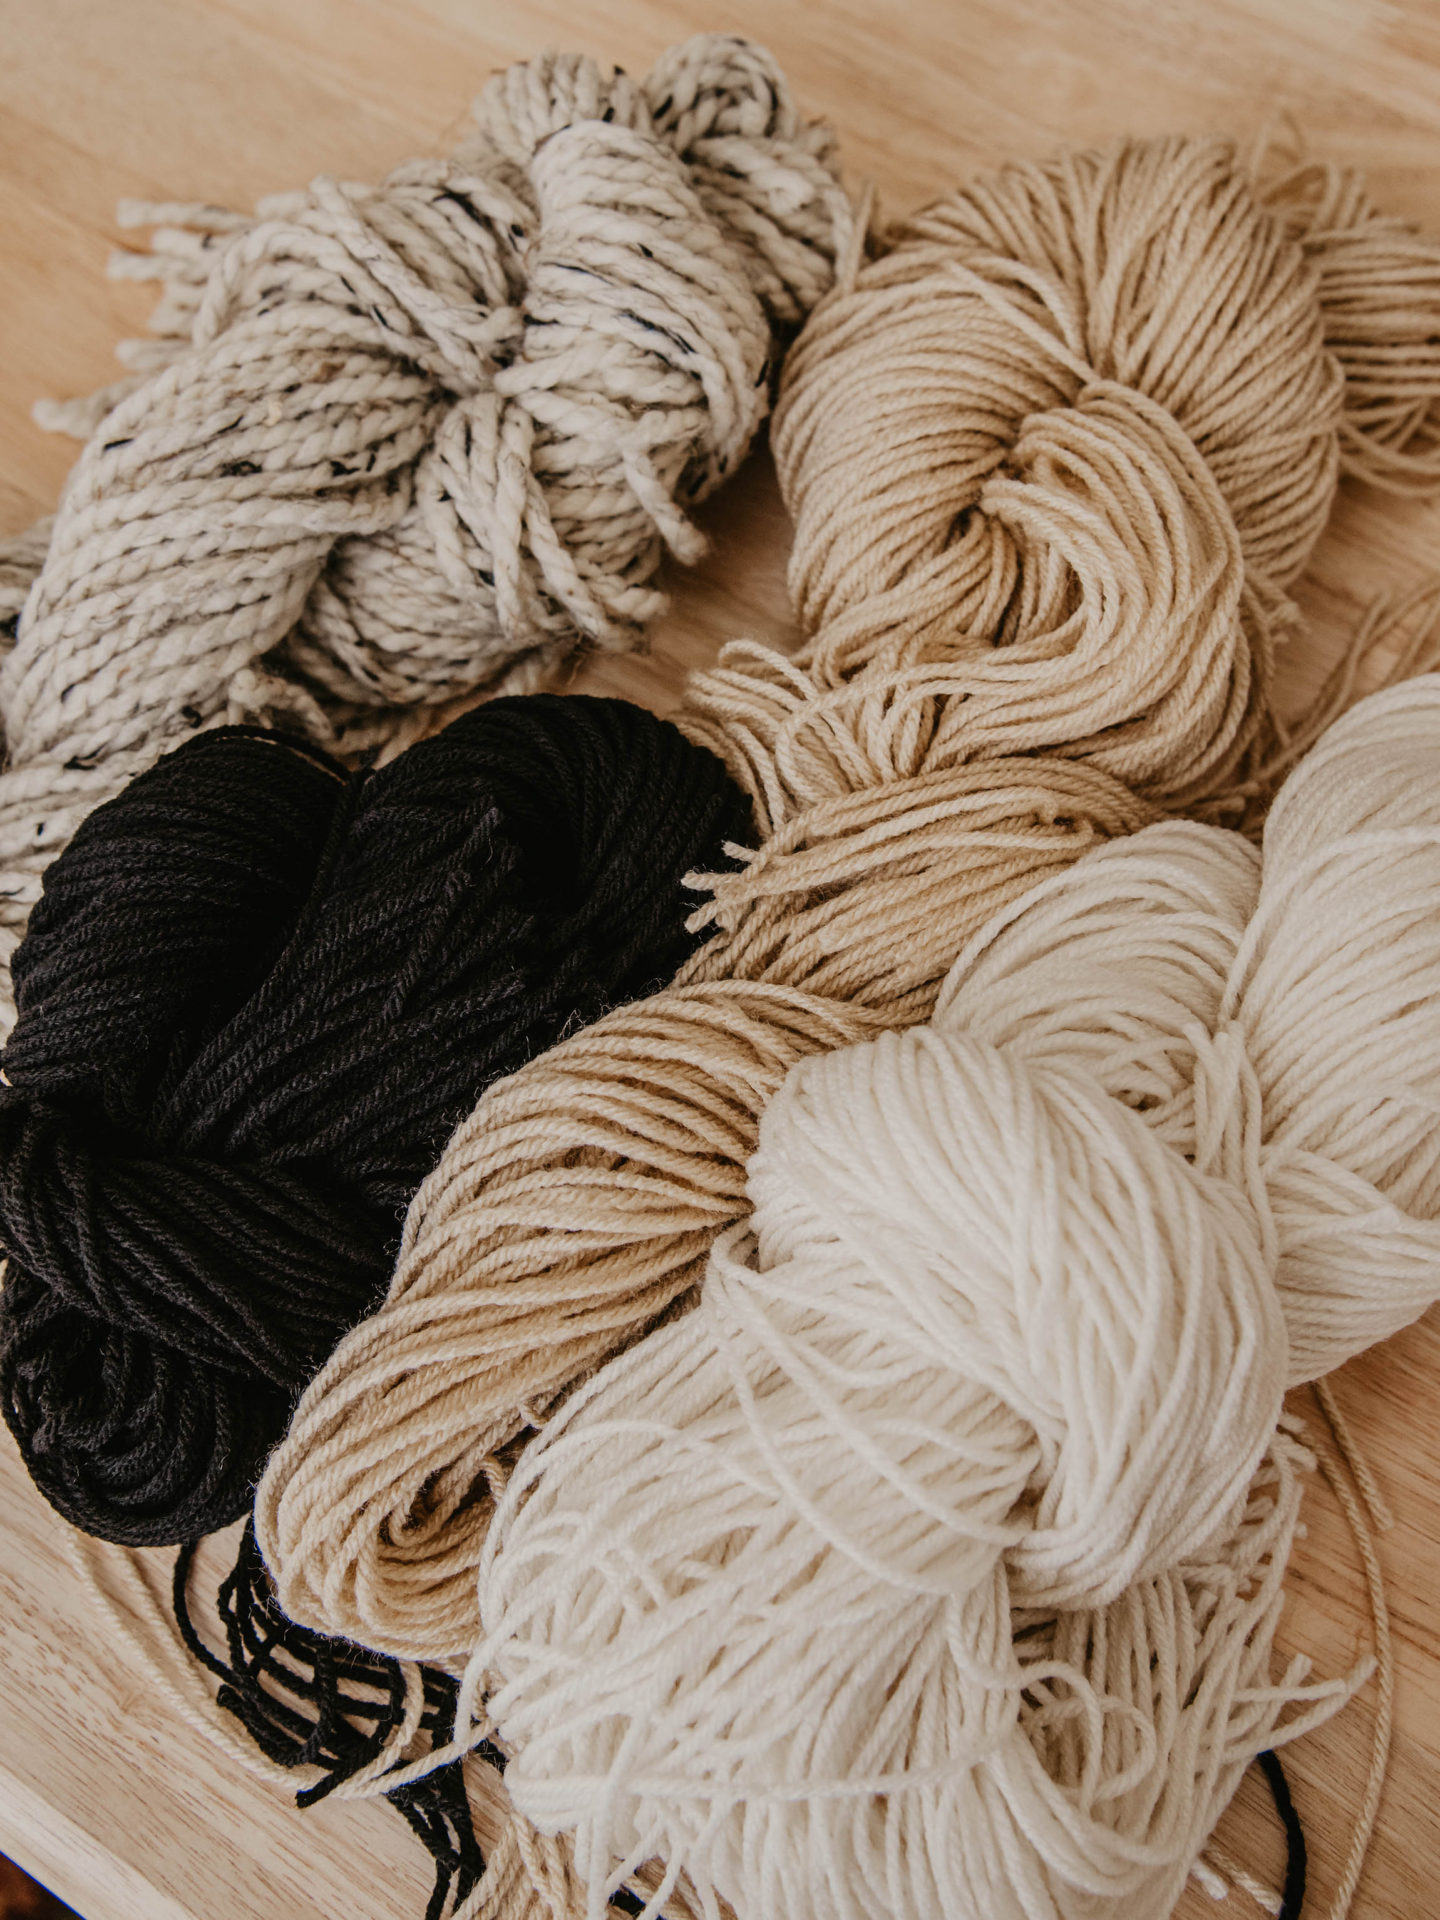
- Yarn (I used: Aran, Buff, Black, and Oatmeal/Beige)
- Scissors
- Hand Saw
- E6000 Glue
- Hot Glue & Glue Gun
- 10-inch embroidery hoop
- Mod Podge
- Old fabric (an old t-shirt will do just fine!)
- Adhesive velcro
Step One:
Using your hand saw and scissors, cut both the embroidery hoops and placemats in half. From there, take some E6000 and carefully glue the hoops to the back of the placemat (see below). Weigh down the glue with some books to ensure that everything fuses together properly. You may want to let this dry overnight to make sure you get the best hold.
You may be wondering what the embroidery hoop is for – it actually gives you some distance between the placemat and the wall so the fiber wall art can sit flush against the wall after the yarn is glued in place.
Step Two:
While the embroidery hoops are drying to the placemats, cut your yarn to your desired length. I measured out 5 feet and cut about 30 pieces. FYI – 30 pieces is not enough to finish this fiber wall art project. I had to cut additional sections of yarn in order to finish. You might be better off cutting ~60 sections to start.
Step Three:
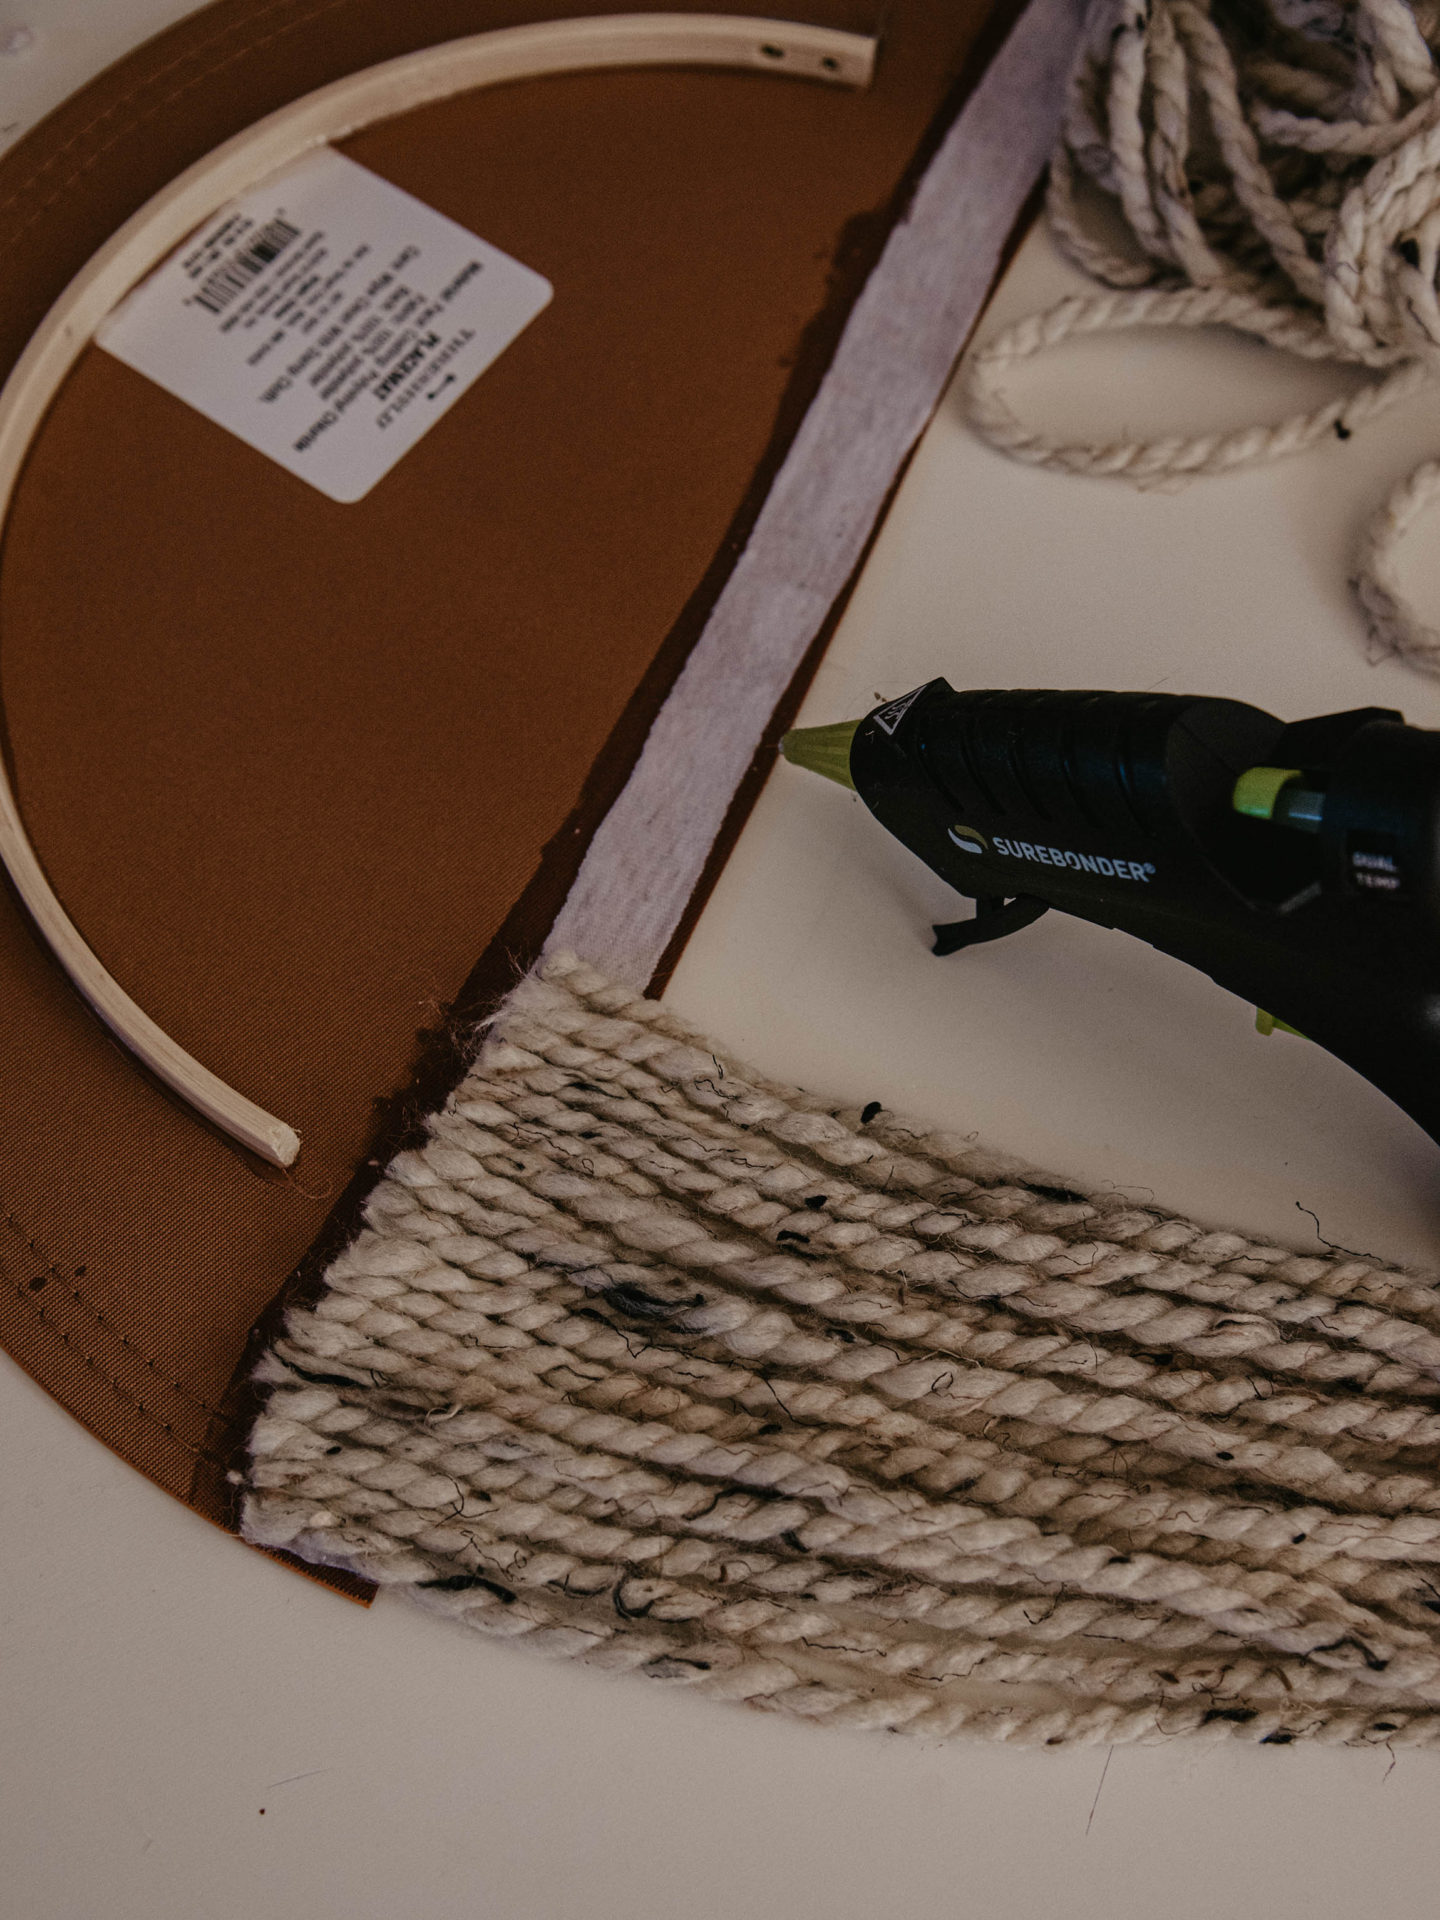
I opted for faux leather rather than wood to house the yarn because it saved on cost. However, I didn’t want the hot glue to cause lumps in the material, so I cut up an old t-shirt and mod podge’d it to the back of the placemat (see below). This allowed me to hot glue the yarn to that t-shirt material versus directly on the faux leather. I let this dry for a few hours and no lumps!
Step Four:
Once the embroidery hoops and t-shirt material are completely dried, you can start hot gluing the yarn. I started by pulling a dime-sized drop of glue on the t-shirt material, holding the yarn taught and placing the yarn into the glue. Each section of glue had enough to house 3-4 sections of yarn, too.
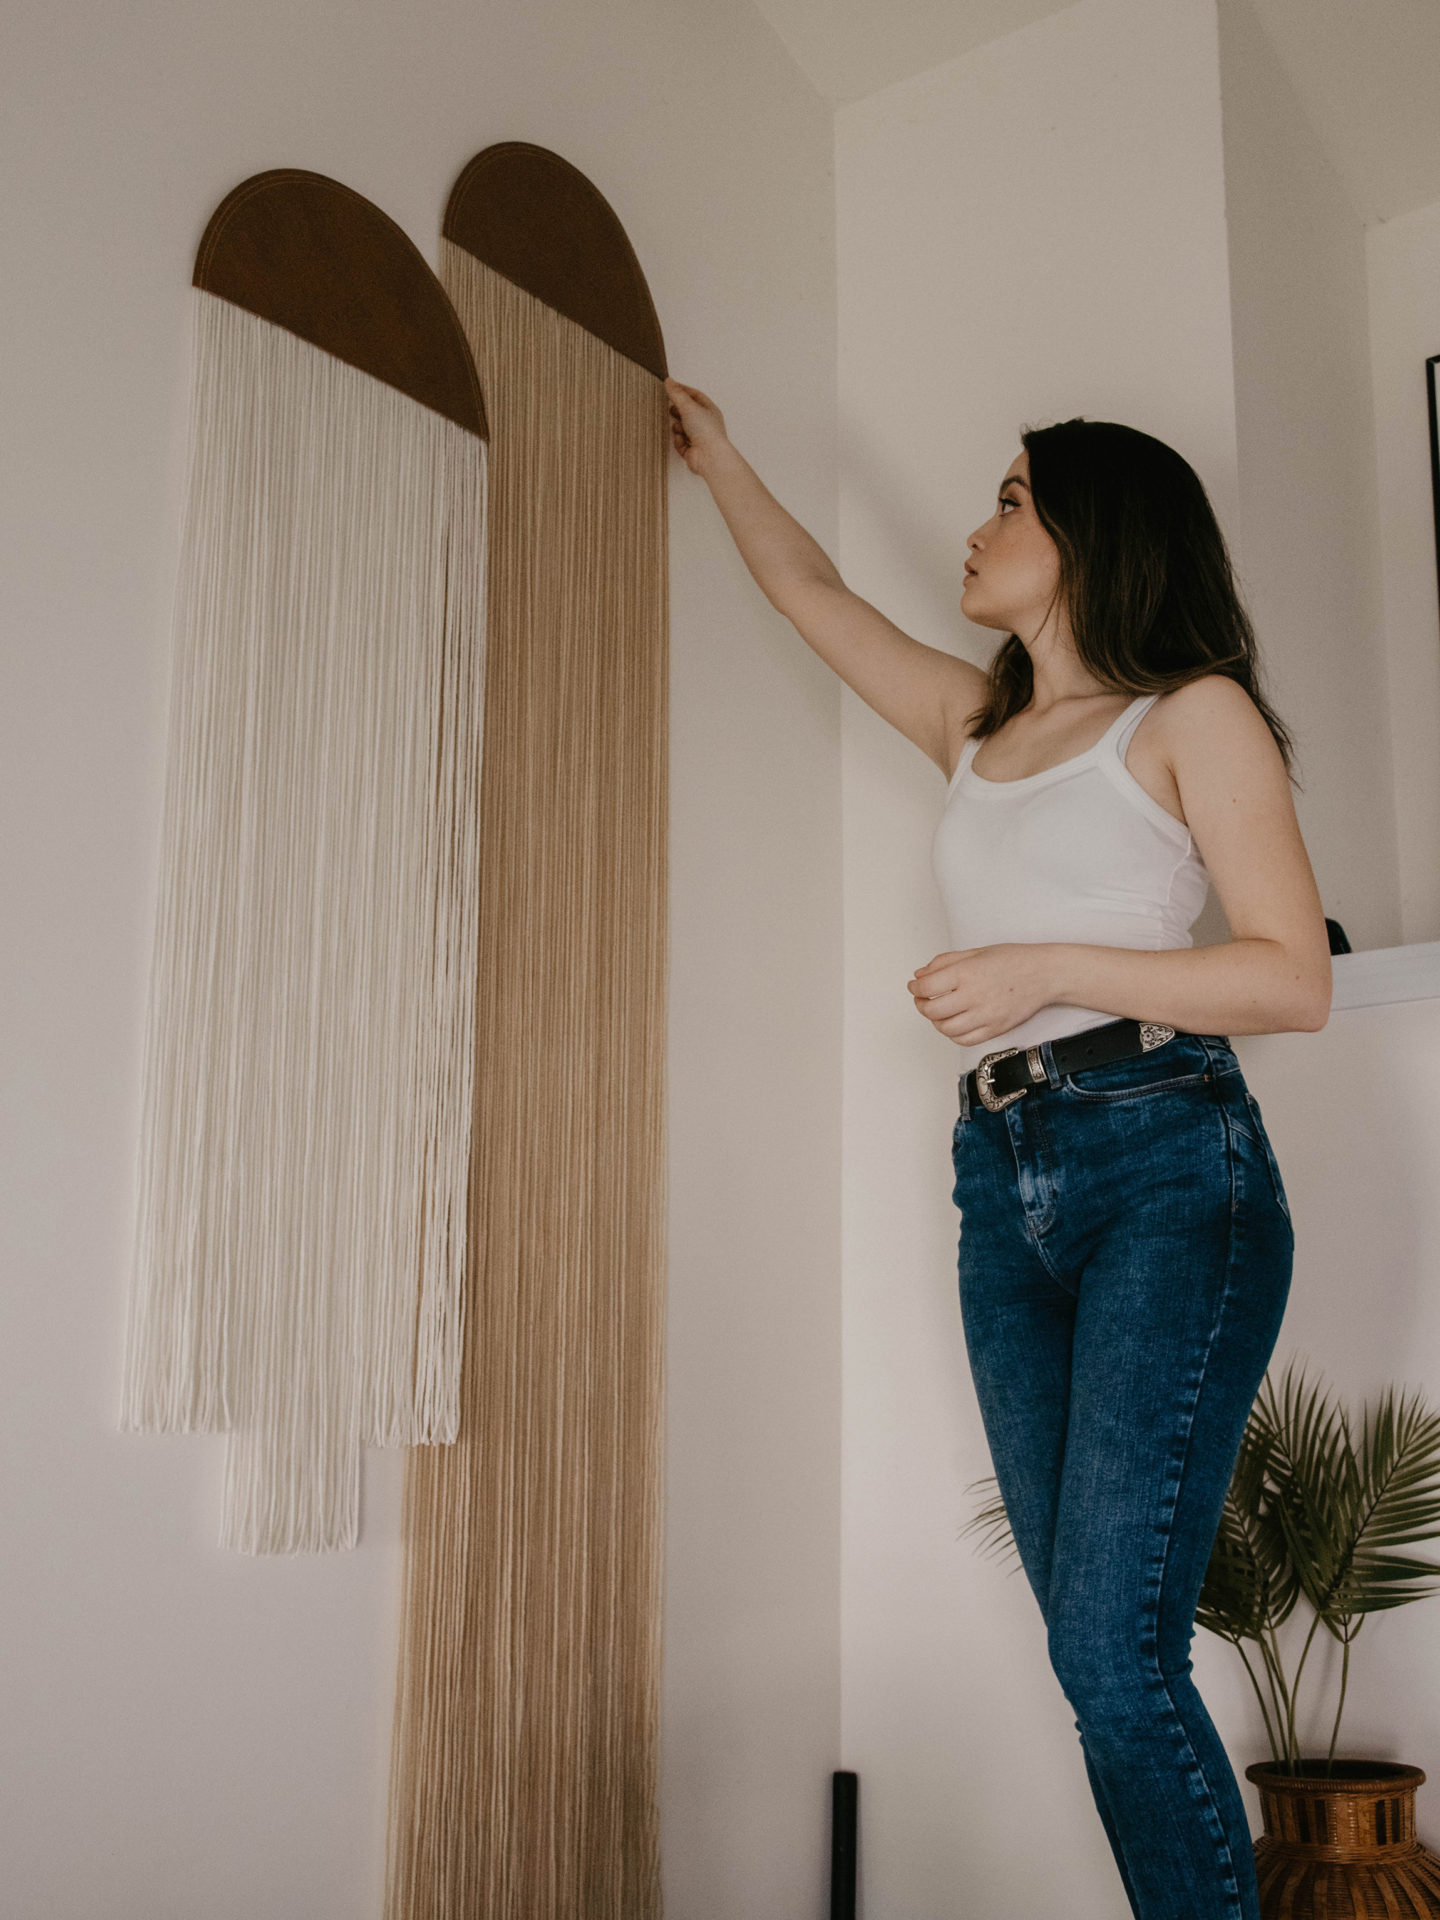
Step Five:
Now all you have to do is hang it and cut it to shape! I hung my fiber wall art with some sticky velcro I had from an old project but you can easily hang it with a nail or picture hanging equipment.
Once I was happy with the placement, I cut the yarn to shape. I wanted the one in the back to remain long to showcase the height of the wall and the overlapping piece to be cut to a fun shape. I showed several fun-shaped fiber wall art installations to Pat and he picked out the shape he liked best. From there, I did my best to replicate it and keep my lines as straight as possible.
Hack: If your yarn is bunched up or not straight, you can take a steamer to straighten out the material. This will help you make sure your DIY fiber wall art appears full and perfectly straight, once cut.
Are you going to give this DIY Fiber Wall Art a try? Let me know in the comments how it turned out.
Want one made with wood instead of leather? Check out my Etsy shop! <blueaugustine.etsy.com>