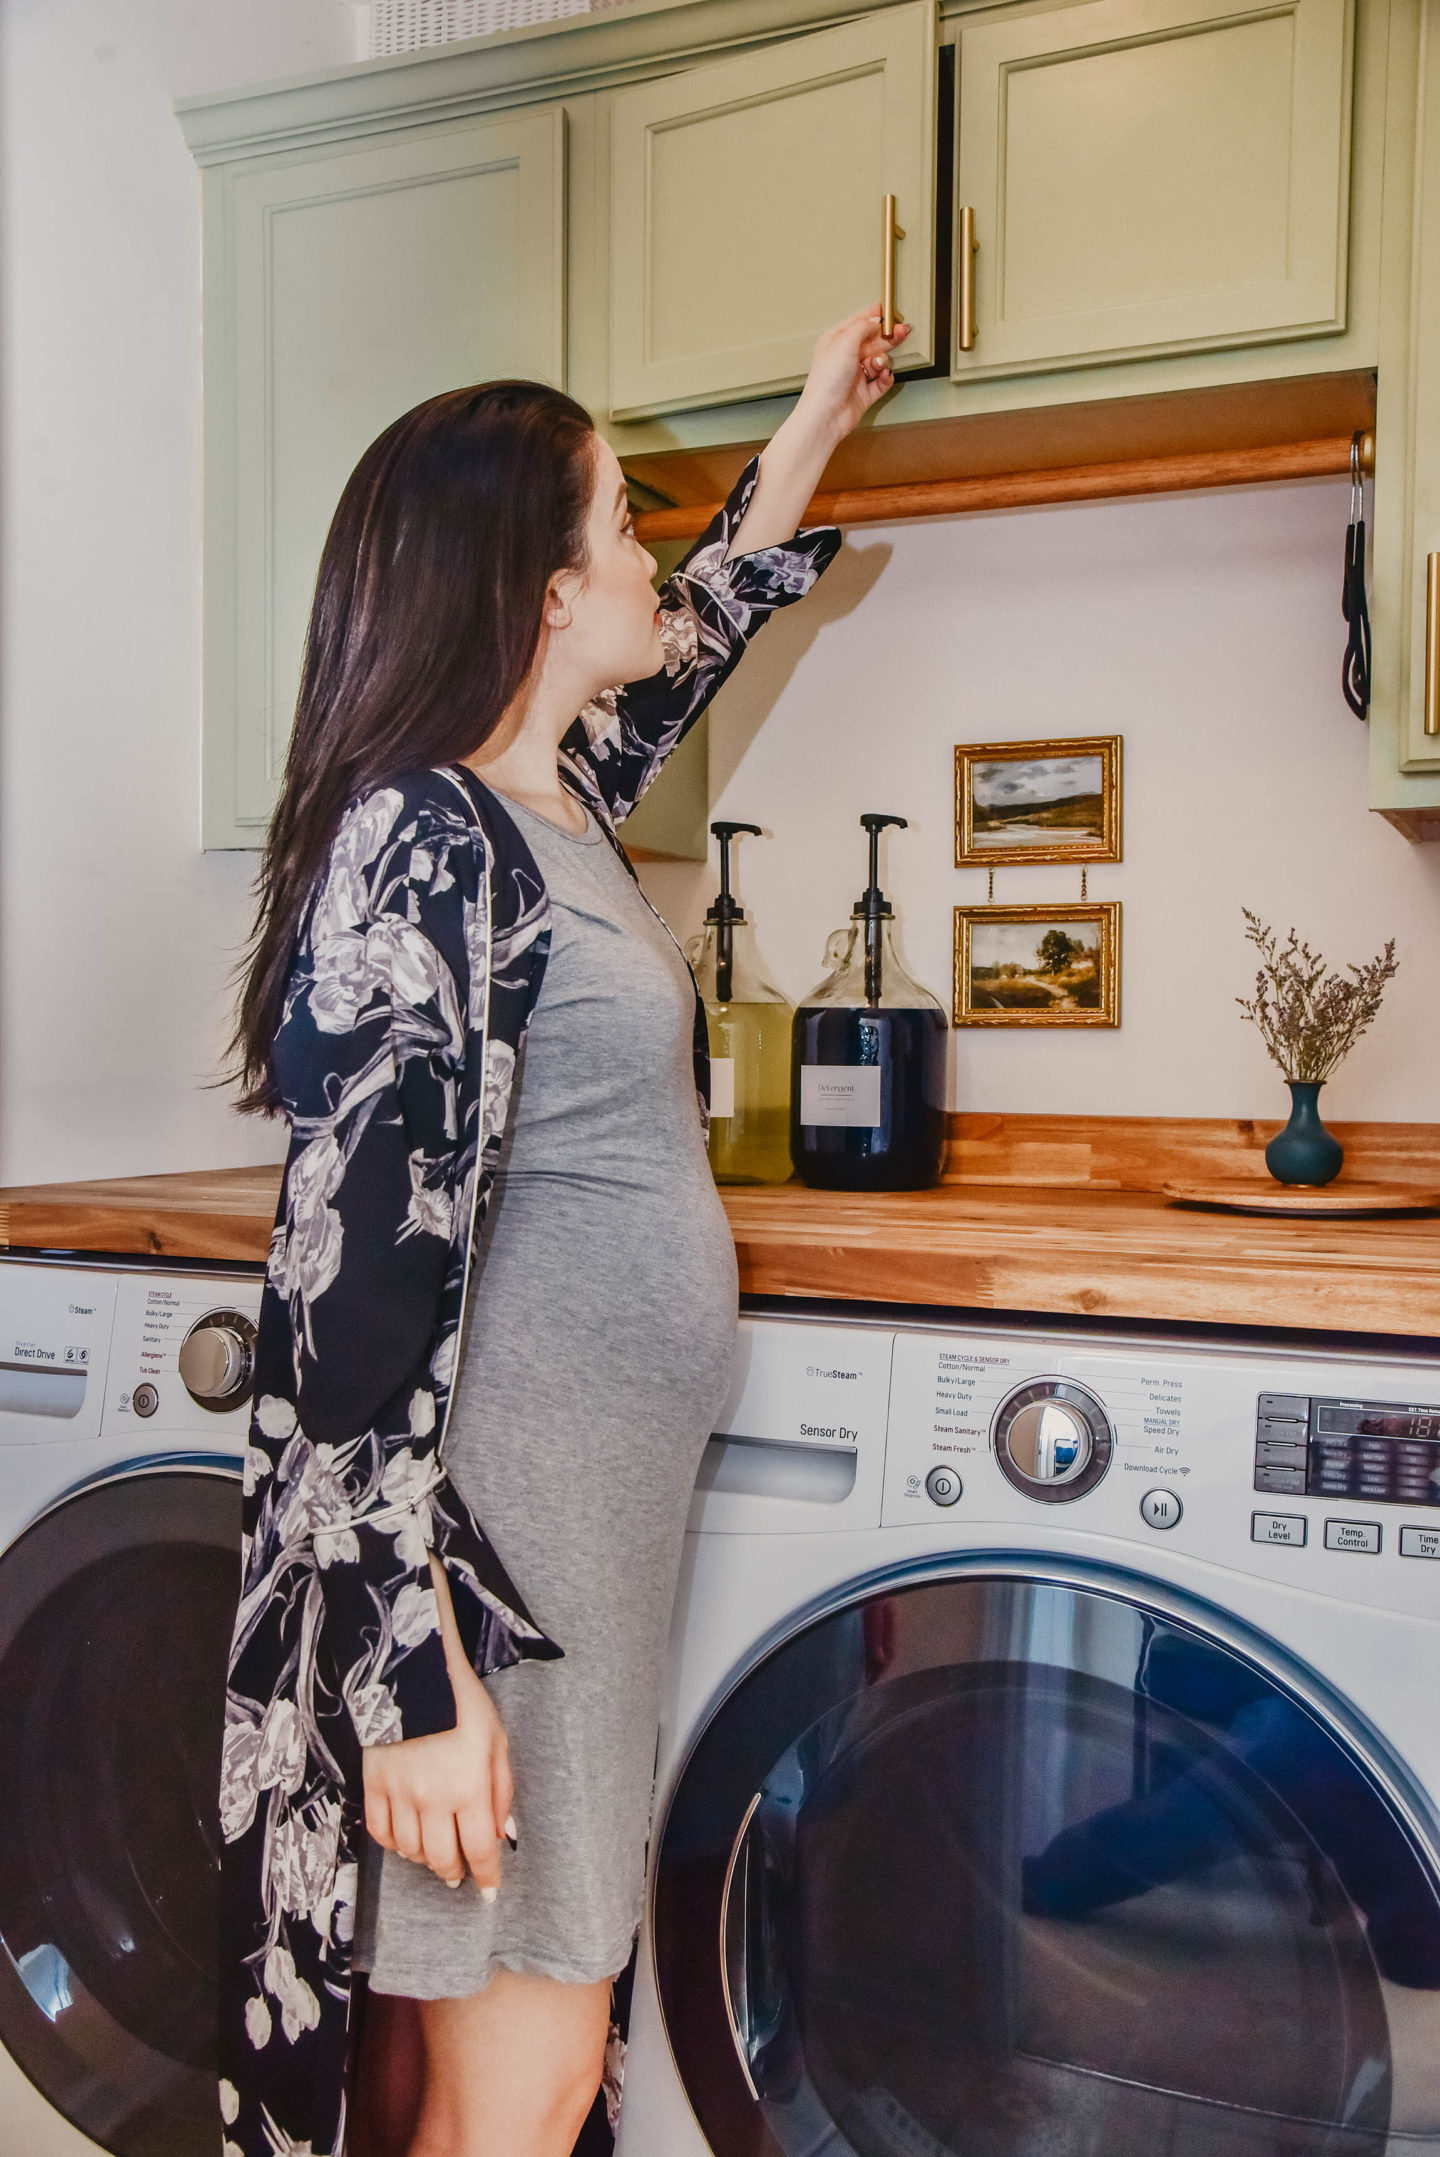
Is it possible to fall in love with a room, cuz I did!
Over the past six weeks, we’ve been working on our laundry room makeover, attempting to make a space that is both well organized and aesthetically pleasing to the eye. It was important to me to have this room finished and completed before the baby comes, when we’re doing laundry a lot more than ever before. I’ve had this exact laundry room plan jotted down for almost as long as I’ve owned this house (six years now) and finally getting the chance to give it a face lift was well overdue. Contact a home addition contractor in Lansdale, PA if you plan to build a new or bigger laundry room.
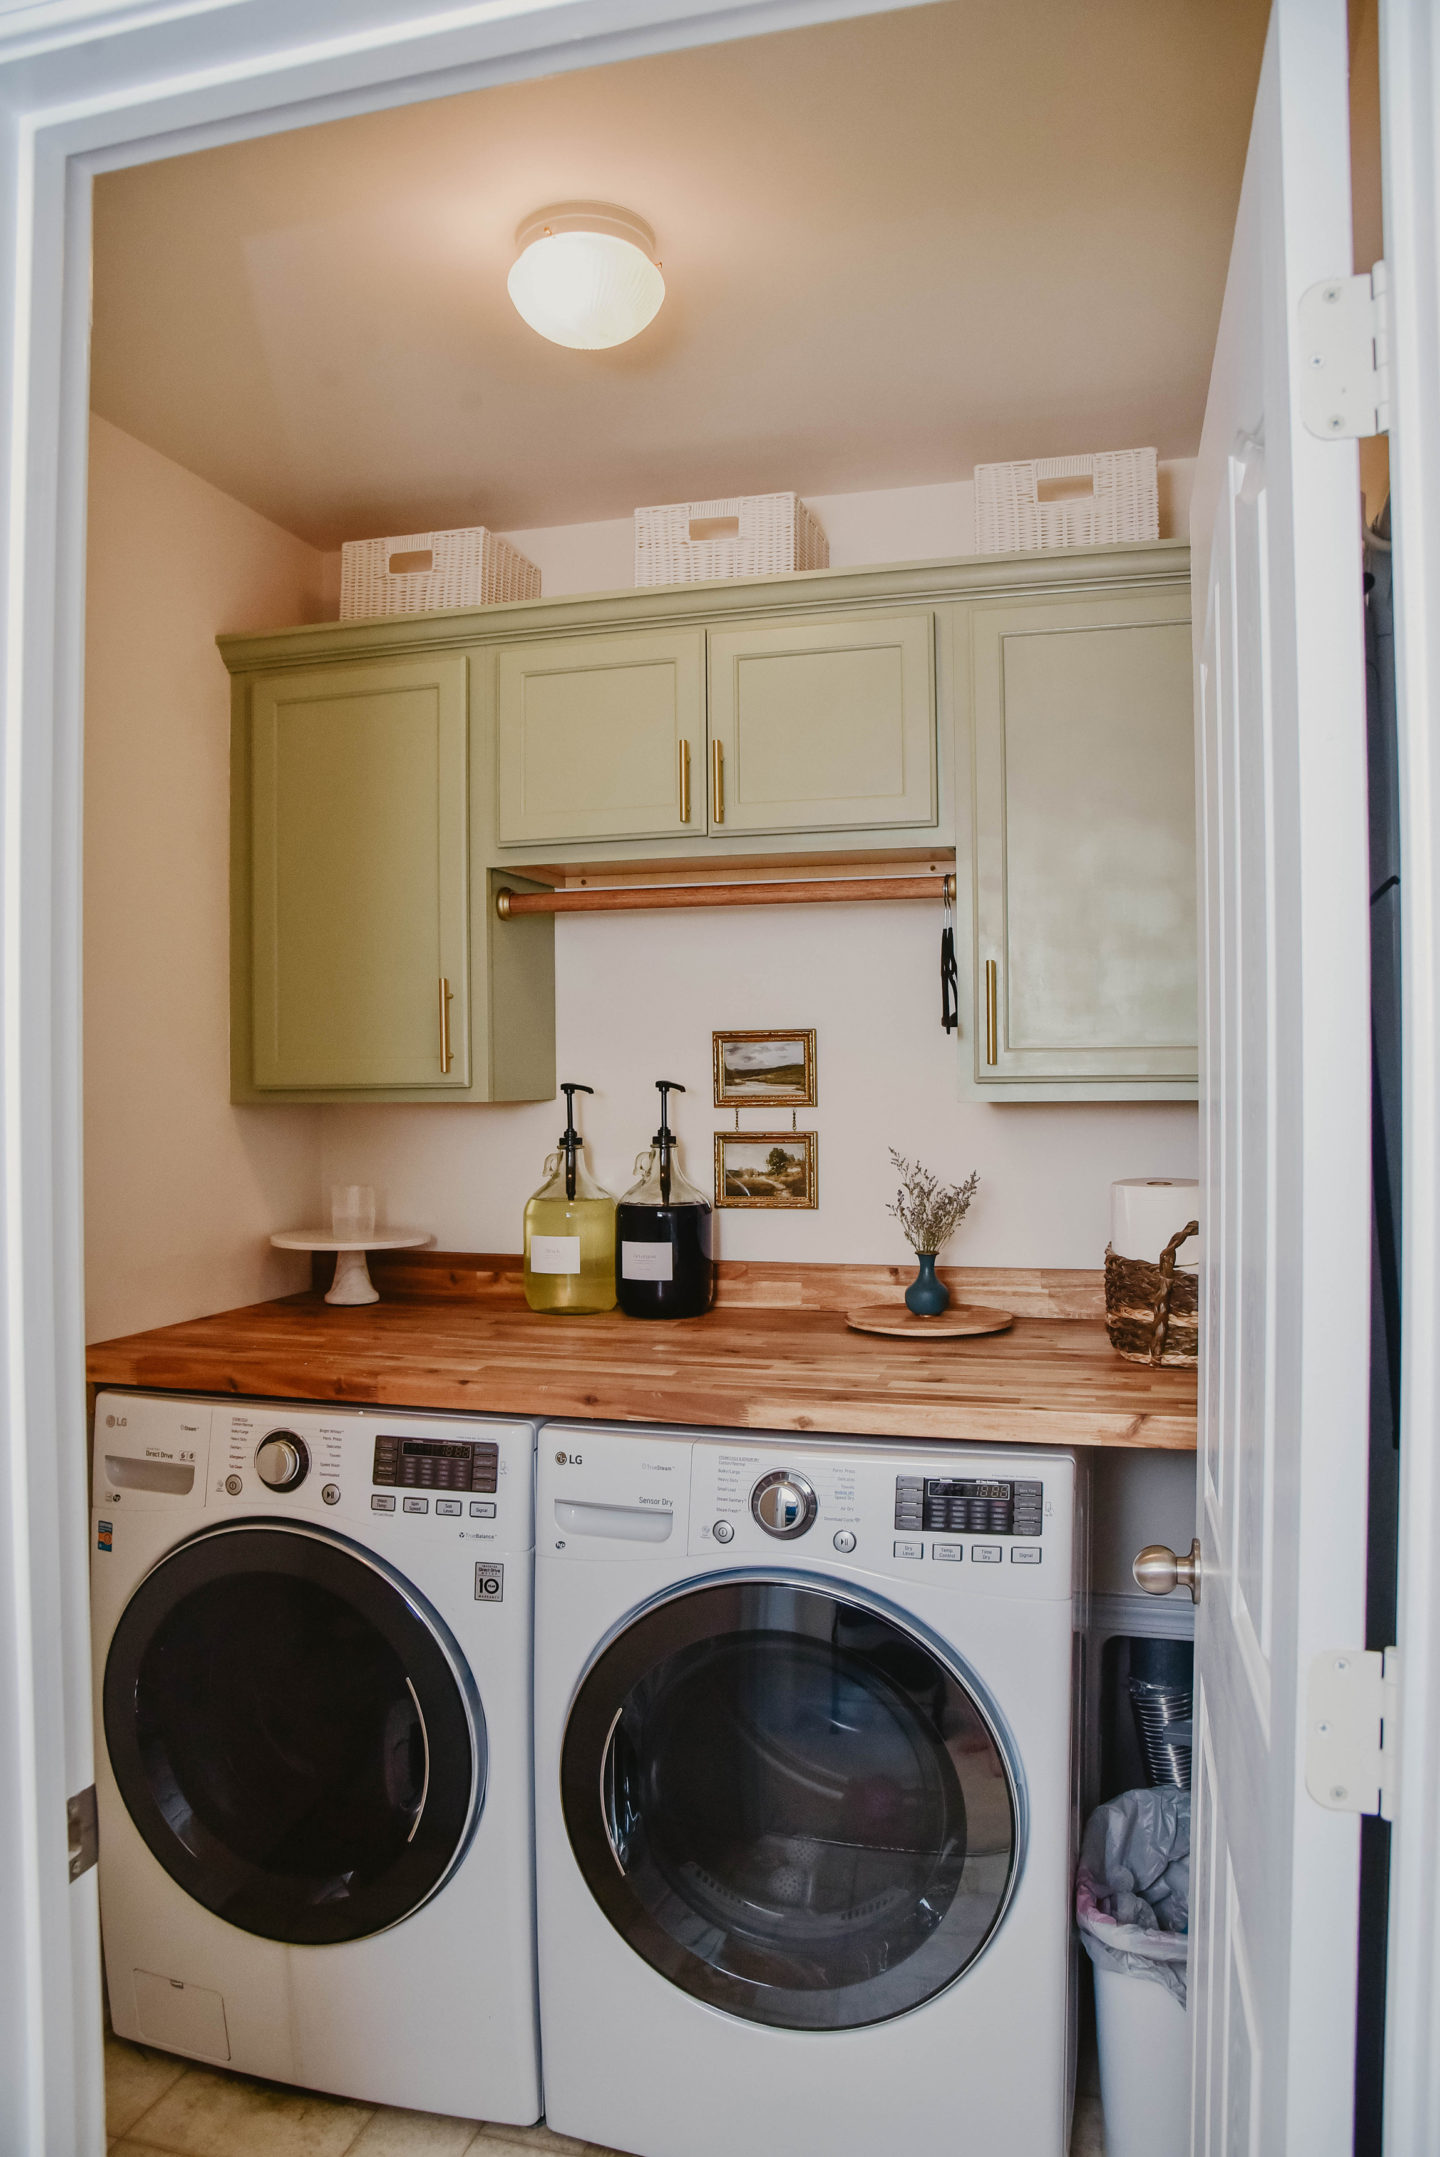
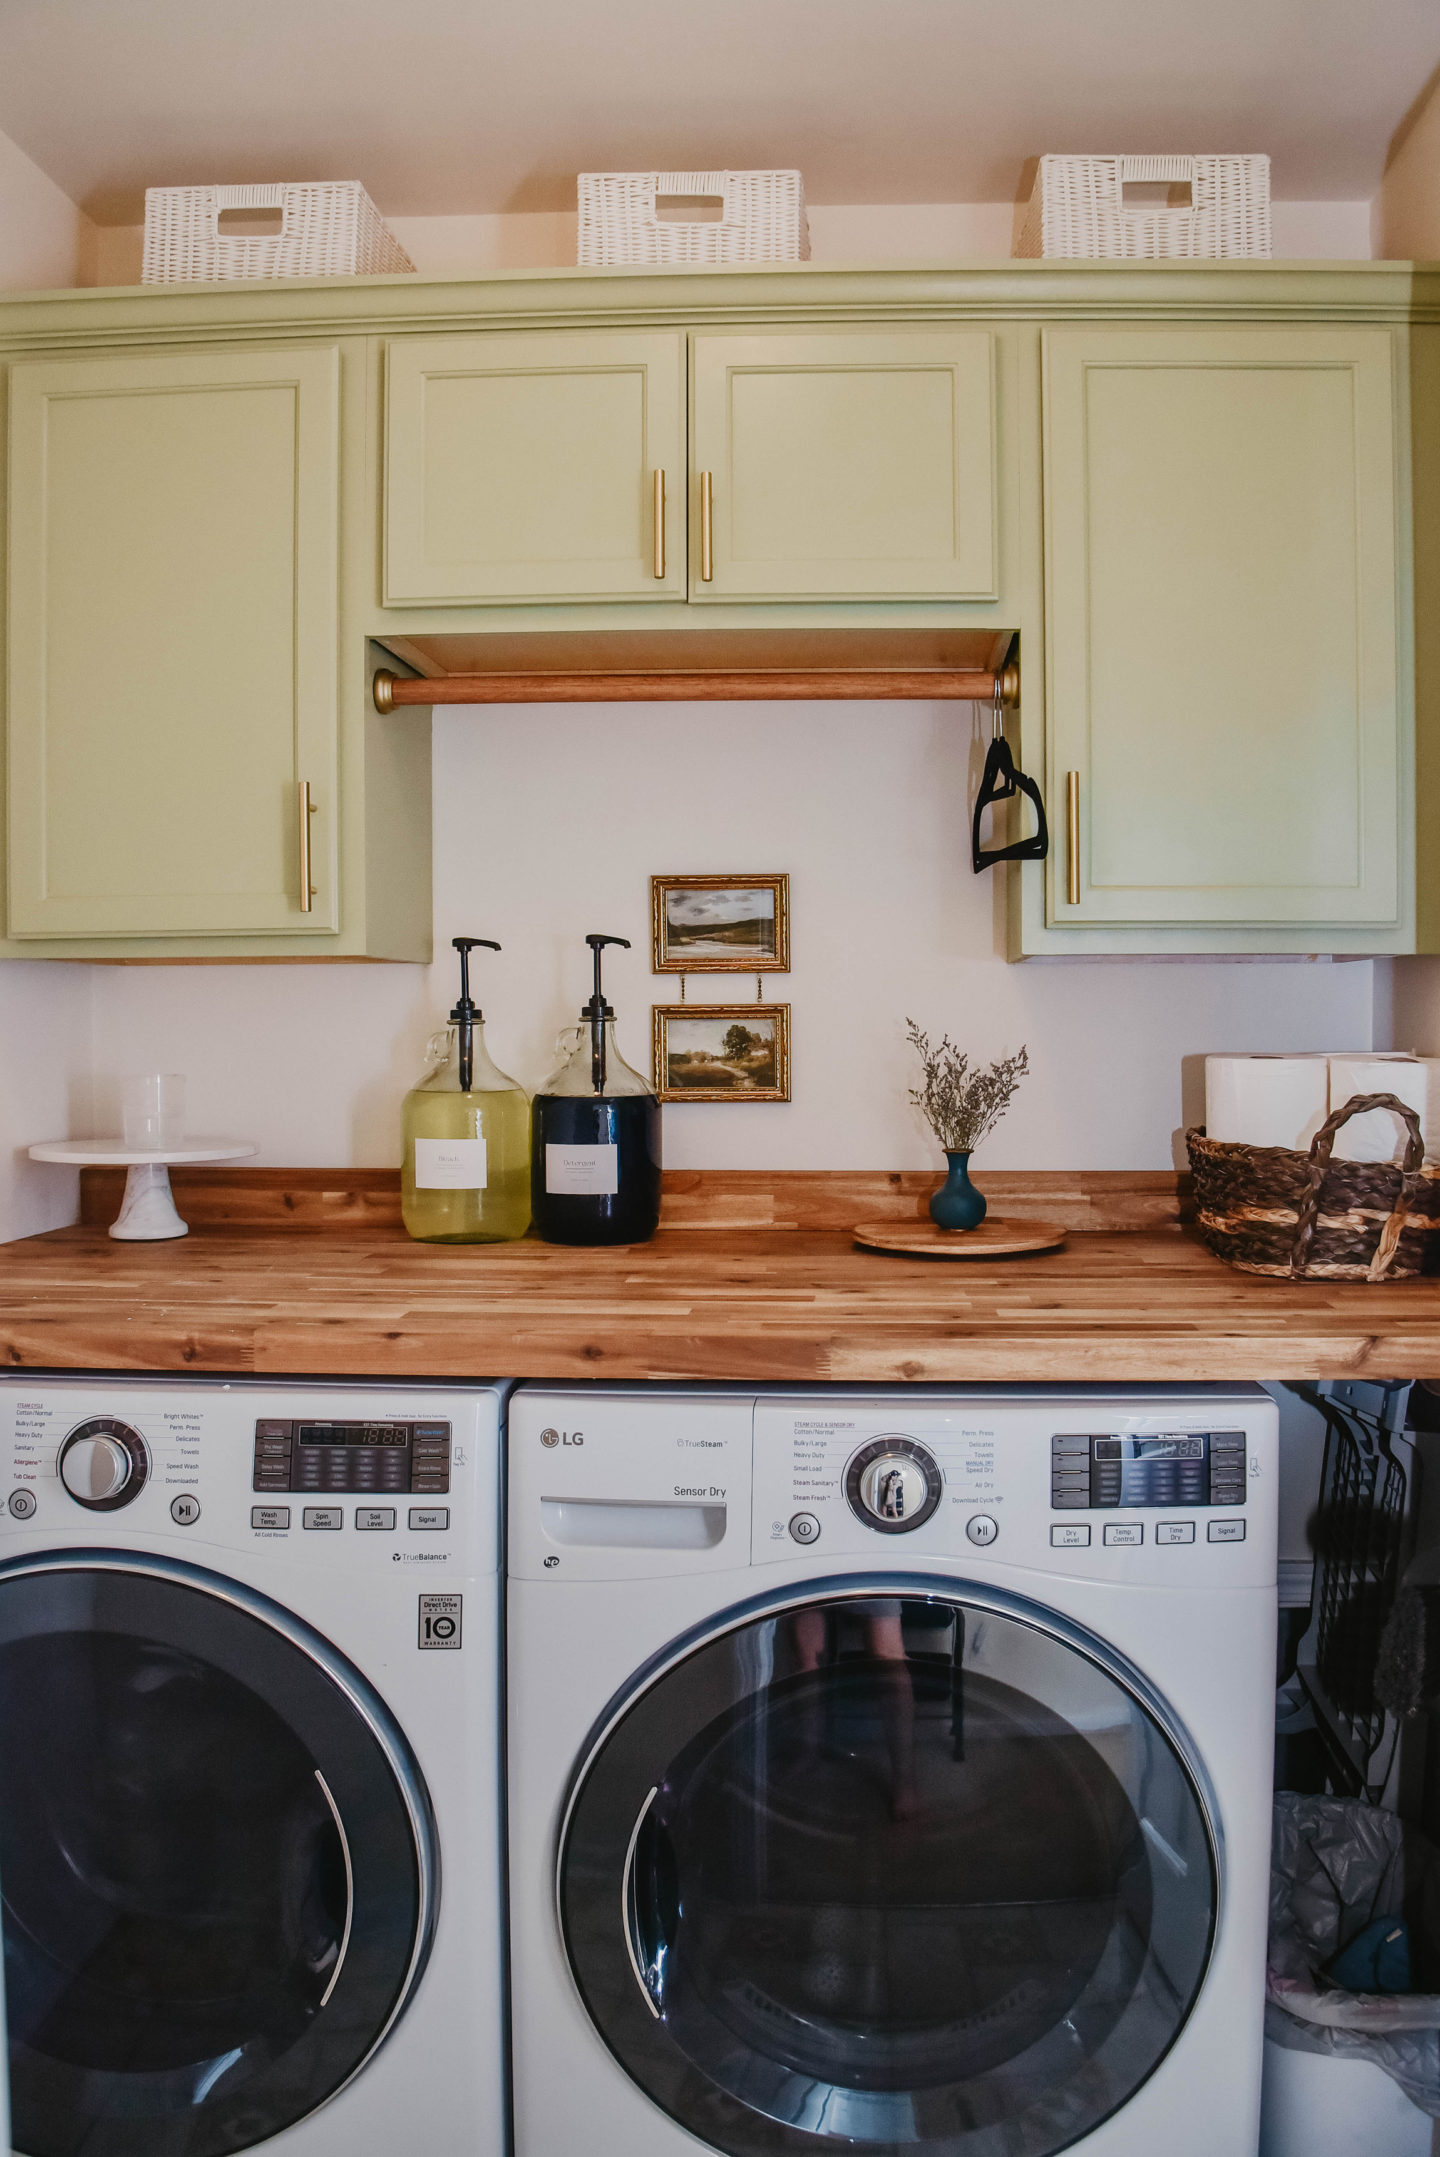
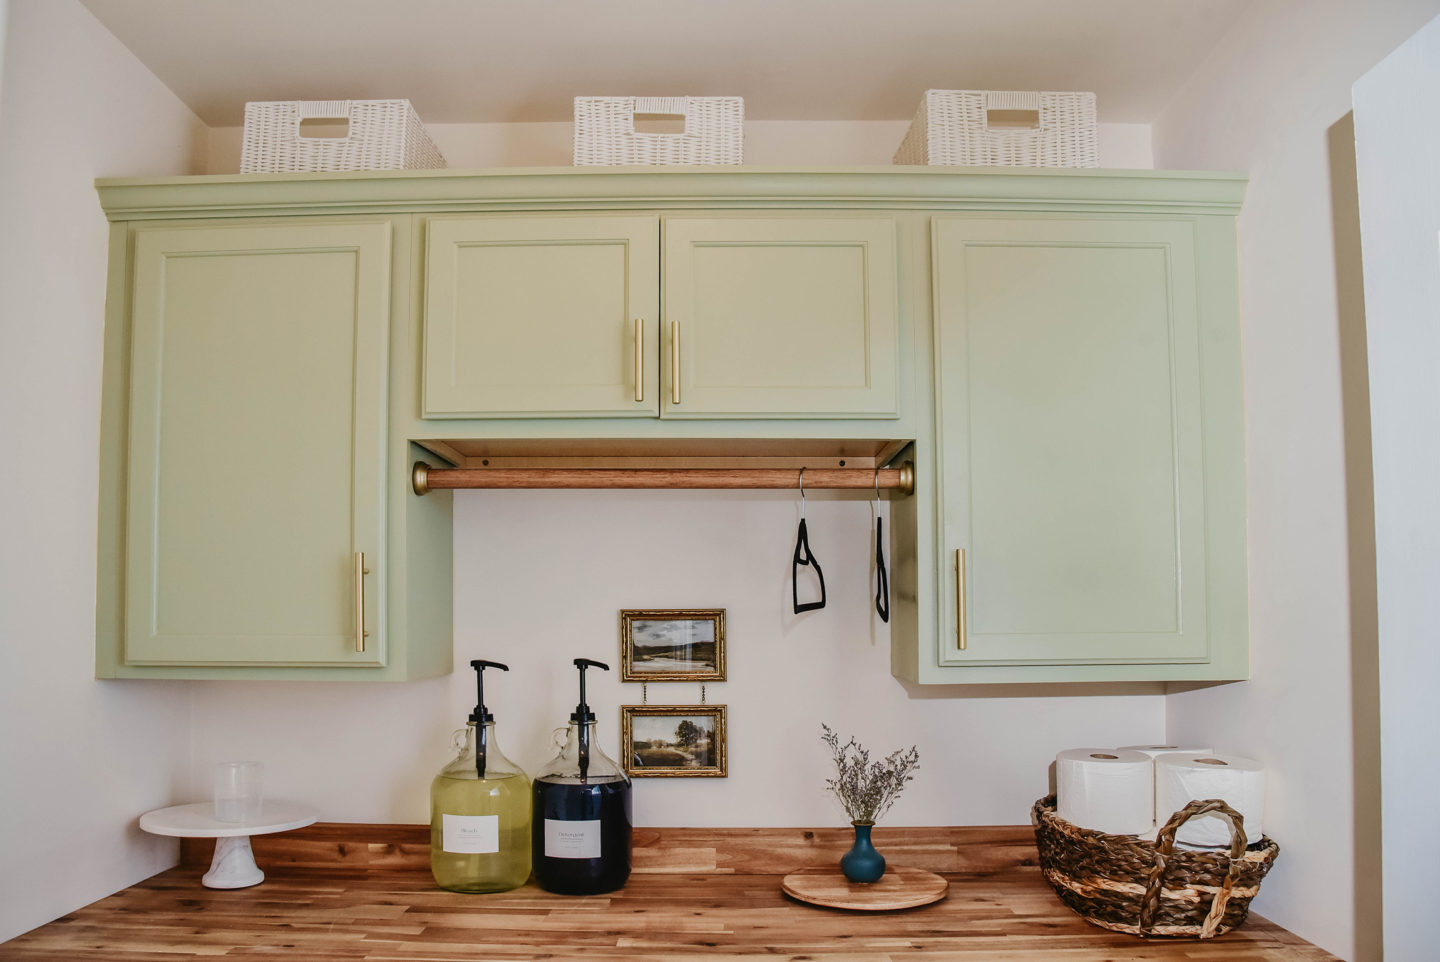
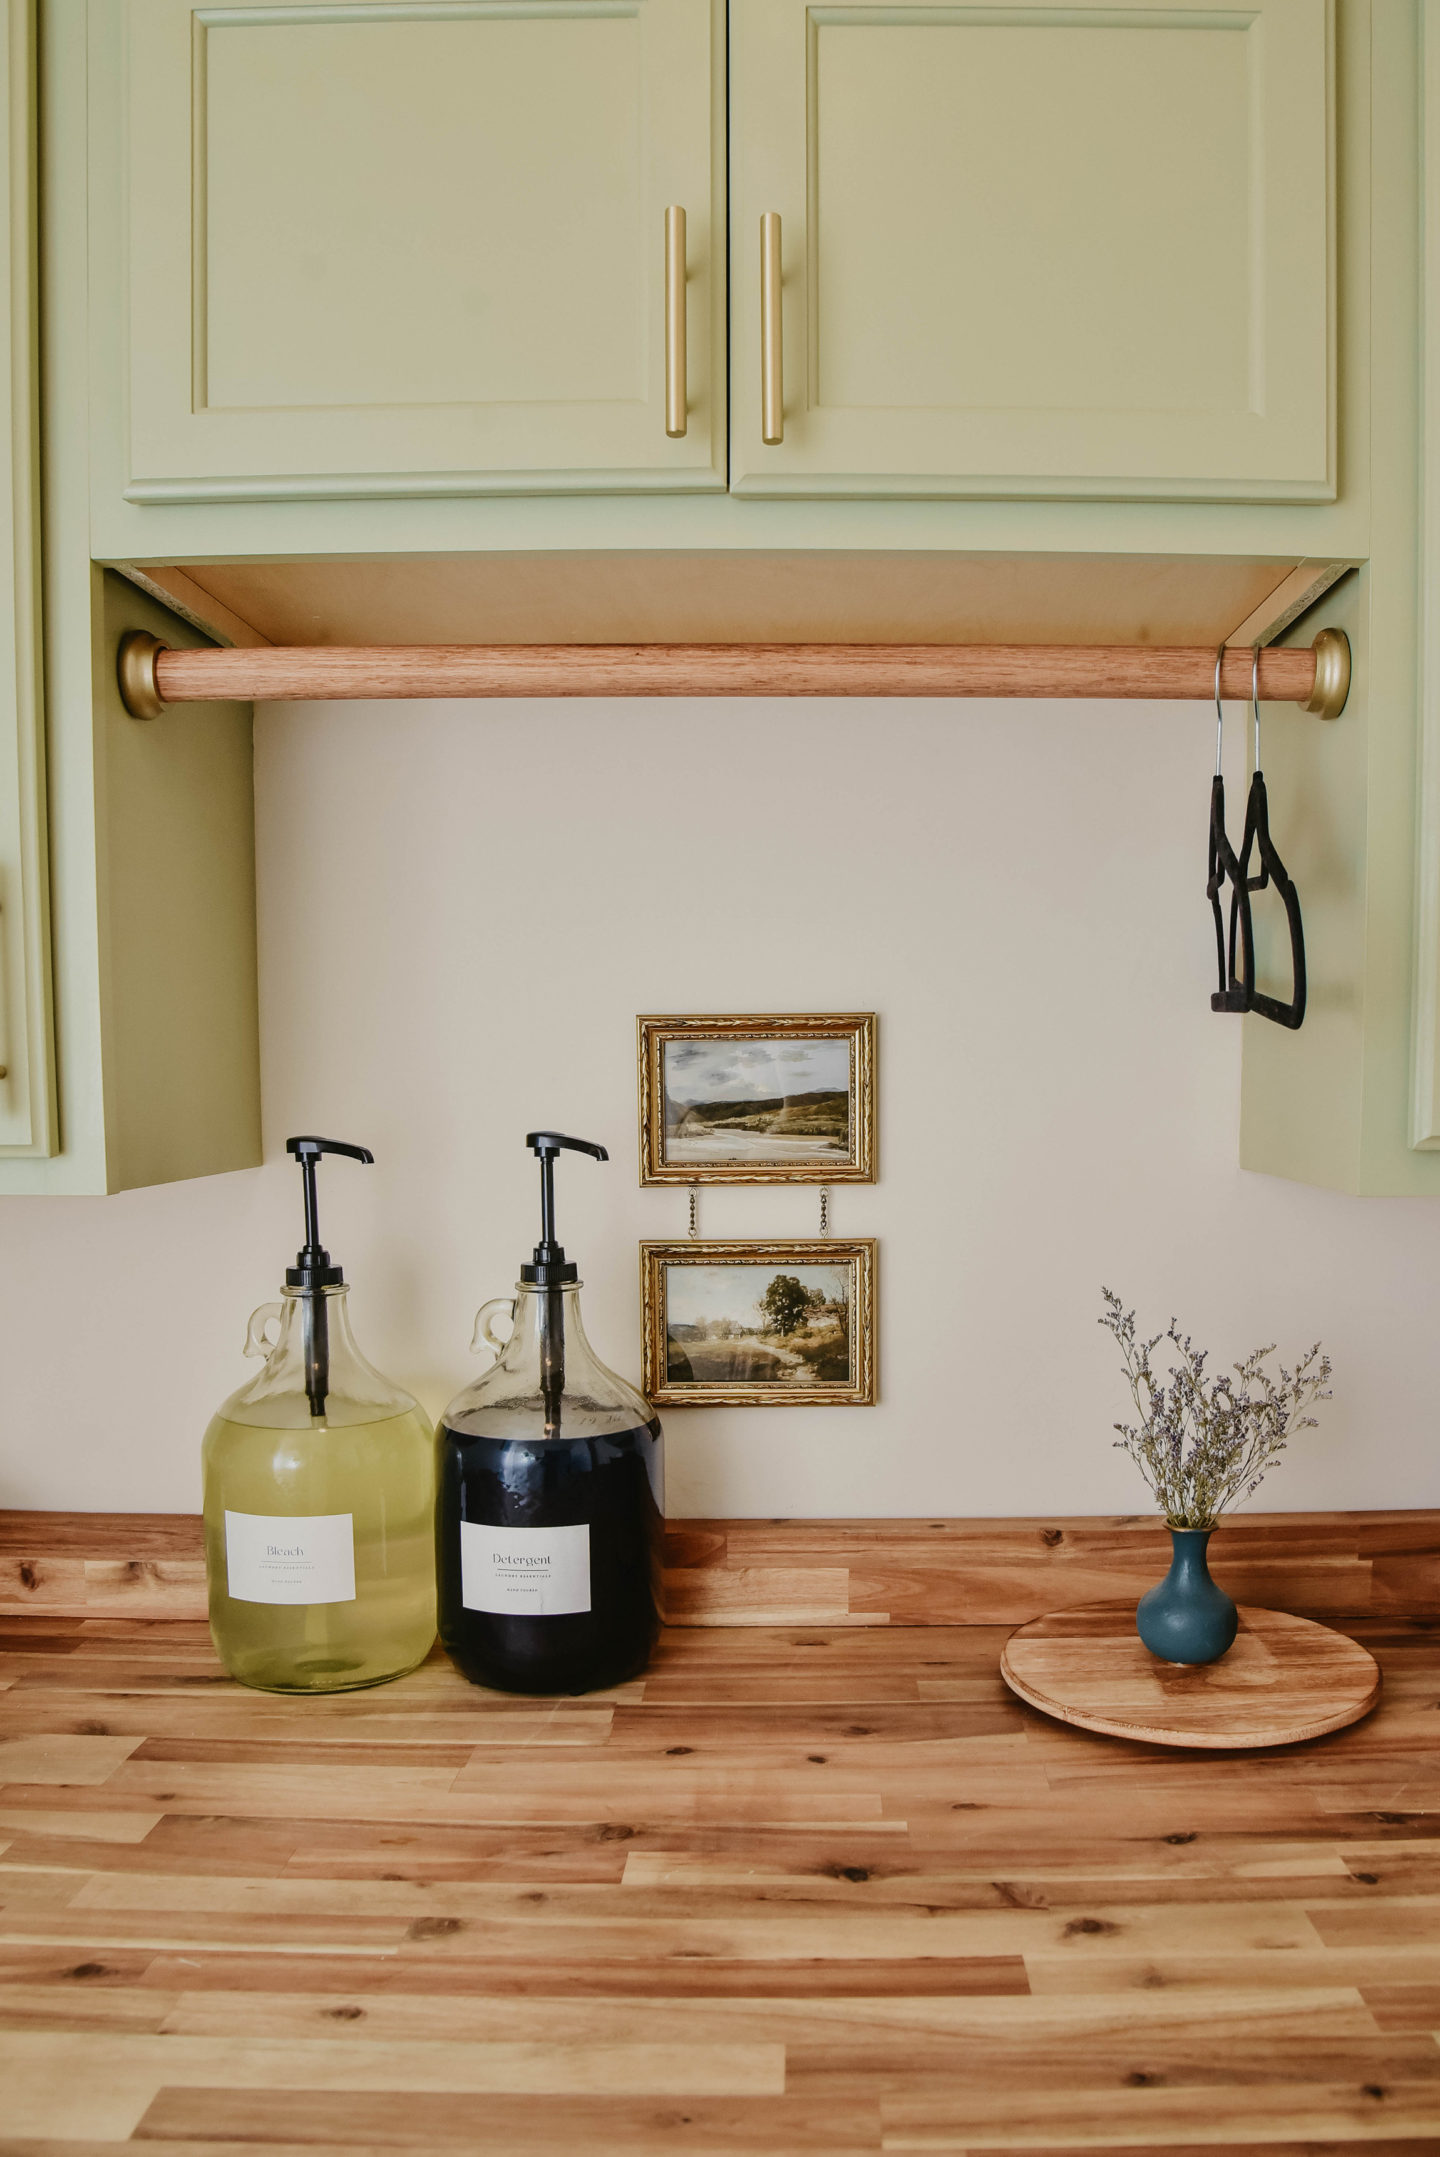
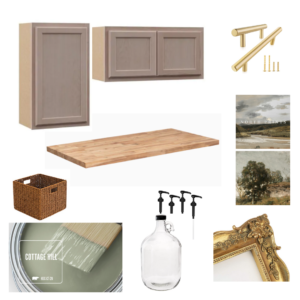
So jumping into the laundry room makeover plans, I knew I wanted a wood butcher block top to go over the washer & dryer. My dad and I looked at countless options before I went with this one. Then I ordered cabinets that would fit the space best, opting for two side cabinets, and one bridge cabinet in the middle. For the gold handle pulls, I chose a 3-inch set and two 3-3/4 inch sets. Pat and I spent some time looking at paint chips before falling in love with Behr’s Cottage Hill. It’s the perfect shade of green and also ties in the artwork I picked out.
Now, when I moved in, the laundry room looked like this (below) but with no washer or dryer. It was an empty room with the usual wire shelves – nothing spectacular. The washer & dryer I have now were housewarming gifts from my parents. But for the last 6 years, the room stayed like this, even though I had drawn up plans to fix up this space, but I had everything storage at a storage unit doncaster instead.

Painting & Assembly
The Butcher Block Counter
I can’t begin to tell you what a headache it was to get this to fit perfectly in my laundry room. Every. single. wall. is. crooked. But we did it! It look a bit of finagling and several trips to Lowe’s for large cuts, but in the end, we had enough left over for a backsplash! The butcher block came pre-stained so I really didn’t have to anything there. We put up 1x3s along the side and back walls, making sure they were level, and then placed the counter on top. My dad screwed the butcher block to the 1x3s to ensure it never moves or comes loose.
The Cabinets
I spent the most time on this part of the project. I sanded, primed, and painted every cabinet & door myself, honestly I wish I would have hired a Painting Company. We went with Cottage Hill by Behr as the final cabinet color. It looks great with our existing lighting and the off-white wall colors we have throughout the home. Installing the door handles was probably the most irritating, though. The screws that came with the handles are easily stripped so two handles actually broke in the installation process. I was able to use an epoxy glue to fasten them to the door.
Pat and my dad lifted all the cabinets and screwed them into studs in the wall, then screwed them into each other for added support. It was important we installed these after the butcher block because we would need the wall space to maneuver the counter to fit into the room.
The Crown Molding
My dad installed these for me since I could not get on a ladder (pregnancy has its perks lol!) He nailed them into the cabinets and screwed them into studs on the side. There’s also plenty of room for storage above the cabinets too!
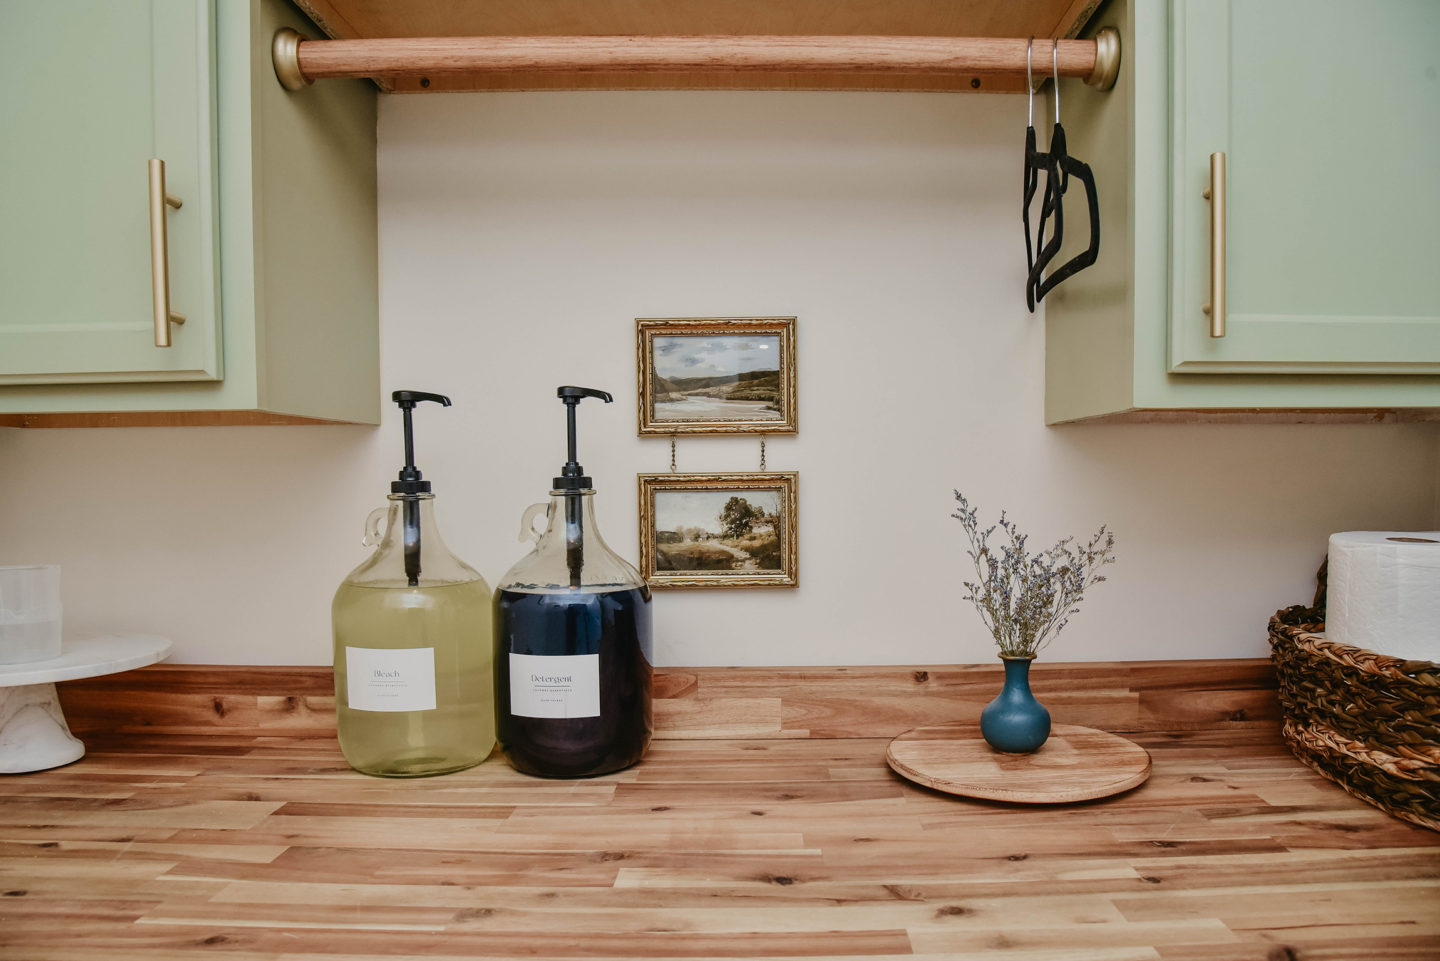
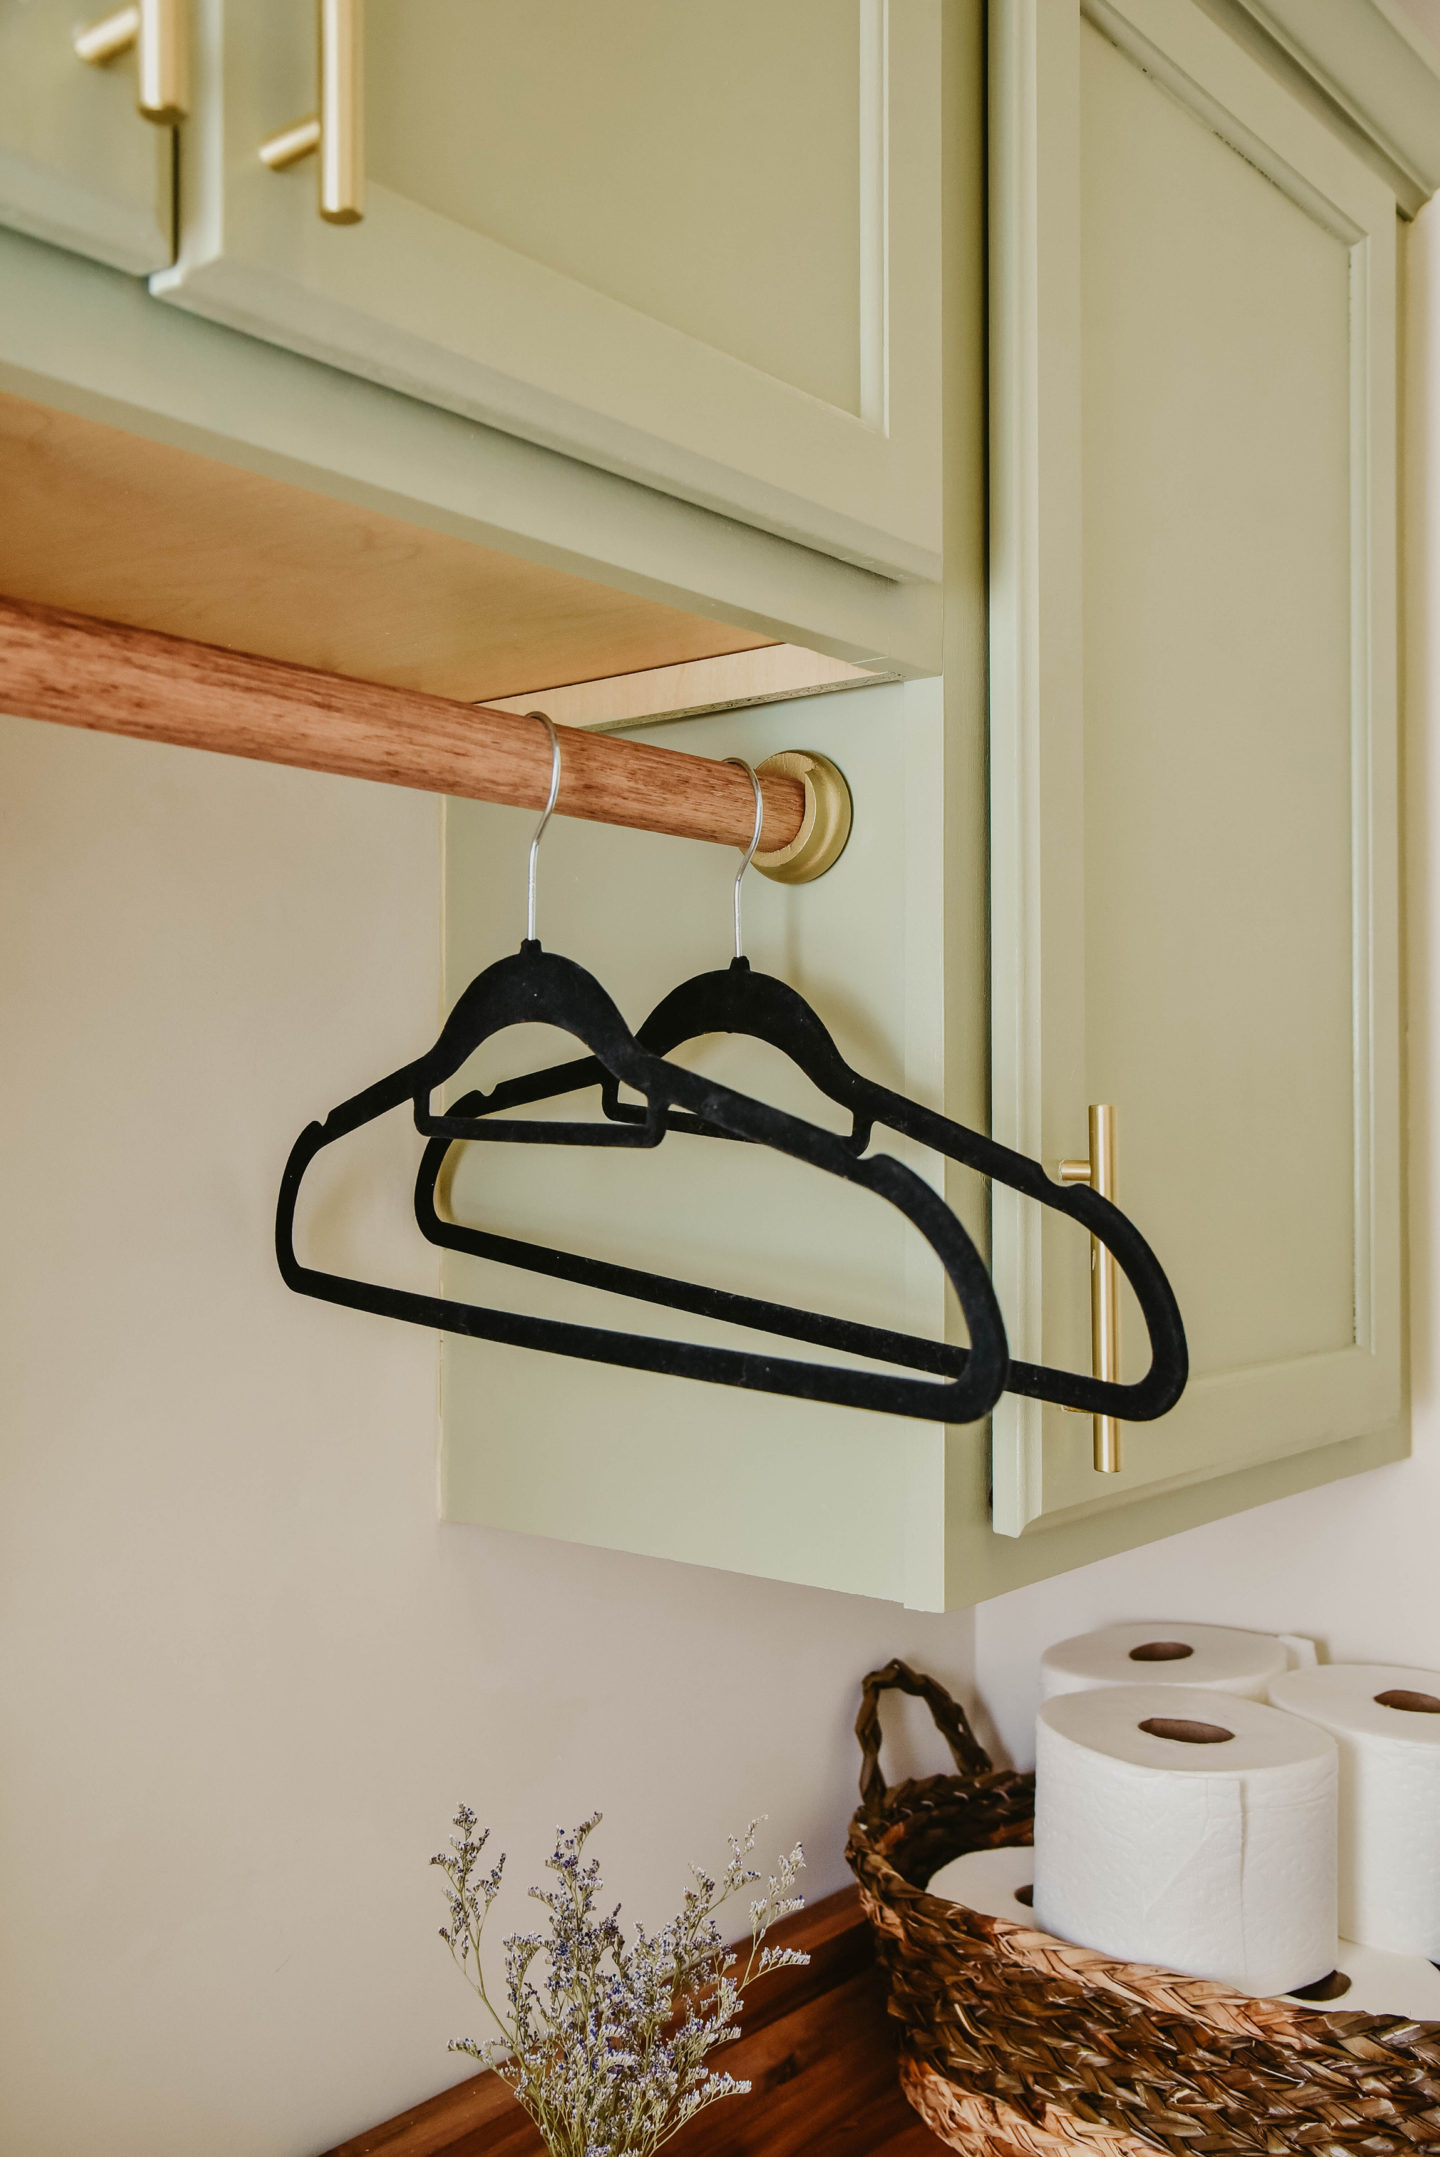
The Hanging Bar
This was a feature I decided to add as we were finalizing the project. I thought about how sometimes clothes shrink and need to be hang dried, and I pictured having to do that with a lot of baby onesies. So I bought 2 wood bar rests and a wood bar, from the closet department at Home Depot, and mitred it to fit. It was a very easy install. I stained the wood and painted the rests gold to match the cabinet handles – that was actually an idea Pat had and I loved it.
Styling The Laundry Room
The Art & Frame
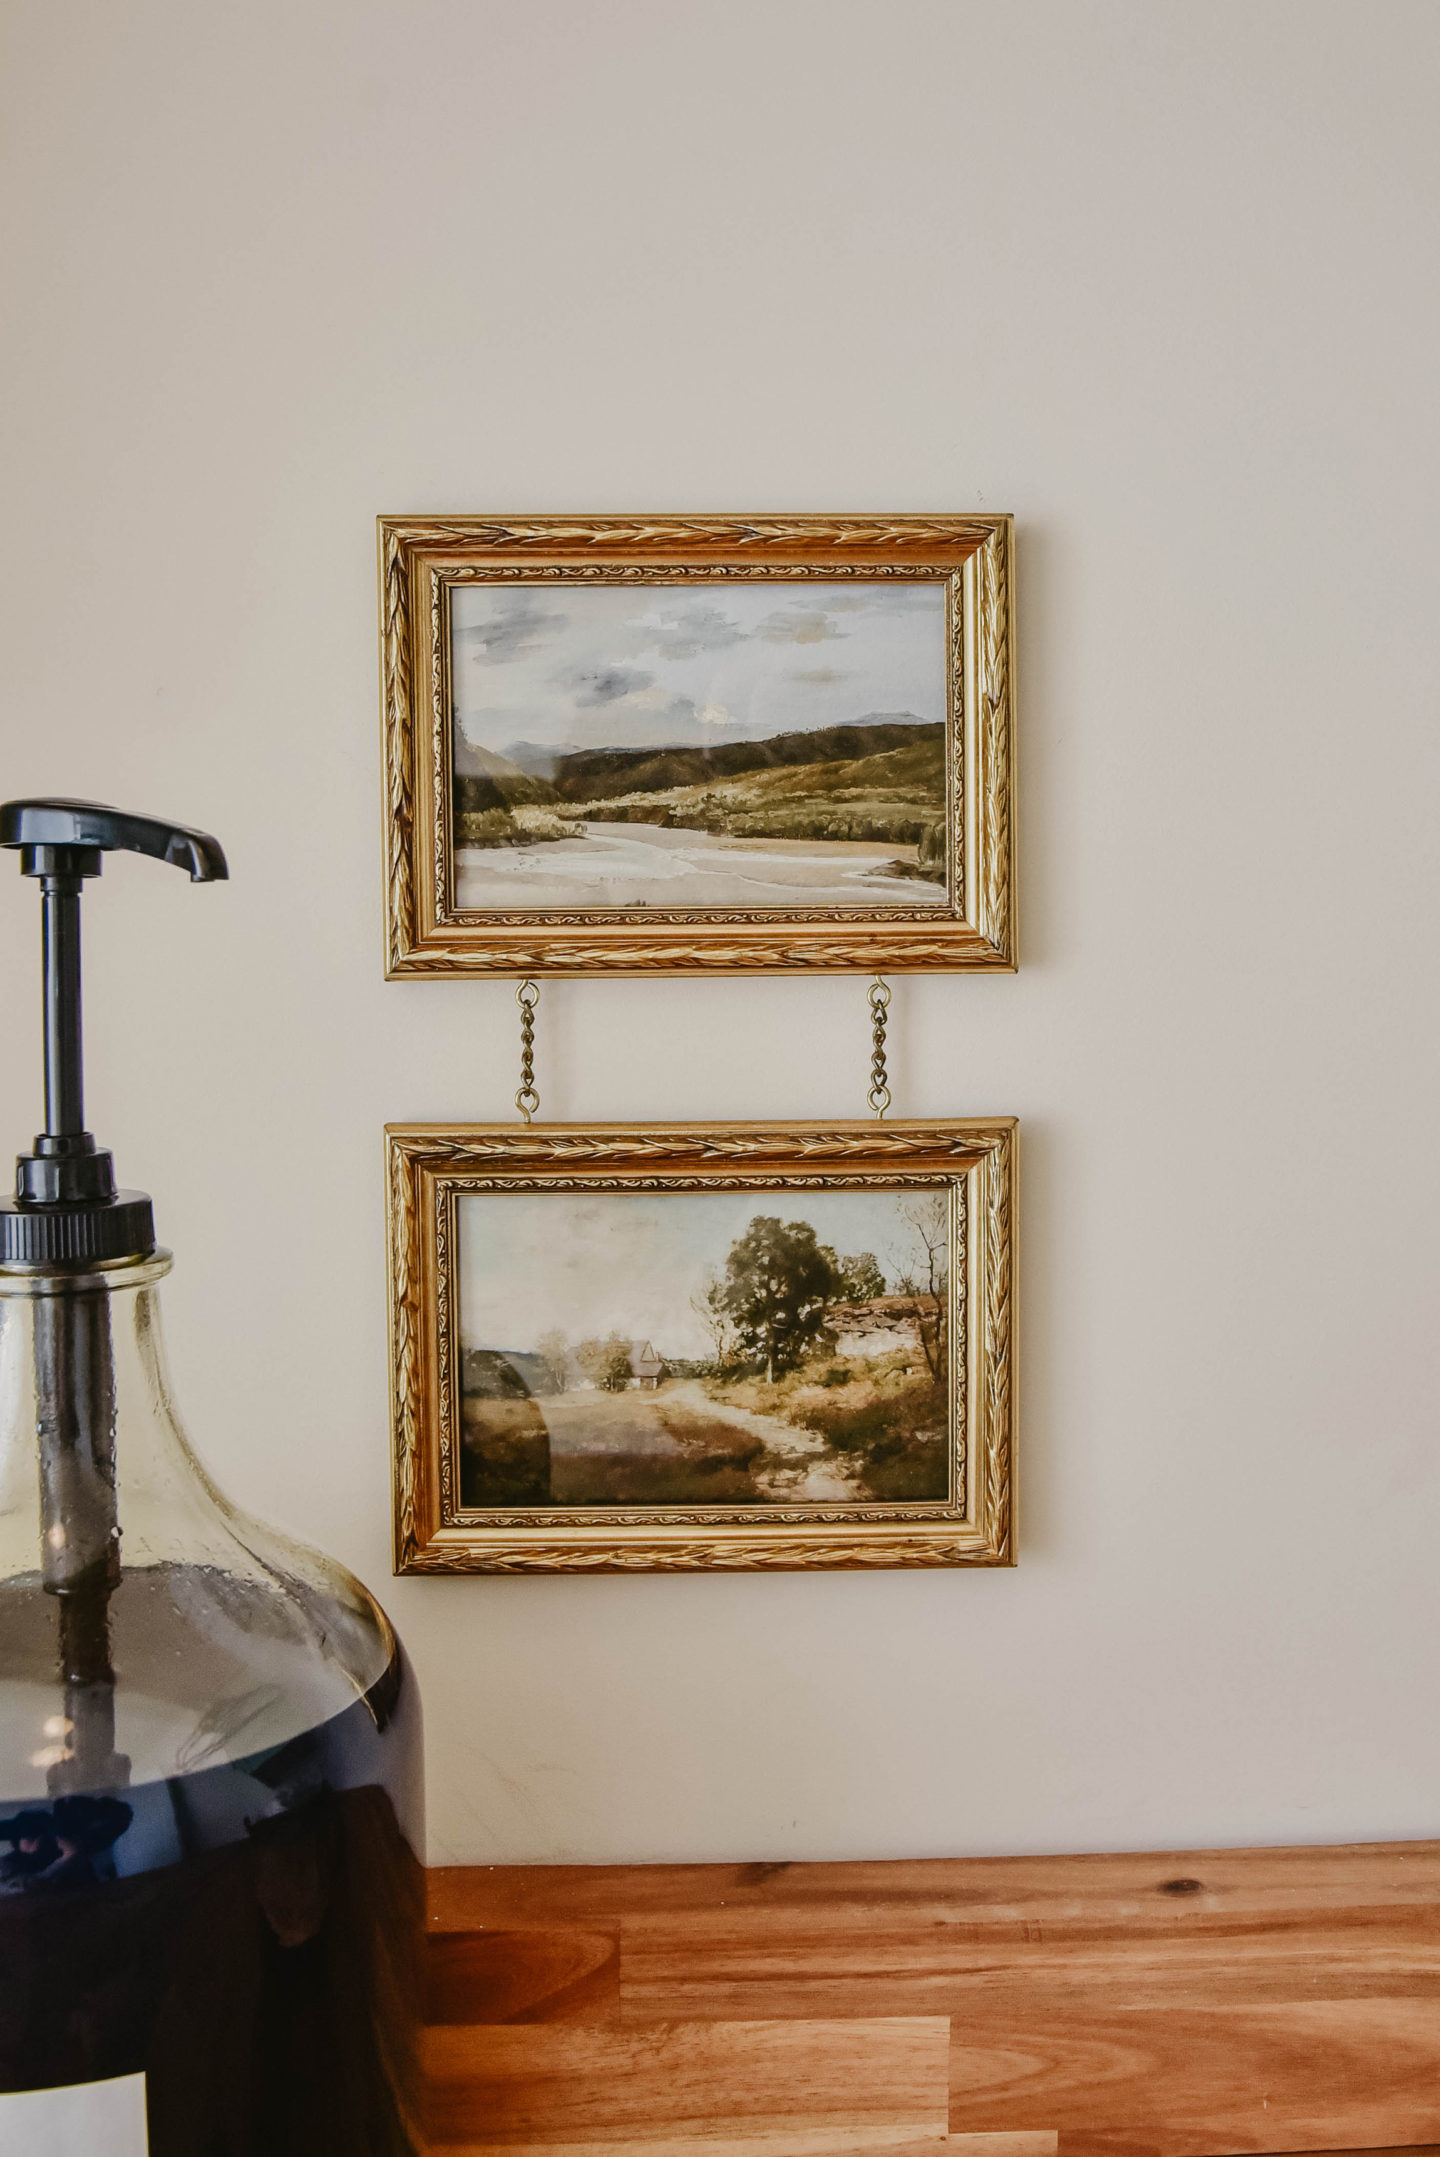
I found this unique frame while antiquing with my parents one weekend for just $12! What a bargain. I tried to find similar items online but didn’t have luck, however, if you’re into floating frames with a chain detail, you may like these. I ordered the art files (one+two) off Etsy and had them printed as giclee prints from Printique, but you can also have these printed at a local shop to save on cost.
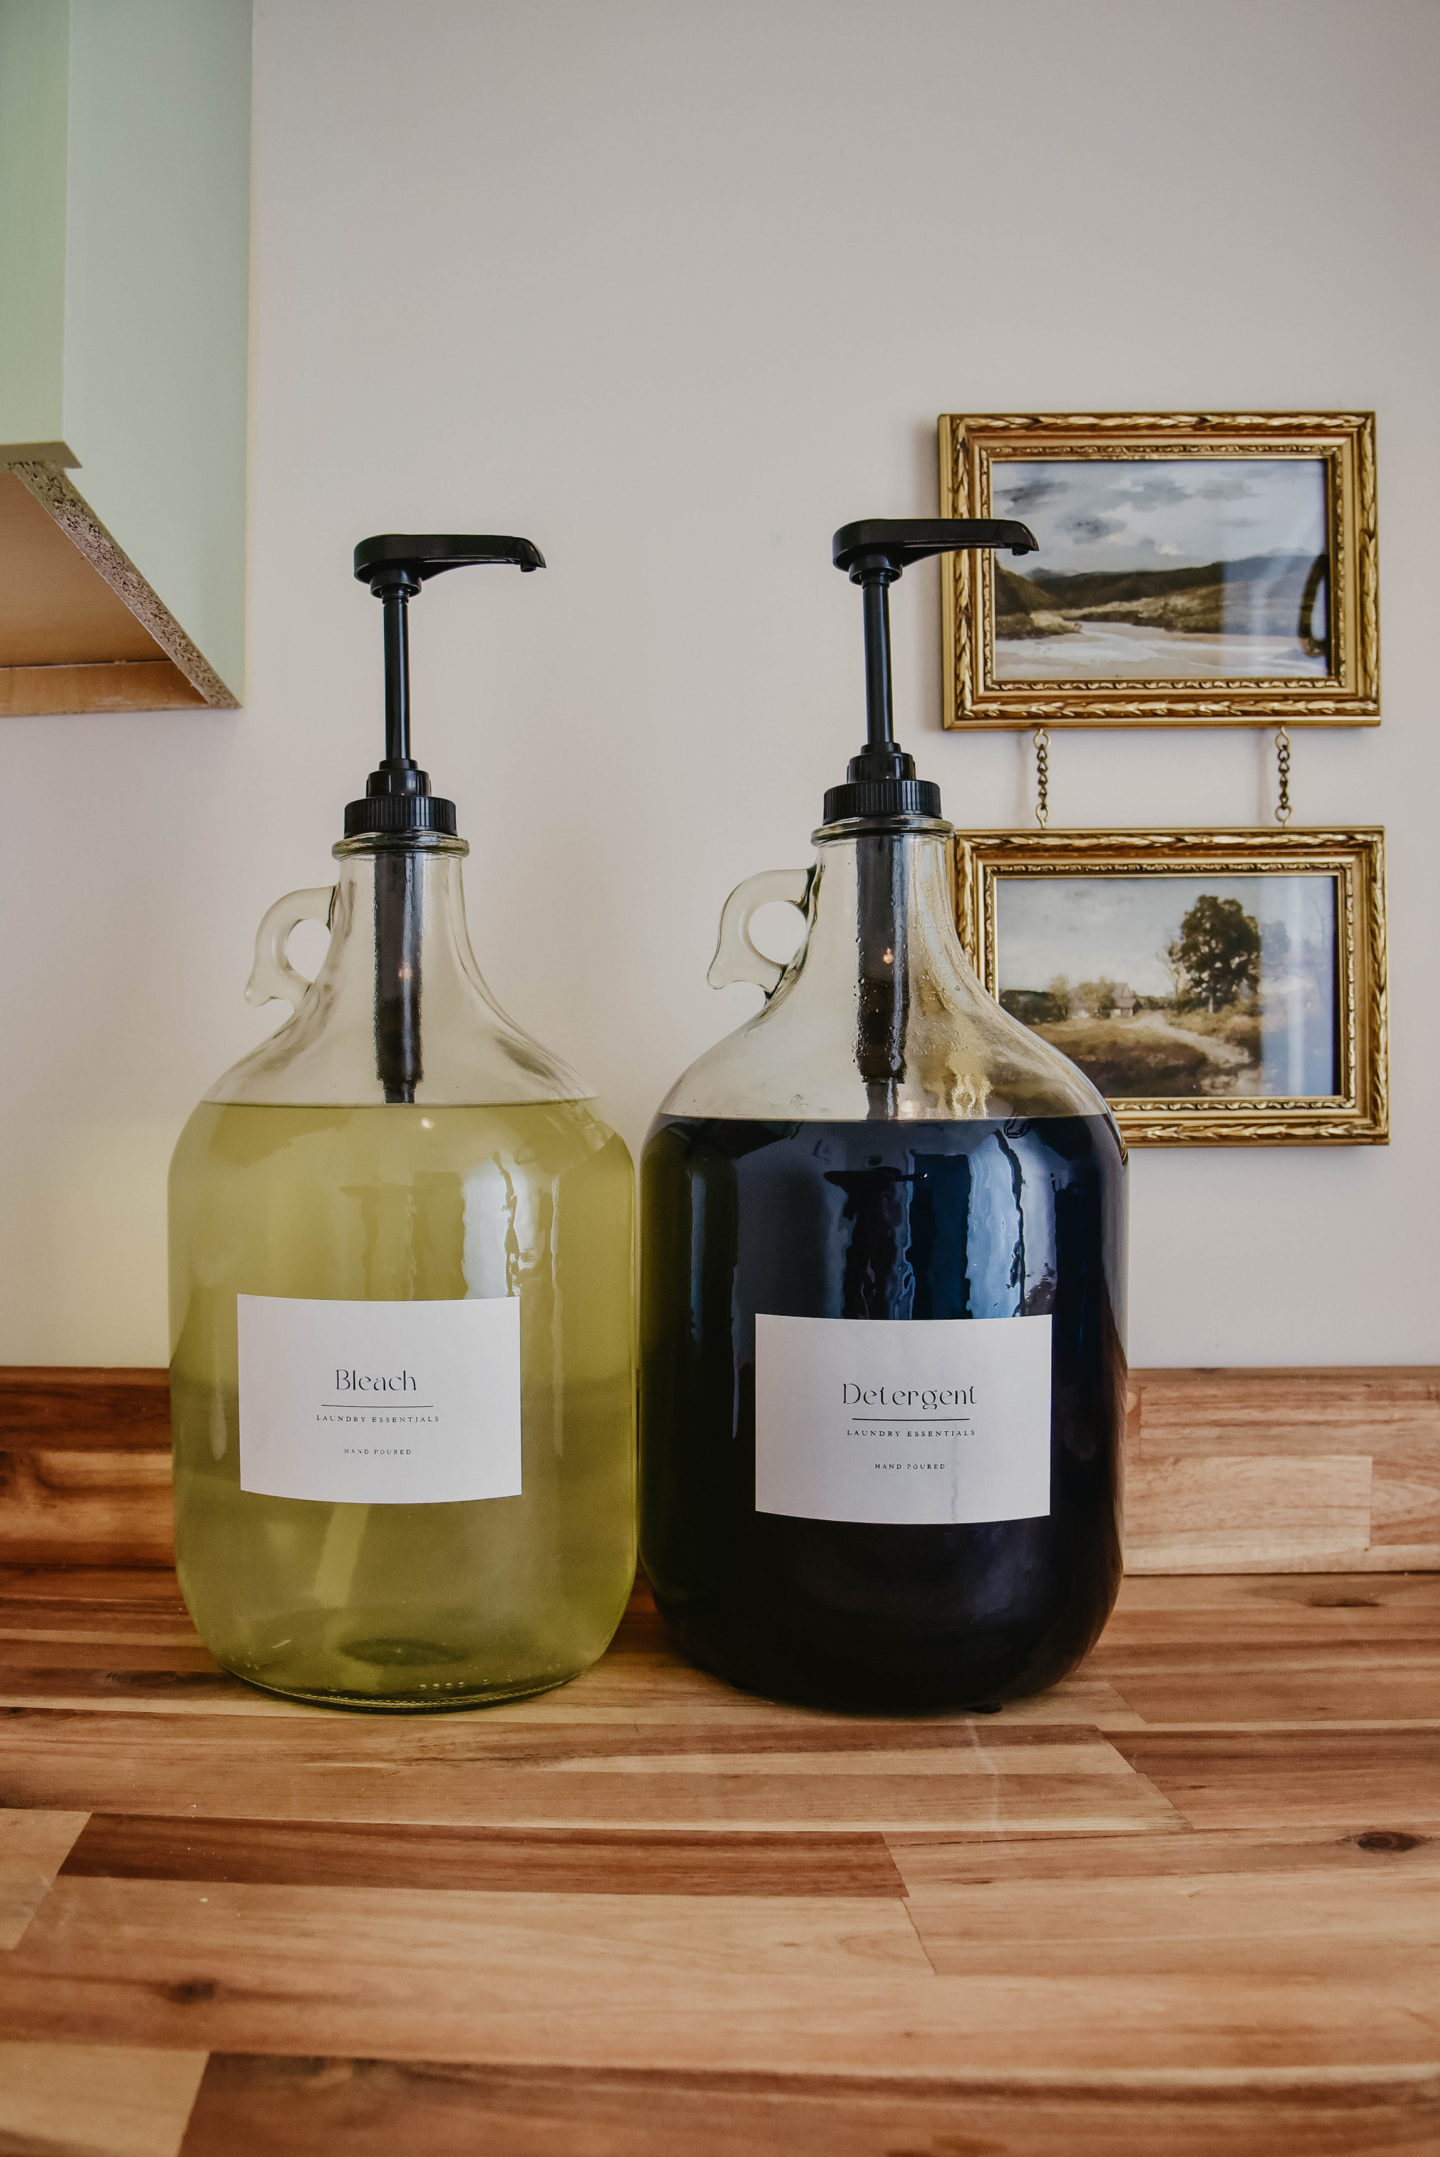
The Gallon Jugs
Because I’m over-the-top extra, I wanted to have my bleach & detergent displayed in aesthetically pleasing containers – keeping the refills inside the cabinets of course. Thankfully every gallon of Tide comes with detergent cups, so I kept two for regular use. I spent a few days looking at stylish options before settling on the clear gallon jugs and black pumps. I’m so glad I did because they give life to the laundry room. I designed the labels on Canva and printed them on sticker paper.
The Baskets
I am still on the hunt for dark brown or wood bins/crates for our over-the-cabinet storage. For now, I am using these old white wicker crates from Target that are actually meant for the baby nursery. I just wanted to showcase the space up there and how we still have more places for additional storage!
–
I hope you are as blown away as I am. We have a few more makeovers coming soon so please subscribe & follow on Instagram so you never miss a thing!
What do you think of my laundry room makeover?