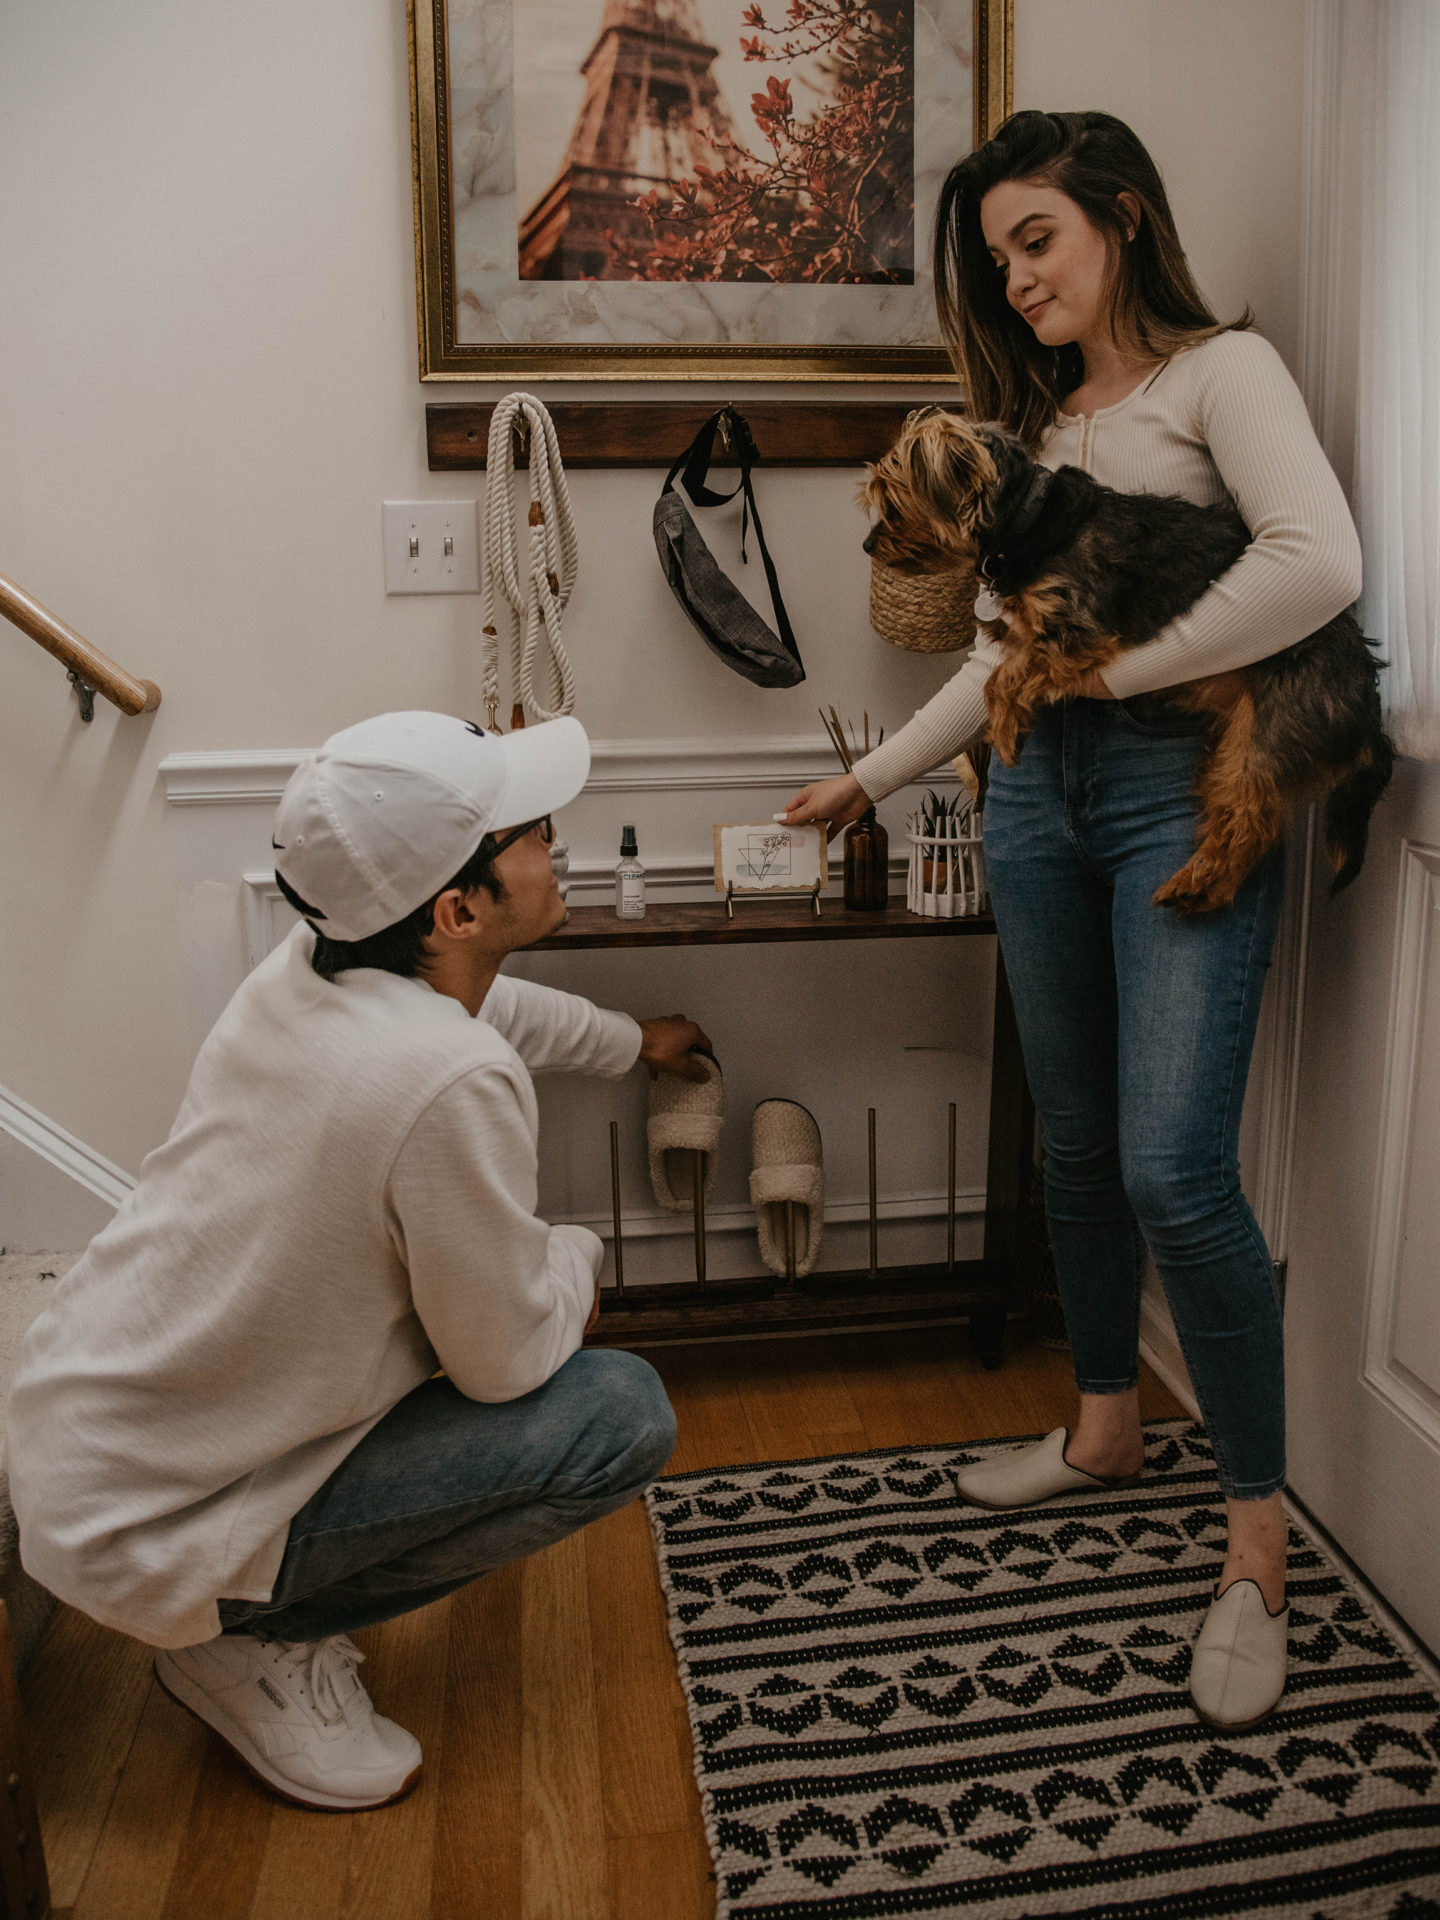
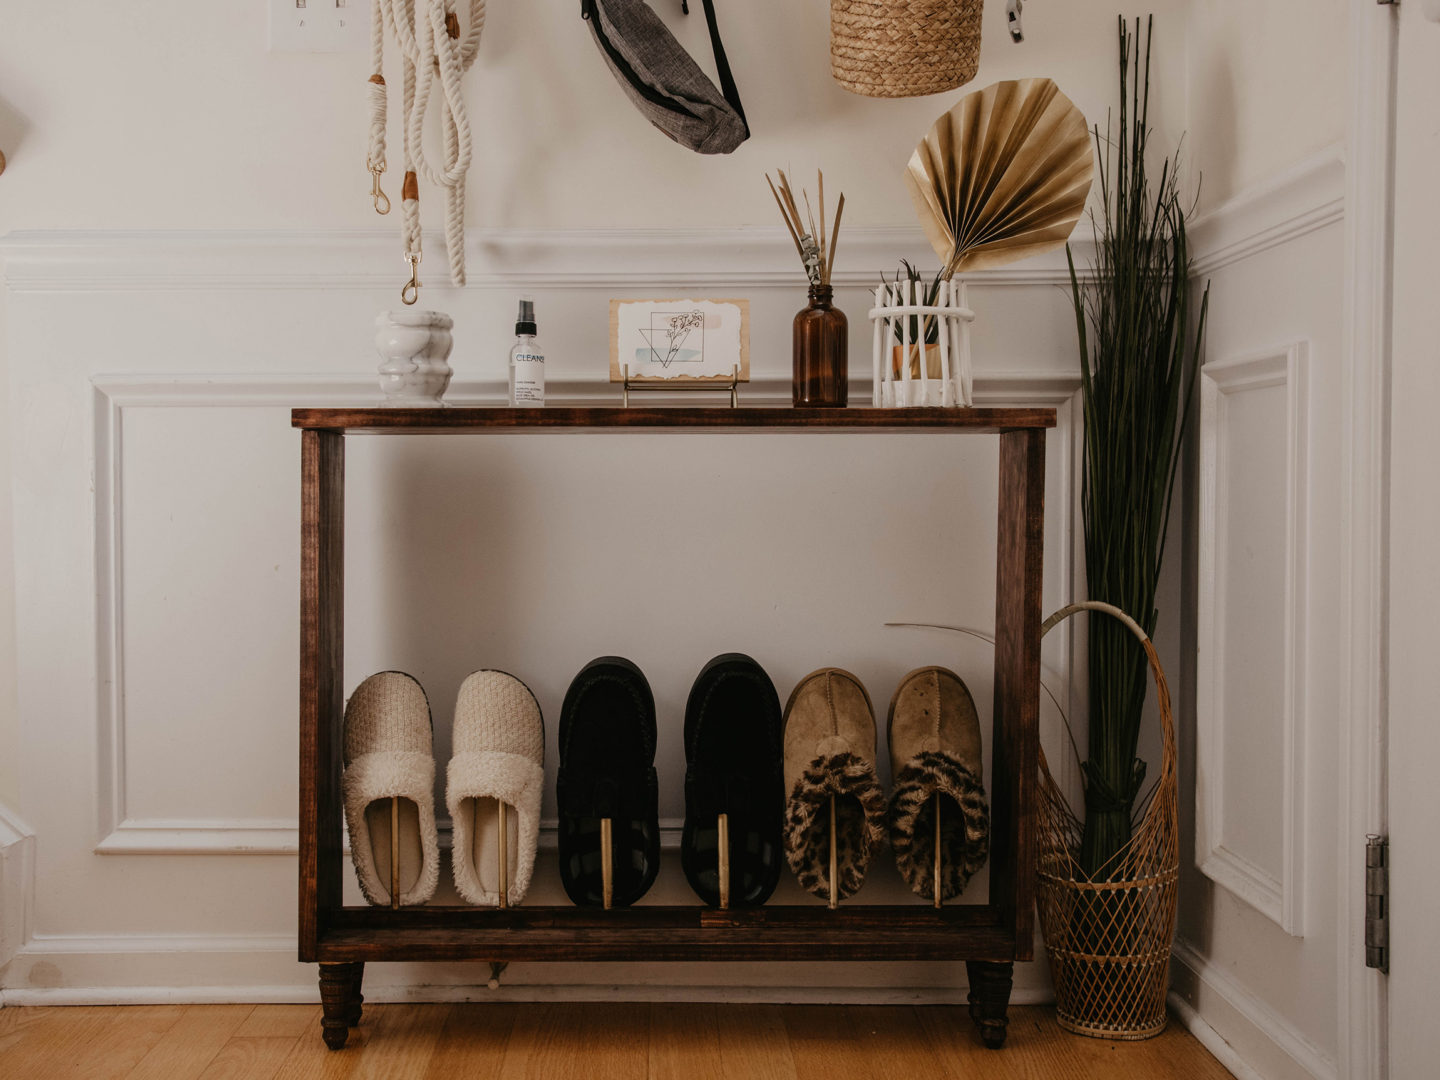
There is usually a pile of slippers at the bottom of my stairs.
It’s not only a hazard, but it’s not attractive. Having tripped over a pair recently, I decided a slipper rack would be my next project. I don’t have a lot of space to fit shoe organizer at the bottom of my stairs so I wanted to use vertical pegs to store our slippers.
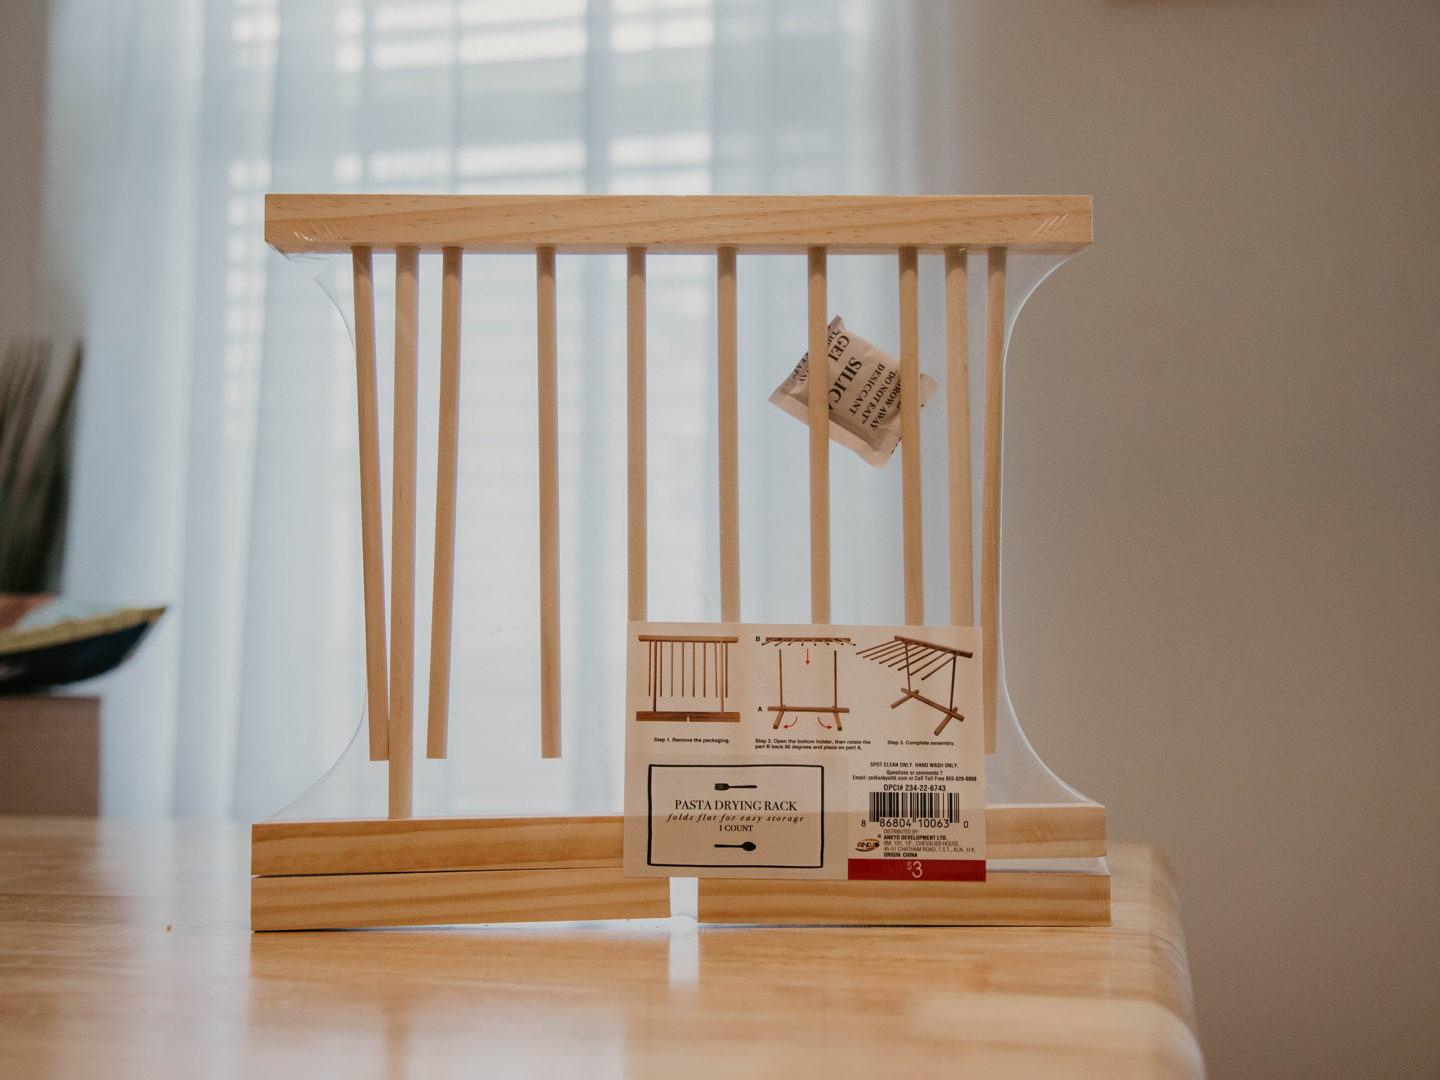
During my last Target run, I saw a pasta drying rack and snagged it for this project! My thoughts were that I could saw off the pegs and use them for the slippers. Since this project worked out, I wanted to show you how you can recreate it using this minor Target hack! S/O to Pat for helping me with all the math and assembly.
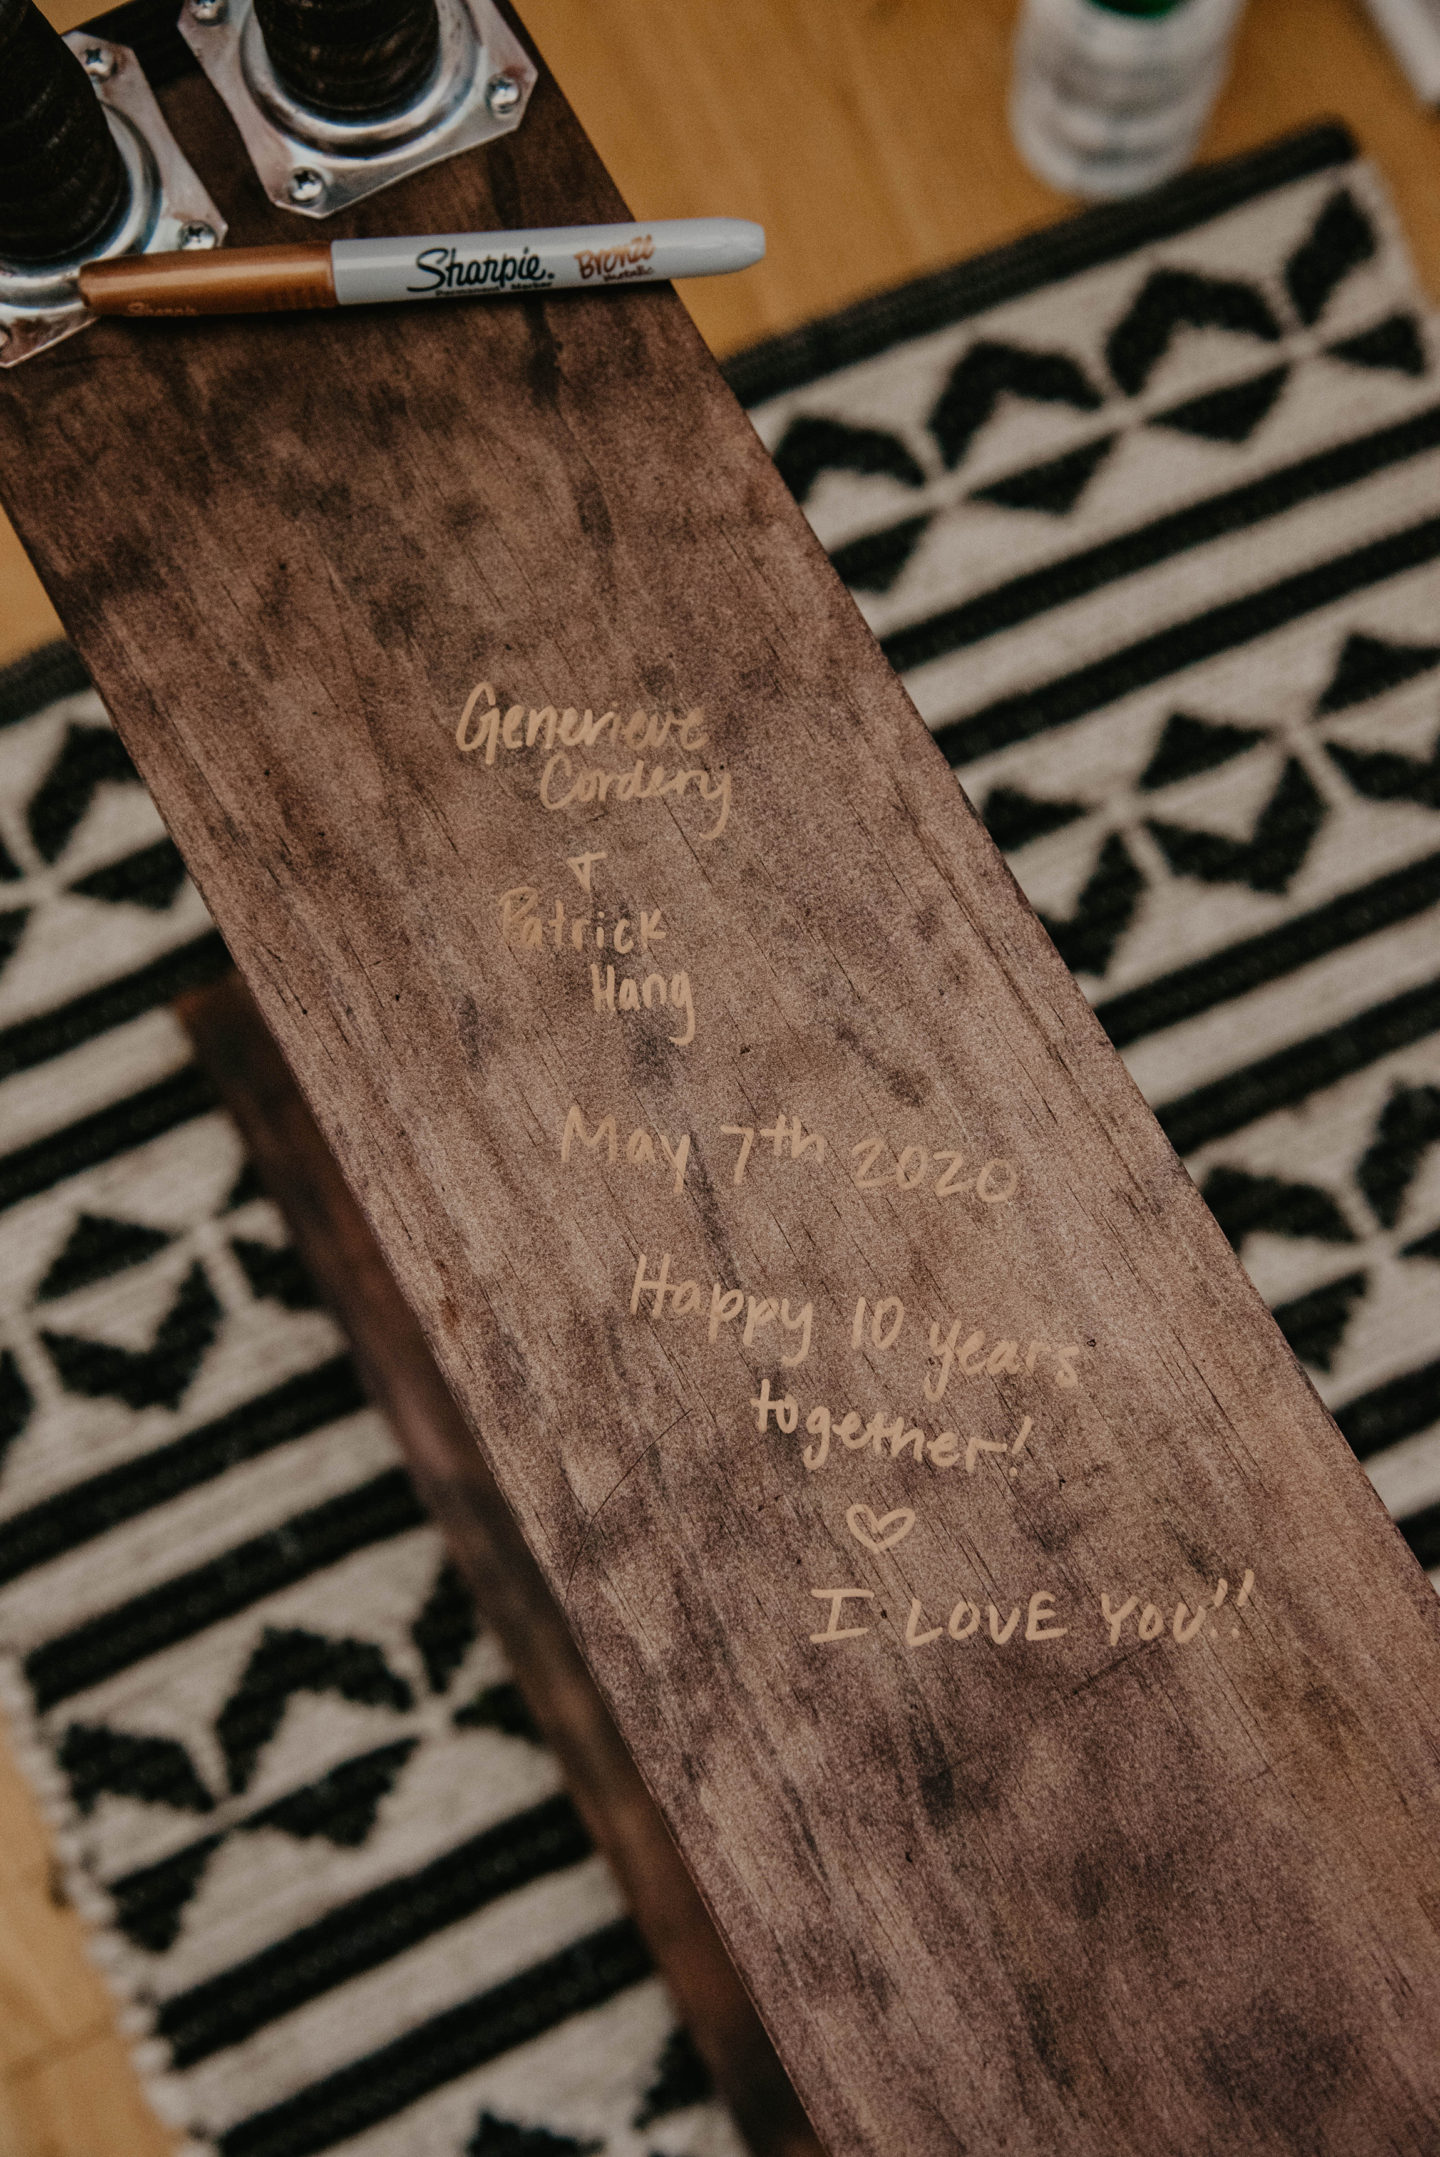
Today is also a special day – it’s my 10 year anniversary with Pat! Due to the pandemic, our return trip to Ocracoke was cancelled so we decided to work on this slipper rack project together. Instead of exchanging gifts, we have a cool piece of furniture that we made together.
Things You’ll Need:
-
- Target Dollar Spot: Pasta Drying Rack (Or you can purchase pegs!)
- Hand Saw (Miter Saw would cut straighter lines!)
- Palm Sander
- E6000 Glue
- Wood Plank – 1×8 (top), 1×6 (sides and bottom) *keep in mind that you need to factor plank length based on your desired dimensions*
- Ruler
- Drill & Drill Bits
- Stainable Wood Putty & Putty Knife
- Minwax Wood Stain – Red Mahogany
- Minwax Paste Finishing Wax – Special Dark
- End Table Legs and Install Kits
- Gold Spray Paint
- Hammer
- Wood Screws
- Screw Driver
Step One:
All my local hardware stores were totally out of pegs and Amazon was going to take 2 weeks to send them to me. Looking for an alternative I found this pasta drying rack from the dollar spot at Target. I actually grabbed two of these so I would have extra pegs.
Step Two:
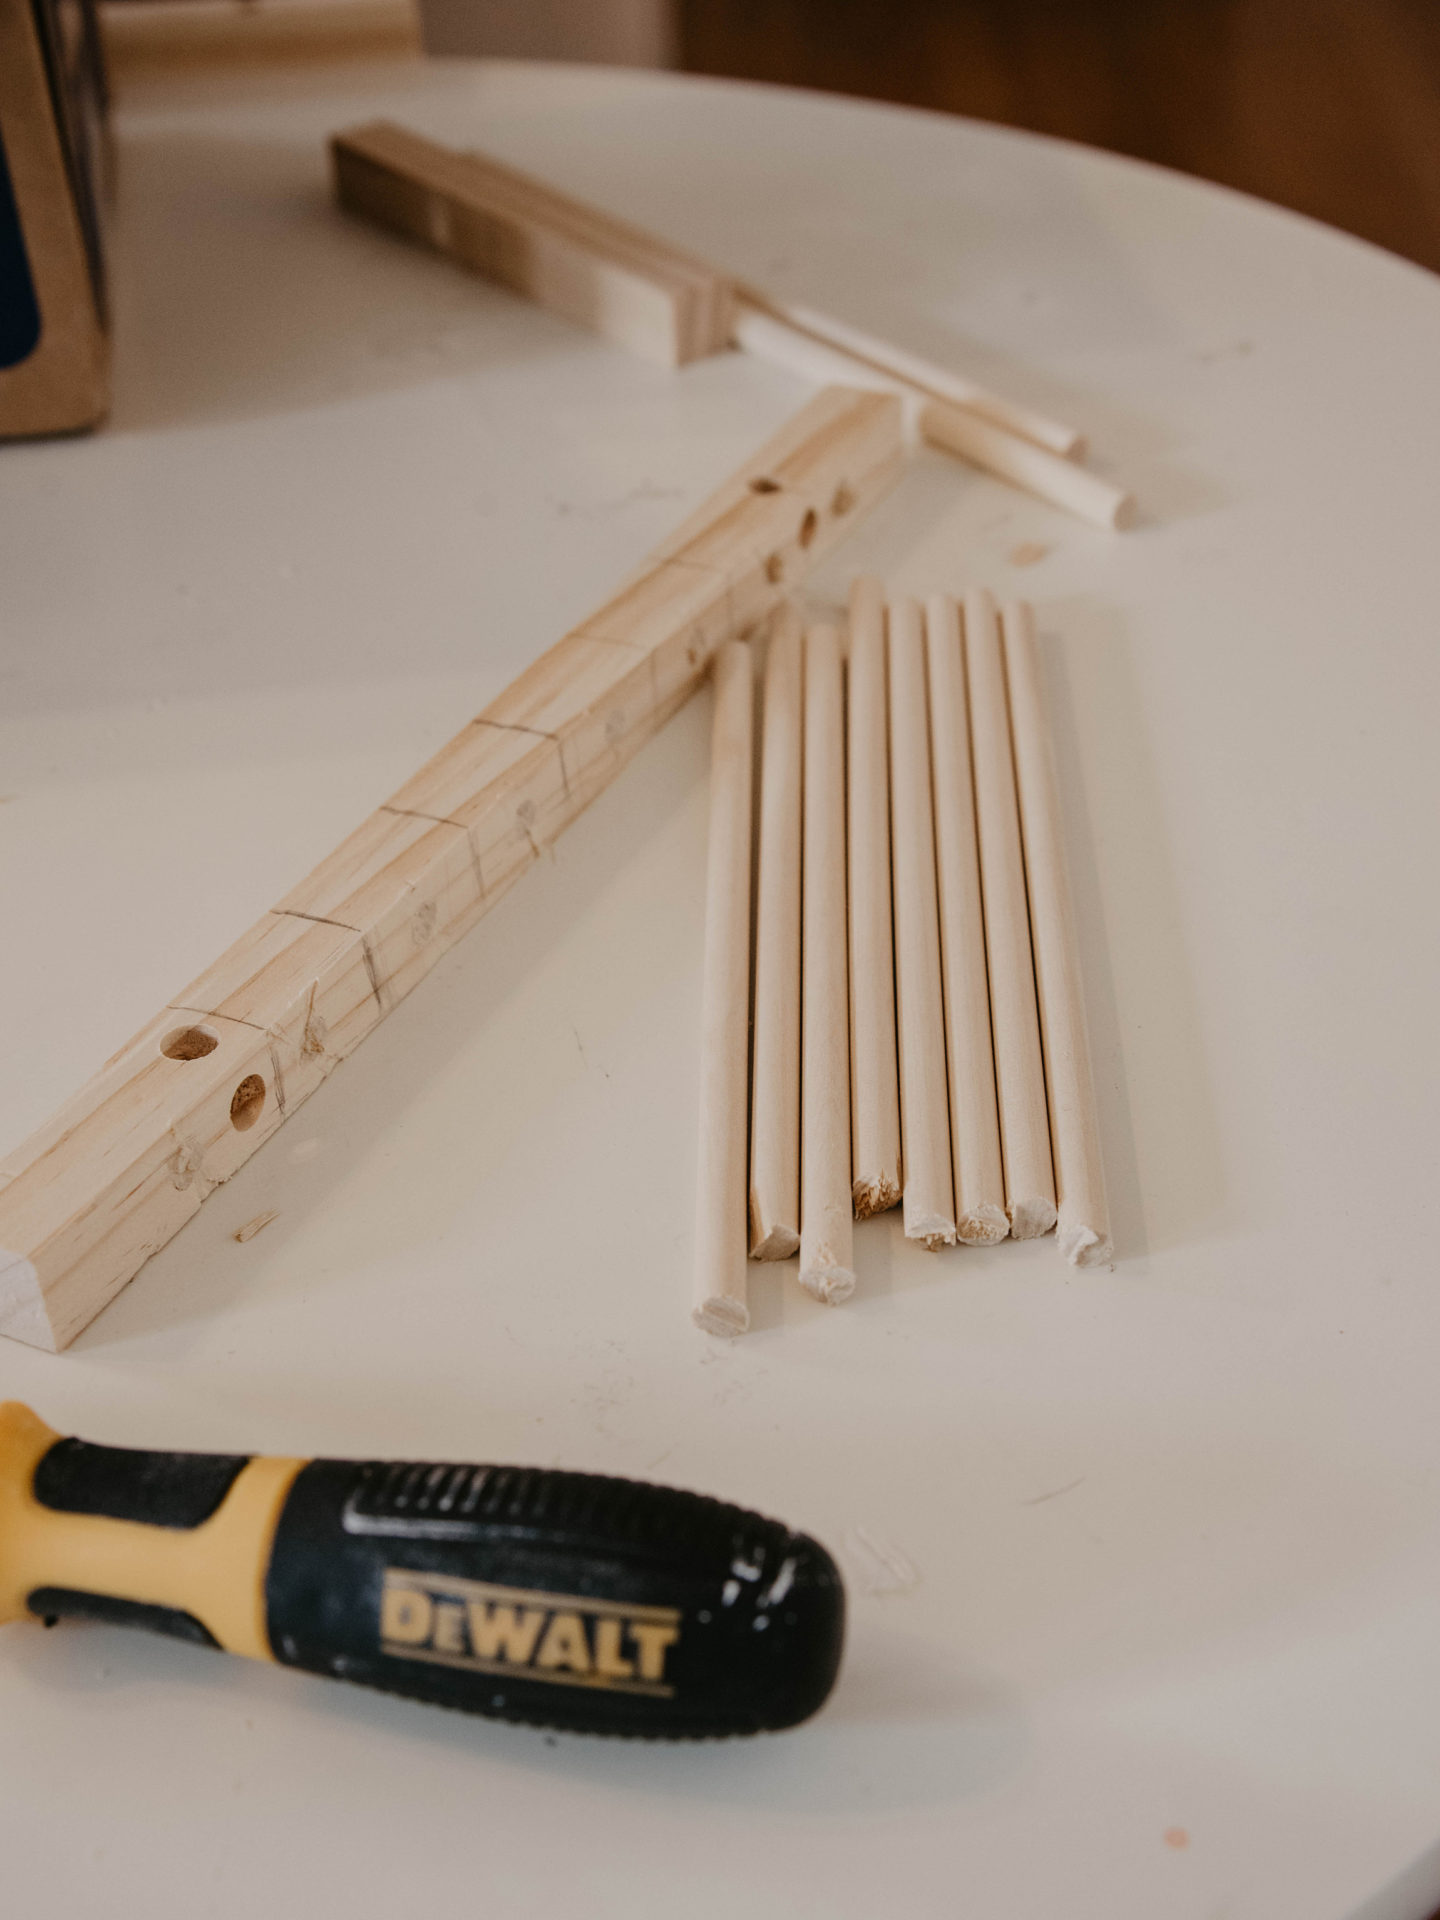
Using a hand saw, I removed each peg from the pasta drying rack. Once those were all removed, I used wood putty and plugged up all the holds in the pasta rack. I let this dry for 24 hours.
Once it was dry, I took my palm sander and sanded down the rough edges where the pegs once were, and the lumps in the wood putty.
Step Three:
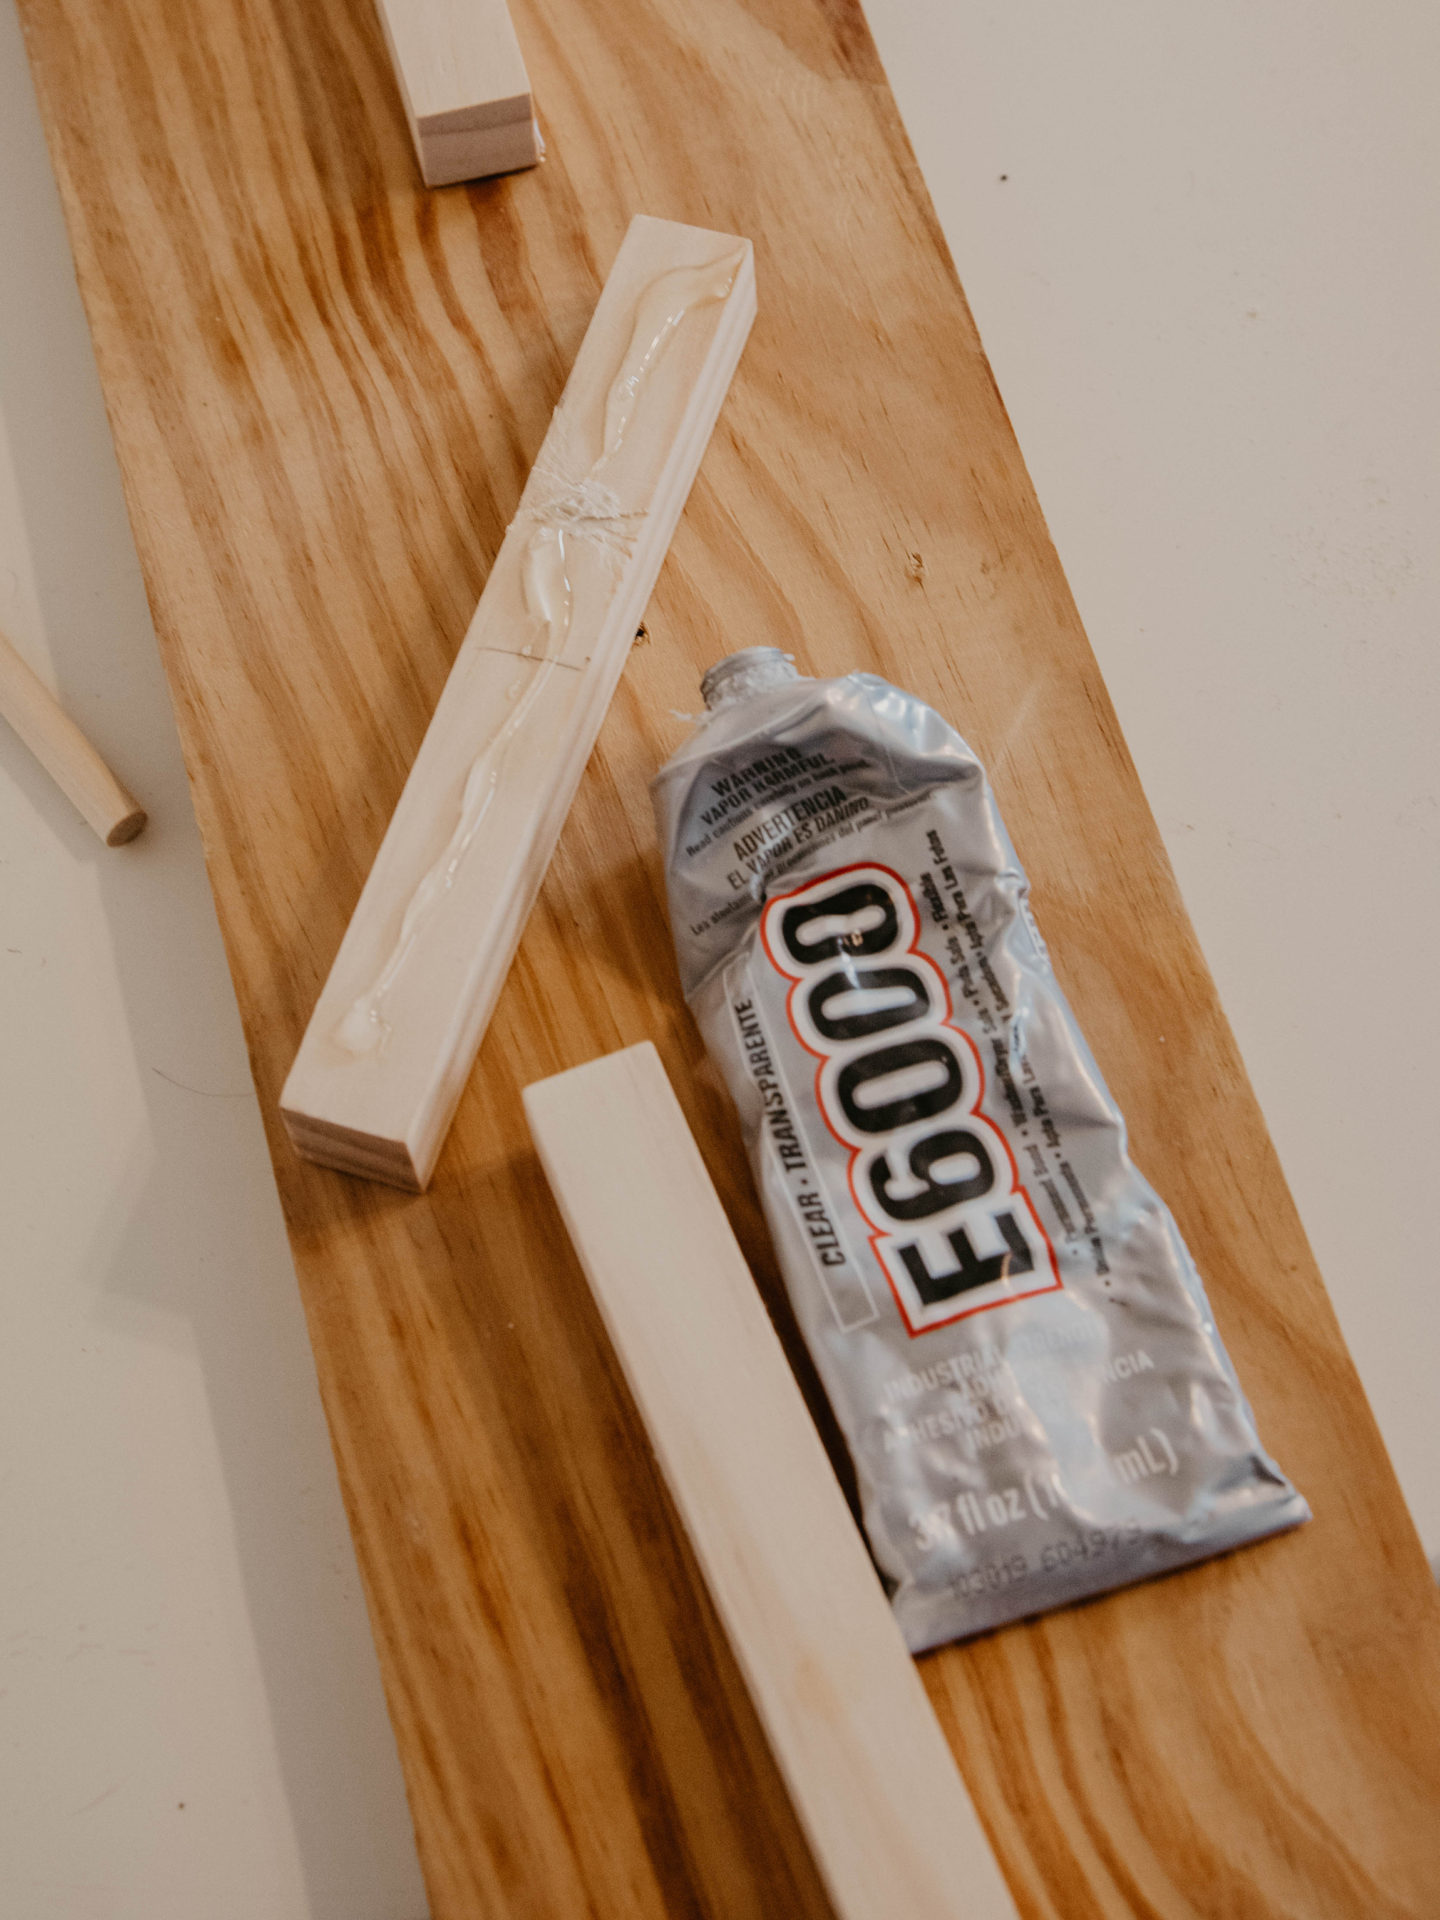
I put E6000 glue on the pasta rack wood and glued it to the center of my (size) wood. I let this cure for 24 hours to ensure the strongest bond. Consider layering some heavy books on top to keep it weighed down.
Step Four:
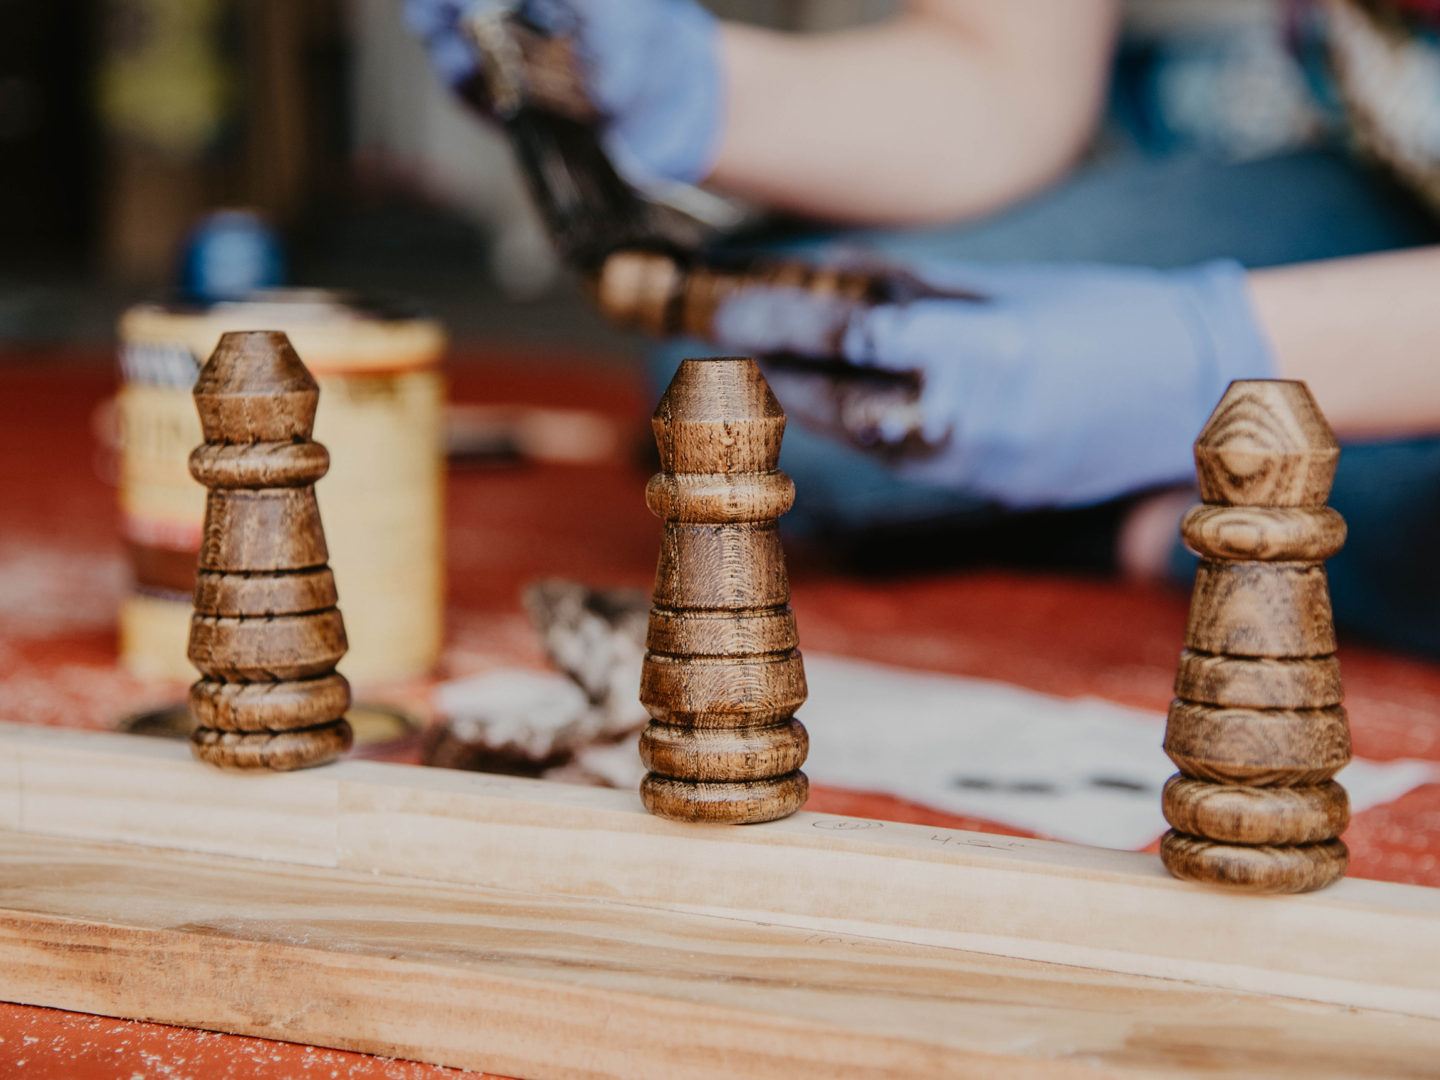
While the E6000 was drying, I started staining the legs. Using my gloves, I applied the stain with a paint brush and then wiped away the excess with a rag. I repeated this process 2x for each leg. I let this dry while I took the pegs outside and spray painted them gold.

Step Five:
You’ll laugh, but I used an old pair of drum sticks as pegs because the Target pegs we’re not long enough for Pat’s big slippers. I sawed off the tips and spray painted them gold to match the pegs! I just had those laying around so I didn’t really factor that in to cost.
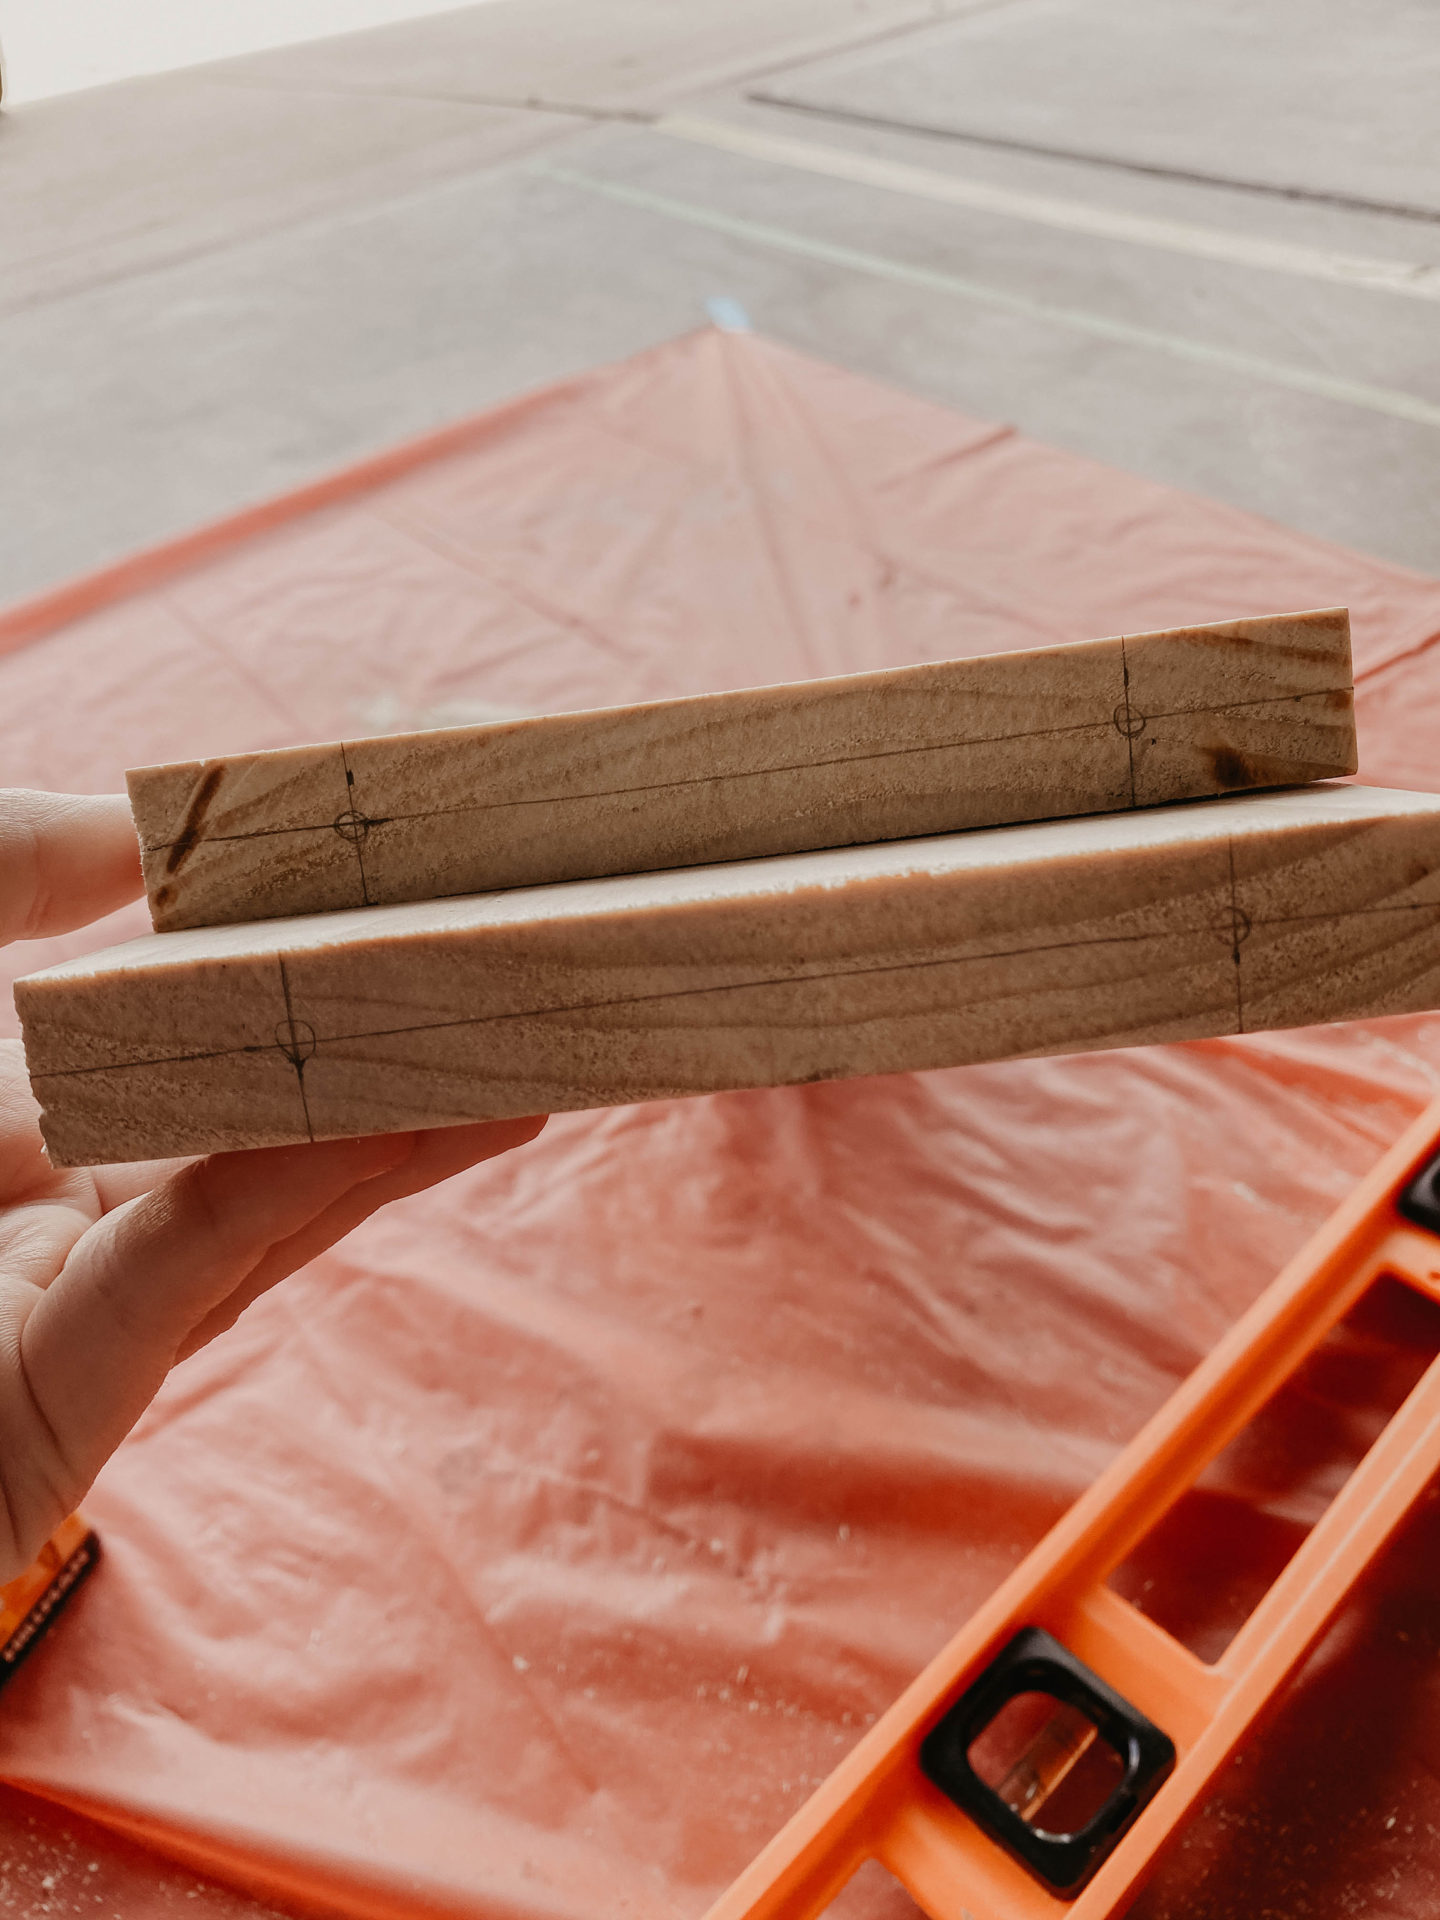
Next, I focused on drilling the peg holes into the wood. First, drill a pilot hole, then go in with the final drill bit size. Pro Tip: If you are not sure which drill bit size to use, grab a scrap piece of wood, drill a hole and test it with a peg.
*NOTE: I actually messed up this part because my math was wrong – and I had to start over. Thankfully, I had enough left over pieces from the second pasta drying rack and wood to do this.*
Step Six:
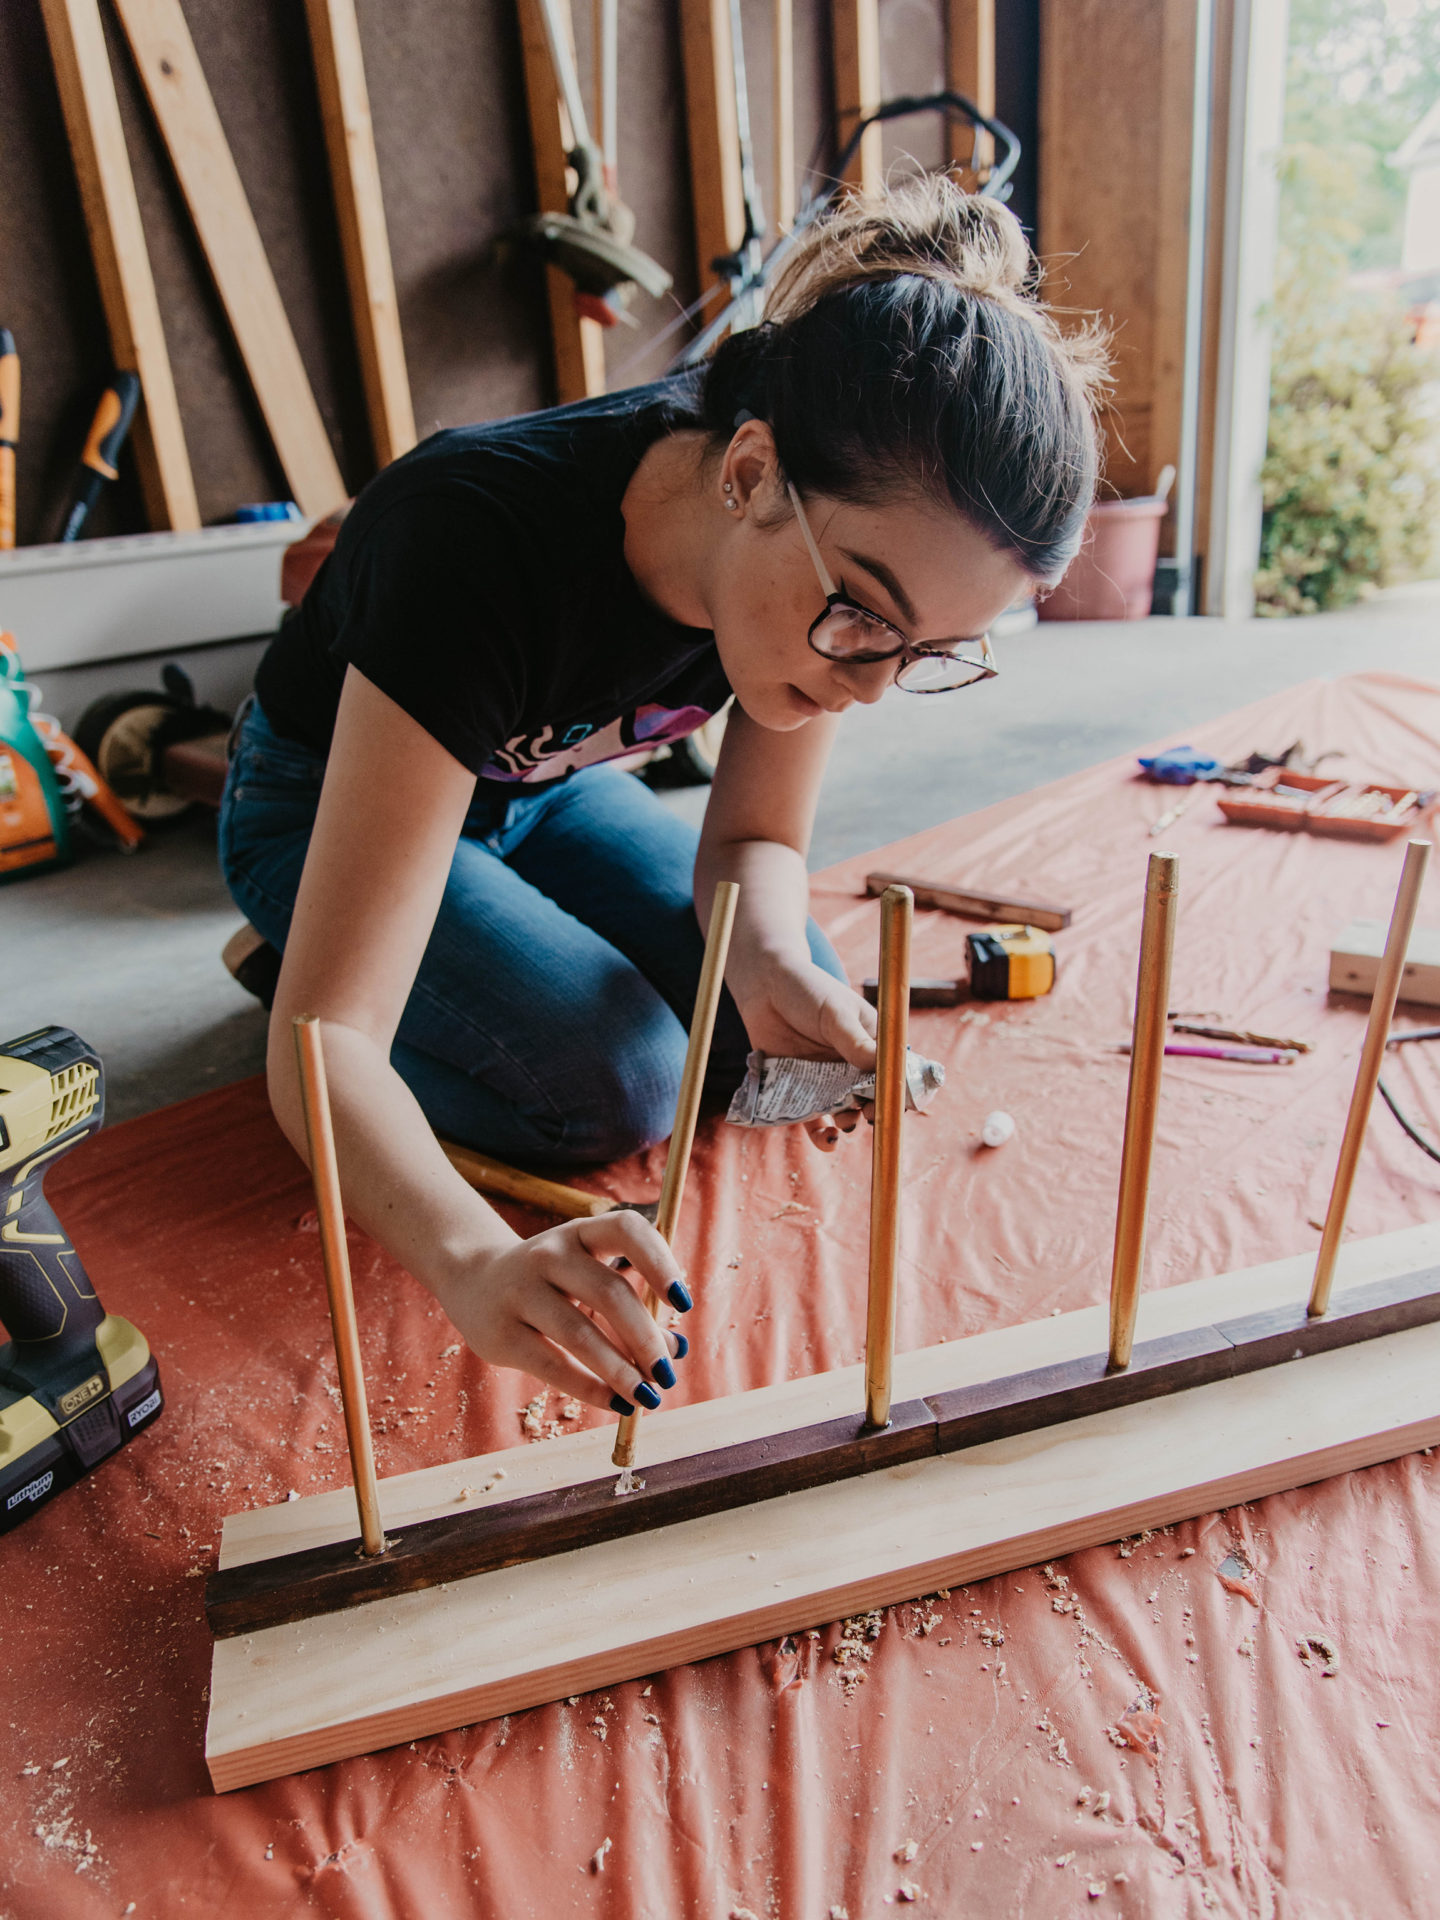
Place each peg in the drilled holes with some E6000 to ensure a solid bond. I took a hammer and drove the pegs in as far as it would go. After positioning the pegs in a straight, upright angle, I let this dry for 24 hours.
*NOTE: You’ll see here that the center strip of wood is stained. During my version 2, I opted to stain that before gluing it to the plank of wood. I’m going to be staining the whole thing in the end anyway, so I had no real reason for doing it.*
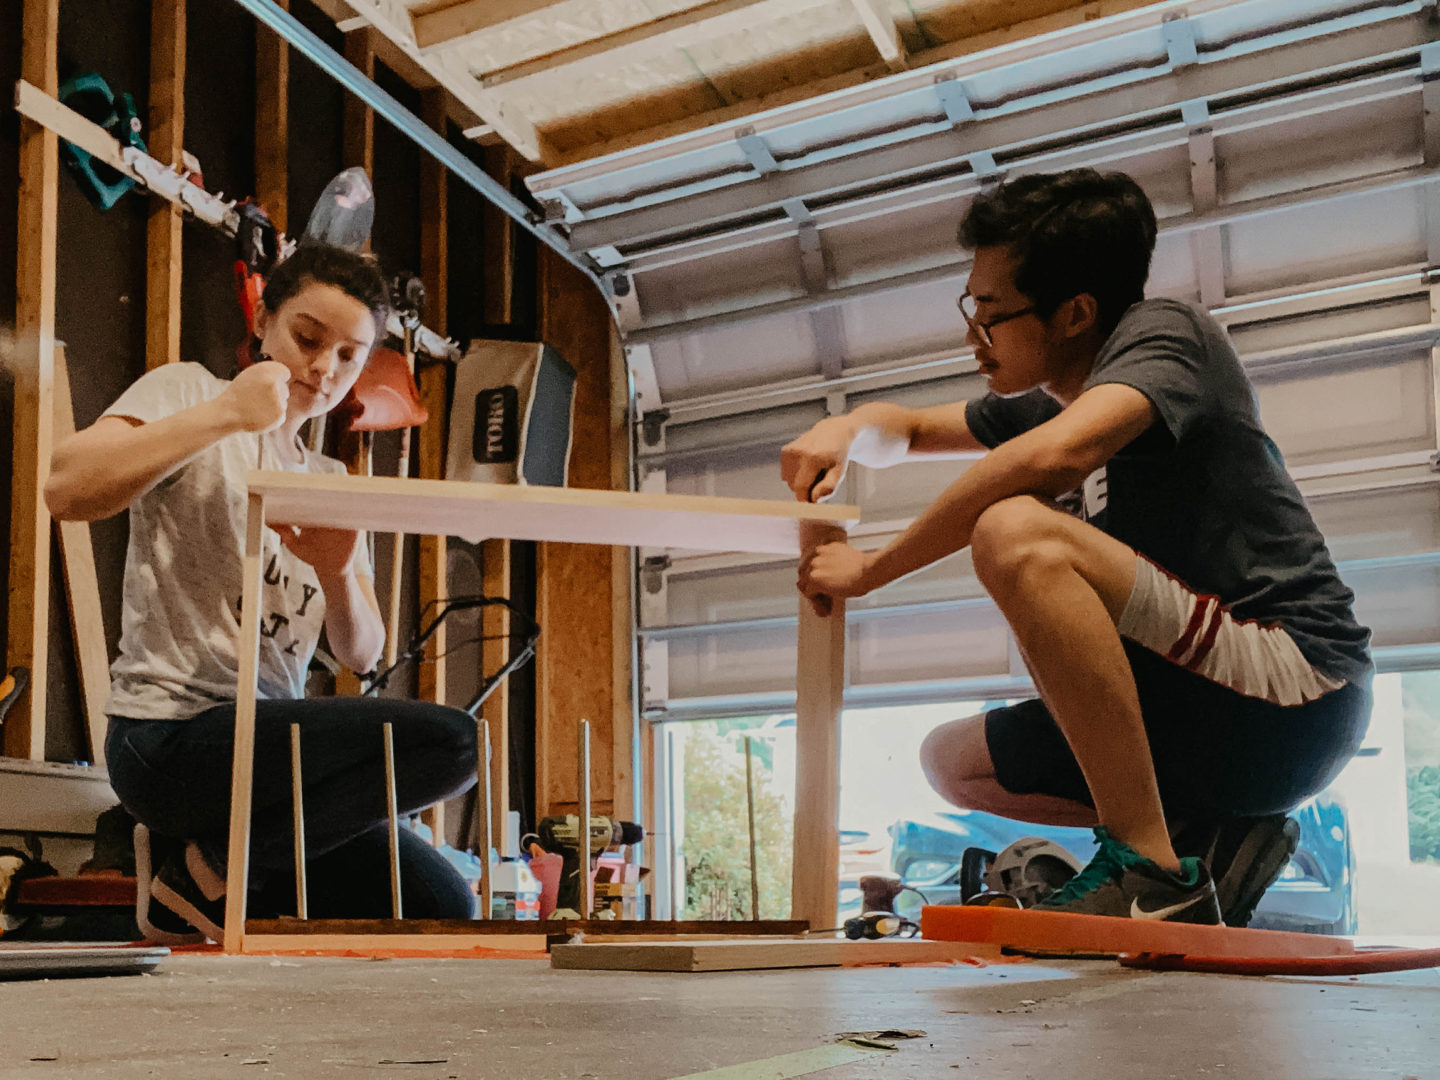
Step Seven:
Next, Pat and I planned out where to drill our pilot holes for the wood screws. Make sure you consistently measure and mark your wood planks so you an ensure that the drilled holes will line up. After we had all the marks for the pilot holes we started drilling!
Step Eight:
Please excuse the crappy iPhone front camera quality here.
All the screw holes were drilled so it was time to assemble our slipper rack! We grabbed our wood screws and started to put the sides together first, then the top. When screwing, make sure you tighten all the screws on the panels evenly. If you favor one screw over another you may find it harder to drive the last screw into the wood. It’s best to bounce back and forth between screws to ensure even tightening.
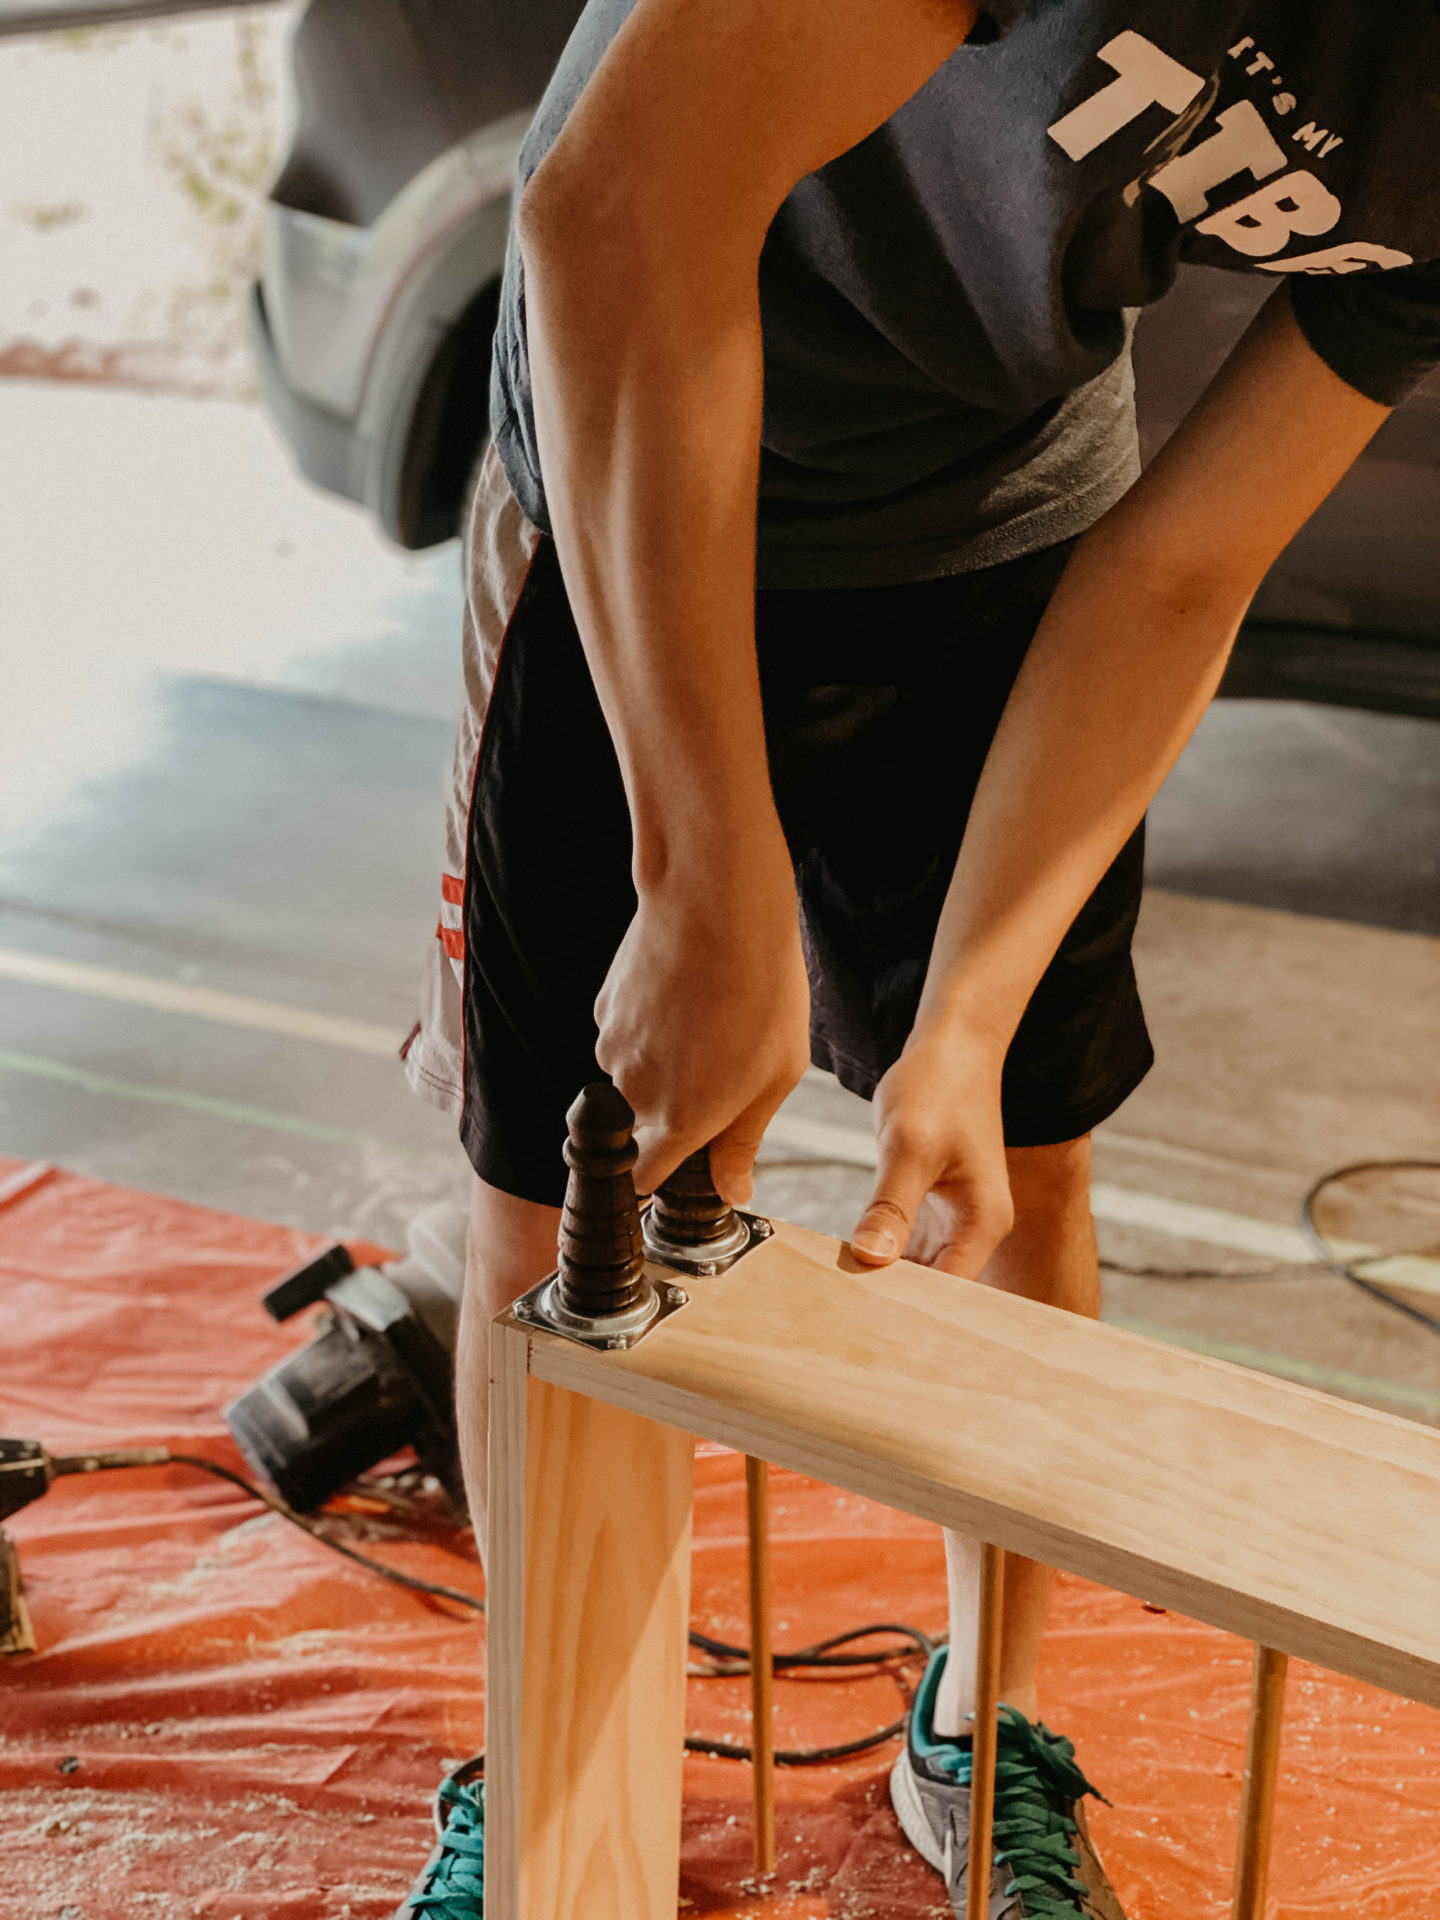
Step Nine:
We bought the install kit for the legs we purchased. This came with the rest plates and screws. We lightly pre-drilled pilot holes for the screws and assembled. From there, all you have to do is twist the legs in place.

Step Ten:
This is my favorite part: staining and sealing. I stained the whole piece, wiping away any excess and let it dry. Once it dried for about 30 minutes, I went in with a second layer. Once the second layer was ready, I cleaned the surface of the wood with a paper towel, prepping it for the wax.
With a rag, I scooped out some wax and started to apply a generous layer all over the areas I had stained. After letting the wax sit on the wood for 30 minutes, I took the same rag and buffed out the wax so slipper rack was free of any excess. Full disclosure, I think this wax took the red stain out of the wood. A varnish may have kept the red mahogany color in tact. I left the rack in my garage to dry overnight.
–
We finally finished this DIY Slipper Rack on May 7th and we signed and dated it on the bottom. We wanted to remember how we celebrated our ten years of loving each other. This project was so much fun to make because I got to work on it with Pat. Now we want to take on more projects together!
Have you guys tried making your own furniture? What did you make first?